
How to Choose the Right custom embroidered patches for Your Brand
Choose custom embroidered patches by matching the artwork, garment and working conditions to the right thread coverage, border, size and backing. Embroidery suits logos, crests and bold lettering, while printed or woven patches can show finer detail. The Customized Patches offers a free digital mockup usually within 12 hours, with a 5-piece minimum per design and production only after approval.
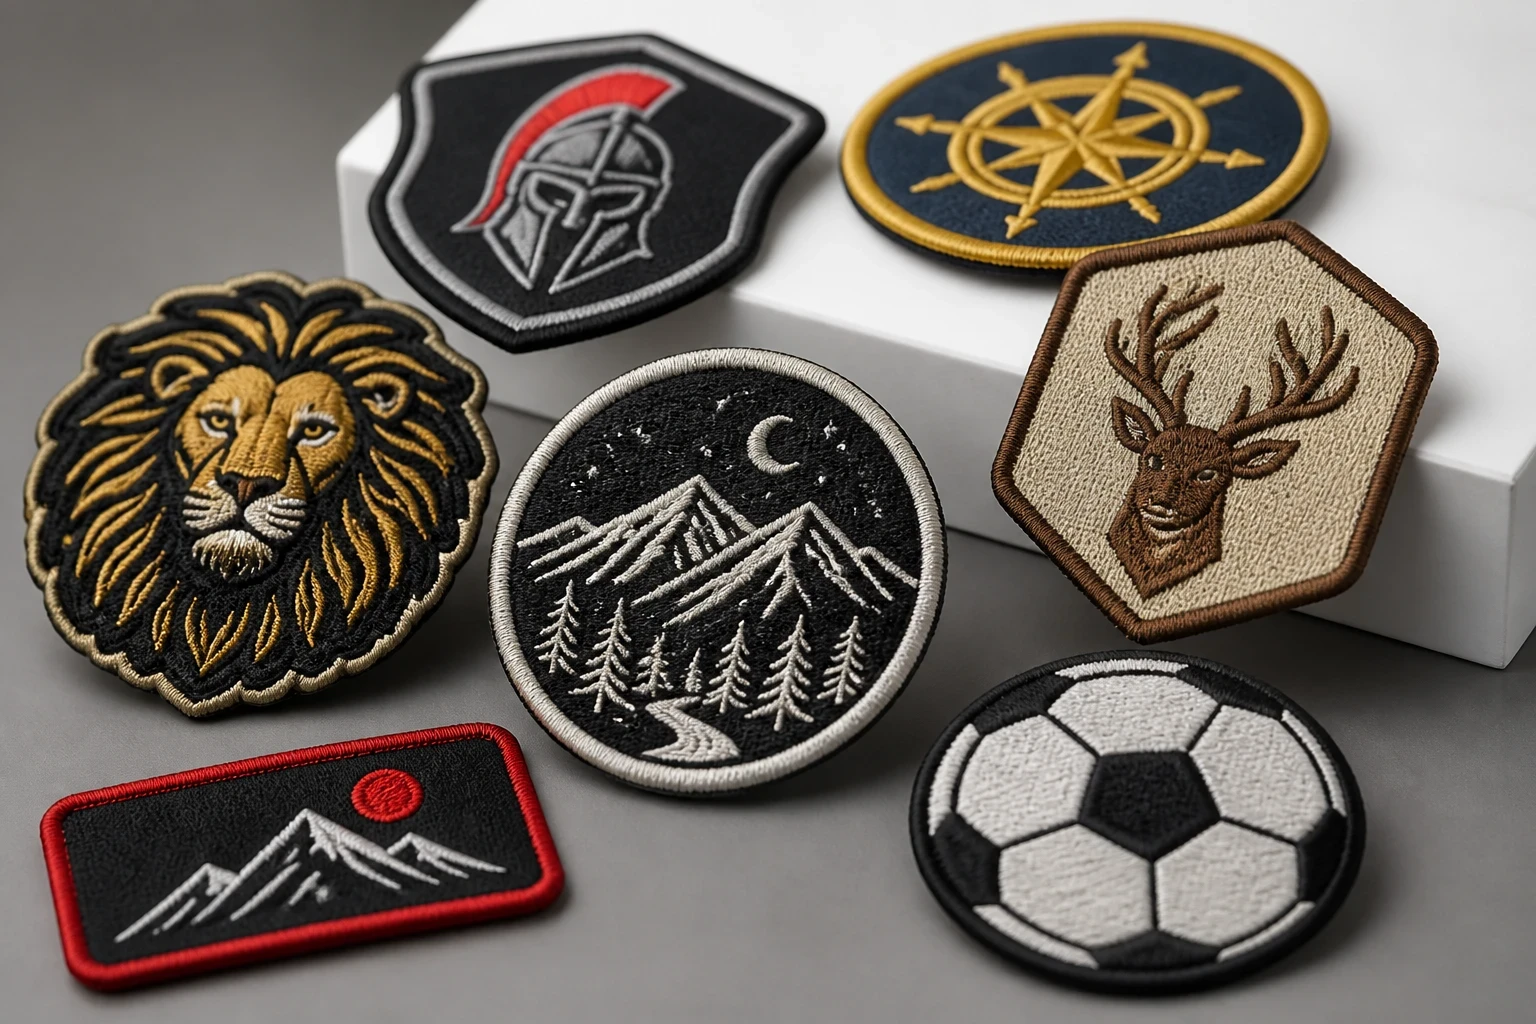
Key takeaways
- Choose embroidery for bold logos, crests, names and designs where raised thread is part of the look.
- Printed or woven patches are often better for gradients, tiny lettering, very fine lines and photographic detail.
- Backing must match the garment: sew-on is dependable, iron-on is convenient, and Velcro is best for removable identifiers.
- The Customized Patches has a 5-piece minimum per design, supplies a free digital mockup usually within 12 hours, and produces only after approval.
The right custom embroidered patches are chosen by looking at four things together: the artwork, the garment, the way the patch will be attached, and how hard it will be used. Bold logos, club crests, names and simple lettering usually suit embroidery. Fine gradients, tiny text and detailed illustrations may be clearer as printed or woven patches.
For a UK order, start with the finished size in inches and a clear photograph of the garment or panel. The Customized Patches supplies a free digital mockup usually within 12 hours, has a 5-piece minimum per design, and produces only after you approve the artwork and specification.
Start with the job your custom embroidered patches must do
A badge for a football club jacket has a different job from a removable identifier on a security vest. A hospitality logo on a polo needs to look tidy after repeated washing. A morale patch on a nylon shell may need a hook backing so the wearer can change it without sewing through waterproof fabric.
Think about visibility, handling and cleaning before choosing the decoration. A school blazer badge is normally fitted once and left in place. A cadet or emergency-services patch may be swapped between garments. A biker vest can carry a large back design, but the curved surface and thick leather affect the edge and attachment method.
- For football clubs and sports teams, check whether the patch will go on a tracksuit, cap, kit bag or fan jacket. The available area and washing method can differ on each item.
- For brands and small businesses, decide if the patch is part of staff uniform, packaging, merchandise or a promotional giveaway. A clean, repeatable logo matters more than filling every available space.
- For cadet units, scouts and youth groups, confirm the wording, unit colours and placement rules before artwork is digitised.
- For biker and motorcycle club garments, measure the front rocker, centre crest and back panel separately. Do not assume one large patch will suit every jacket.
- For hospitality and workwear, check the fabric label. Lightweight polyester polos, cotton twill shirts and heavy wool coaches can need different backing and stitch settings.
If you are comparing use cases, our guide to custom patches for workwear and uniforms in the UK covers placement, laundering and practical uniform concerns. For bags and equipment, see custom patches for bags, backpacks, and luggage in the UK, where nylon, curved panels and abrasion become more relevant.
Choose between embroidered, woven and printed construction
Traditional embroidery builds the design with thread on a fabric base. It gives a visible stitch texture and a slightly raised finish, which is why it works well for crests, initials, bold type and heritage branding. It is not the best answer for every logo. Printed is flatter; that is the point. A flat print can preserve a gradient or a small illustration that thread would simplify.
Woven patches use finer threads and a tighter surface, so they can handle smaller lettering and narrow lines more cleanly than standard embroidery. They still have a textile appearance, but less raised texture. PVC is a sensible option for wet, tactical or outdoor kit where a rubber-like surface is easier to wipe clean.
| Patch type | Best for | Main strength | Watch for |
|---|---|---|---|
| Embroidered | Crests, bold logos, names, clubs and uniforms | Tactile thread texture and a familiar badge appearance | Fine text, gradients and very narrow gaps may need simplifying |
| Woven | Detailed logos, small lettering and flatter textile badges | Fine lines and compact detail | Less raised texture than embroidery |
| Printed | Gradients, illustrations, photographic or highly detailed artwork | Smooth surface and broad colour detail | Can look less traditional than stitched thread |
| PVC | Outdoor equipment, airsoft, tactical kit and wet conditions | Easy-clean surface and strong shape definition | Not suitable if you specifically want a fabric or heritage finish |
| Chenille | Varsity jackets, large letters and statement school or streetwear designs | Deep, soft pile and strong visual texture | Large pile is not suited to tiny detail |
| Leather | Caps, heritage goods, premium casualwear and simple marks | Natural material and stamped appearance | Artwork needs to work with the available stamp or engraving detail |
You can compare the construction choices in The Difference Between custom embroidered patches and printed patches, Explained and Woven vs Embroidered Patches: Which Should You Choose?. If the design uses oversized lettering or a varsity style, chenille patches may be a better fit than a standard embroidered badge.
When embroidery is the sensible choice
Embroidery is a strong choice when the design needs to look like a badge rather than a flat label. A football crest with a simple shield, a company monogram on a jacket, or a cadet shoulder emblem can all benefit from the stitch definition. The thread catches light differently from the base fabric, helping a simple design read from a short distance.
The design still needs breathing room. Lettering squeezed into a narrow border may close up during digitising. A thin outline may need to become a wider satin-stitch line. That is not a failure of the patch; it is a physical limit of thread and scale. Our guide to how to design a custom patch that stitches cleanly explains the artwork decisions that prevent avoidable rework.
Set the size, shape and border before approving artwork
Patch size is not only a design decision. It controls legibility, cost, placement and the amount of material under the needle. Measure the usable area rather than the whole garment. A patch that looks balanced on a 12-inch back panel may overwhelm a chest pocket or leave too little room on a cap.
For small branding, a patch around 2 to 3 inches wide can work, provided the logo is simple. Chest and sleeve patches are often around 3 to 4 inches, depending on the garment. Large back pieces may be 8 to 12 inches or more, but the correct size depends on the artwork and the panel. Treat these as starting points, not fixed rules.
| Application | Typical starting size | Useful checks |
|---|---|---|
| Cap front | 2 to 3 inches wide | Check the crown curve and keep lettering bold |
| Polo or shirt chest | 2.5 to 4 inches wide | Avoid covering a pocket, button or seam |
| Jacket sleeve | 3 to 4 inches wide | Measure the flat section and allow for movement |
| Sports kit bag | 3 to 5 inches wide | Check the fabric thickness and whether the bag panel is curved |
| Motorcycle jacket back | 8 to 12 inches wide or larger | Measure the panel, seams, vents and existing club patches |
| School blazer | Set by the school or society specification | Confirm placement and badge proportions before ordering |
The outer edge affects the whole impression. A merrowed border gives a rolled, corded edge that suits traditional crests and club badges. Heat-cut edges follow a detailed outline without the same raised roll. Laser-cut edges can suit intricate shapes, but the edge choice should be tested against the base and the intended wear. Read Merrowed vs Heat-Cut vs Laser-Cut Patches: Which Edge Should You Spec? before making a final call.
Match the backing to the garment and the working conditions
Backing is where a good-looking patch can become impractical. Sew-on is usually the safest option for long-term use because the stitches pass through the patch and garment. It is suitable for denim, cotton twill, wool coaches and many work jackets, provided the wearer or alterations team can sew through the layers.
Iron-on backing is convenient on suitable cotton or cotton-blend fabric, but it is not a universal substitute for sewing. Heat, pressure and a protective cloth are needed during application. An iron-on patch that looks secure on day one can peel after a dryer cycle, especially if the garment is nylon, heavily textured, water-resistant or repeatedly washed.
- Choose sew-on for denim, leather, heavy cotton, wool coaches, long-term uniforms and patches that must stay attached through hard wear.
- Choose iron-on for suitable smooth fabrics where a quick application is useful and the care instructions support it. Sewing around the edge can add security.
- Choose Velcro or hook-and-loop for removable identifiers, tactical gear, event staff roles and garments with a dedicated loop panel.
- Use adhesive backing mainly for temporary display or light-use applications. It is not the same as a sewn attachment.
- Tell the manufacturer if the garment is waterproof, padded, elasticated or heat-sensitive. That information can change the recommendation.
For a fuller comparison, see Sew-On vs Iron-On vs Velcro: Which Patch Backing Lasts Longest? and Patch Backing Types Explained: Iron-On, Velcro, Adhesive, and More. A Velcro panel is particularly useful for units and equipment that need different identifiers, while a merrowed sew-on crest is often the better fit for a traditional club jacket.
Make the artwork readable at the finished size
A logo file can look sharp on a monitor and still need adjustment as a patch. Screens show smooth curves and unlimited colour blending. Thread has a fixed thickness, and a patch has a fixed number of stitches. Tiny gaps can close, small serifs can disappear, and a long word can become difficult to read once reduced to a 2.5-inch badge.
Not sure whether thread or ink will hold your logo clearly? Send the artwork and the intended garment for a free digital mockup usually within 12 hours, then compare the finish before production.
GET A FREE MOCKUPKeep the most recognisable part of the mark. A team crest may need the central initials and a simplified shield rather than every fine line in the original artwork. A business logo may work better with a larger symbol and shorter wording. Do not remove brand rules casually, but do ask for a production version that remains legible.
Colour, contrast and thread coverage
Thread colours are selected to match the approved design as closely as the available thread range allows. Strong contrast normally reads better than two similar shades. Dark navy lettering on black fabric may look refined in a large design but disappear at small size. A light border can give the design separation without adding lots of extra detail.
Full embroidery coverage creates a rich surface but can make a patch heavier and more expensive than a design with an exposed twill base. A partial fill may be the right choice for a lighter badge or a large design. If your brand guide includes exact colour references, send them with the artwork and review the digital mockup before approval.
Digitising is the stage where a flat artwork file becomes a stitch plan. Ask to see the proposed layout, check the spelling and inspect small text at its actual size. The guide to Embroidery Digitizing for Custom Patches: What UK Buyers Should Approve covers stitch direction, density and the details that buyers often overlook.
Consider the garment before you finalise custom embroidered patches
Nylon shells can be slippery, lightweight and heat-sensitive. They may need sew-on or Velcro rather than a hot iron. Waterproof coatings can be damaged by heat or piercing, so the garment supplier's care instructions matter. A Velcro panel also needs enough loop area to support the patch without catching on surrounding fabric.
Wool coaches and varsity-style jackets have their own problems. Dense embroidery can feel heavy on a soft body, while chenille gives a deliberately raised finish for large letters and school-style marks. On a cotton polo, a smaller embroidered logo usually sits neatly, but too much dense backing can affect drape.
- Caps require attention to curvature. A wide rigid patch may wrinkle across the front, while a smaller flexible patch can follow the crown more naturally.
- Backpacks often have seams, zips and padded sections that limit sewing access. Check the inside of the panel before specifying a sew-on finish.
- Jerseys and performance fabrics stretch. A large dense patch can alter the feel of the fabric, so consider a lighter construction or a different decoration method.
- Leather biker vests can accept sew-on patches, but thick hides may need a suitable needle and careful placement away from existing seams.
- School blazers need consistent placement across many garments. Measure one approved blazer and use it as the reference rather than estimating from a product photograph.
Our guide to Custom Patches for Jackets in the UK: Size, Backing, and Stitch includes practical points for sleeves, chests and back panels. For hats and caps, see Custom Patches for Hats and Caps: UK Size, Type, and Backing Guide, because crown shape can affect both size and attachment.
Plan quantity, pricing and approval properly
The Customized Patches accepts a minimum of 5 pieces per design. That makes a small trial run possible for a new club, start-up, event or team, while larger runs can reduce the per-piece cost once the artwork and setup are already settled. A different size, wording or backing may need to be treated as a separate specification.
Ask for a clear quote showing the design size, quantity, backing, edge, thread coverage and delivery arrangement. If you need several colourways, list each one separately. Supplying five black patches and five white patches may not be the same as ordering ten identical patches, because each design needs to be prepared and approved.
| Order detail | Why it affects the quote or result | What to provide |
|---|---|---|
| Finished width and height | Controls material, stitch area and garment fit | Measurements in inches and a placement photograph |
| Quantity per design | Affects setup allocation and unit cost | Separate quantities for each colourway or wording |
| Backing | Changes production and application method | Sew-on, iron-on, Velcro or another required finish |
| Edge | Changes the outline, appearance and shape | Merrowed, heat-cut or laser-cut preference |
| Artwork | Determines how cleanly small features can be reproduced | Vector file where possible, plus brand colours and fonts |
| Delivery date | Allows time for mockup, approval, production and UK shipping | Required-in-hand date, not only the date you place the order |
A mockup is not just a sales image. It is the point where you catch a misspelt name, a border that is too narrow, an unsuitable backing or a logo that looks cramped at the proposed size. The artwork is produced only after approval, so use that stage to check every practical detail rather than treating it as a formality.
Allow time for the mockup, production and UK delivery
The free digital mockup from The Customized Patches is usually supplied within 12 hours. That is the review stage, not the finished-patch delivery time. Once the design, size, edge, backing and quantity are approved, the order moves into production and then UK-wide shipping.
Build in time for one round of sensible changes, especially if the artwork belongs to a committee, school, club or brand team. A rush usually starts with a late logo or an unconfirmed garment measurement. Send the cleanest artwork available, state the deadline clearly and identify one person who can approve the final mockup.
- Day one: send the artwork, garment details, dimensions, quantity and required-in-hand date.
- Usually within 12 hours: review the free digital mockup and check wording, colour, placement, edge and backing.
- After approval: production begins. No patches are produced before the artwork and specification are approved.
- Before delivery: allow for the agreed production period and UK-wide shipping. Contact the team early if the order is linked to a match, event, launch or uniform issue.
For a broader ordering checklist, read How to Order Custom Patches in the UK (From Mockup to Doorstep). The related guide How Long Do Custom Patches Take? UK Turnaround from Mockup to Delivery is useful if your deadline is fixed.
Avoid the common ordering mistakes
The most common problem is specifying a patch from the artwork alone. A logo can be technically correct and still be too small for the lettering, too dense for a stretchy jersey or too hot to apply to a nylon shell. A photograph of the garment often answers questions that a logo file cannot.
The next mistake is assuming that the cheapest-looking finish is the most suitable. An iron-on patch can be convenient, but it is a poor choice if the garment is regularly tumble dried or the fabric cannot take heat. A printed patch may cost more than a very simple embroidered badge, but its ability to retain a gradient can prevent a brand mark from being simplified beyond recognition.
- Do not approve a screen-sized mockup without checking the actual finished dimensions in inches.
- Do not count different colourways, names or backing types as identical designs without confirming how they will be quoted.
- Do not put a merrowed border through a pocket, zip, seam or sharp garment curve without checking the placement.
- Do not use iron-on as the only attachment on a hard-wearing jacket unless the fabric and care instructions support it.
- Do not send a low-resolution screenshot if a vector logo, PDF or high-resolution artwork is available.
- Do not leave approval to several people with conflicting instructions. Nominate one final approver.
Name sew-on, iron-on or Velcro on the quote and include a photograph of the garment. We show the proposed backing and finish on a free digital mockup usually within 12 hours, with production starting only after approval.
GET A FREE MOCKUPIf durability is the main concern, compare the garment decoration options in Custom Patches vs Screen Print vs Heat Transfer: Which Lasts on UK Apparel?. The right answer may still be an embroidered patch, but it should be selected for the job rather than by habit.
A practical decision guide for UK brands
Choose embroidered construction if you want a recognisable stitched badge, your artwork uses bold shapes, and the garment can carry the texture. Choose woven if the mark contains smaller lettering or fine lines but you still want a textile patch. Choose printed if gradients, illustrations or a flat surface matter more than raised thread.
For a removable role or unit identifier, choose Velcro and make sure the garment has a suitable loop panel. For a permanent club crest on denim or heavy cotton, sew-on remains the dependable starting point. For a temporary event or promotional item, the attachment and expected lifespan can justify a different balance.
| If your priority is... | Start by considering... | Reason |
|---|---|---|
| Traditional club or team appearance | Embroidered with a merrowed edge | The raised thread and rolled border create a familiar crest finish |
| Very small lettering | Woven or printed | Fine detail may be clearer on a flatter surface |
| Removable identification | Embroidered or PVC with Velcro | The patch can be changed without replacing the garment |
| Heavy jacket wear | Sew-on embroidered construction | Sewn attachment is less dependent on adhesive and heat |
| Outdoor or wet equipment | PVC or a carefully specified sewn patch | PVC is easy to wipe clean; fabric choices need consideration |
| Varsity or school letter style | Chenille or bold embroidery | The raised pile or thread is part of the intended look |
| A small first run | A simple design at 5 pieces or more | The minimum makes a trial batch possible before a larger order |
The safest route is to send the design, intended garment and deadline together. That gives the production team enough information to flag a backing problem, suggest a more readable size or explain a trade-off before the order is made. A good patch quote is not only a price; it is a specification that can be checked.
How to care for the finished patches
Care starts with the garment, but stitched patches still benefit from sensible washing. Turn the garment inside out where possible, use the temperature stated on the clothing label and avoid treating the patch as a loose removable item. Excessive heat can affect adhesive backings, and aggressive tumble drying can shorten the life of the garment and attachment.
For a sew-on badge, inspect the perimeter after washing and repair a loose section before it catches on equipment. For iron-on patches, check the corners periodically. If a corner lifts, do not keep washing it in the hope that it will settle. The guide How to Wash and Care for Custom Patches (UK Jackets, Hats, and Uniforms) gives more detail for common garments.
Choose with the next order in mind
A good first patch should work now and remain repeatable later. Keep the approved mockup, dimensions, thread or print colours, backing and final artwork together. If the club orders another batch six months later, those records reduce the chance of a slightly different crest or border.
Brands should also decide which parts of the design are fixed and which can change. A fixed logo with variable event wording may need separate designs. A school badge may remain the same while year tabs change. Clarifying that structure at the start helps with quantities, approvals and future quotes.
The best custom embroidered patches are not necessarily the largest, densest or most decorated. They are the ones that remain readable, attached and appropriate for the garment. Start with the job, test the artwork at the real size, specify the backing honestly and approve the mockup with the finished use in mind.
Frequently asked questions about custom embroidered patches
These are the questions we regularly answer for UK teams, brands, clubs and businesses before a quote is confirmed. If your design has unusual dimensions, several backing types or a difficult garment, include those details with the artwork.
Frequently asked questions
What are custom embroidered patches best used for?
Custom embroidered patches work well for bold logos, club crests, team names, uniforms, jackets, bags and branded workwear. They give a raised thread finish that suits traditional badges. If the artwork contains gradients, very fine lines or tiny lettering, ask whether woven or printed construction would reproduce it more clearly.
What is the minimum order for custom embroidered patches?
The Customized Patches has a minimum of 5 pieces per design. Different wording, colourways, dimensions or specifications may need to be treated as separate designs, so list each version when requesting a quote.
How quickly can I receive a digital mockup in the UK?
The Customized Patches usually supplies a free digital mockup within 12 hours. This is the approval stage, not the full production and delivery time. Production begins only after the artwork and specification have been approved, followed by the agreed manufacturing period and UK-wide shipping.
Should I choose sew-on, iron-on or Velcro backing?
Choose sew-on for long-term attachment on denim, cotton twill, wool and hard-wearing jackets. Choose iron-on only when the fabric and care instructions support heat application; an iron-on patch can peel after a dryer cycle. Choose Velcro for removable identifiers and garments with a suitable loop panel. See Sew-On vs Iron-On vs Velcro: Which Patch Backing Lasts Longest? for a fuller comparison.
Can small text be used on custom embroidered patches?
Small text can be used, but legibility depends on the finished patch size, font, stitch width and contrast. A word that looks clear on a screen may close up on a 2-inch badge. The production mockup should show the proposed size and allow you to simplify or enlarge the lettering before approval.
Are embroidered patches better than printed patches for a brand?
Neither is automatically better. Embroidery suits bold logos and a tactile badge appearance, while printed patches are flatter and can retain gradients, illustrations and fine colour detail. Choose based on the artwork, garment and intended finish. The guide Embroidered vs Printed Patches: Which Is Better for UK Brands? compares the two options.
Ready to produce custom patches for your UK team or brand?
GET A FREE MOCKUP