
How to Choose the Right varsity chenille patches UK for Your Brand
Choose varsity chenille patches UK by matching the patch’s size, letter style, colours, edge, backing and garment to its job. Chenille suits bold varsity lettering and crests on jackets, hoodies and blazers, while embroidered, woven or printed patches handle finer detail. The Customized Patches provides a free digital mockup usually within 12 hours and produces only after approval, with a 5-piece minimum per design.
Key takeaways
- Choose chenille for bold, tactile letters and simple crests rather than very fine artwork.
- Measure the usable garment area in inches before deciding the finished patch size.
- Select sew-on, iron-on or Velcro backing according to the garment and how often the patch will be removed.
- The Customized Patches has a 5-piece minimum per design, supplies a free digital mockup usually within 12 hours and produces only after approval.
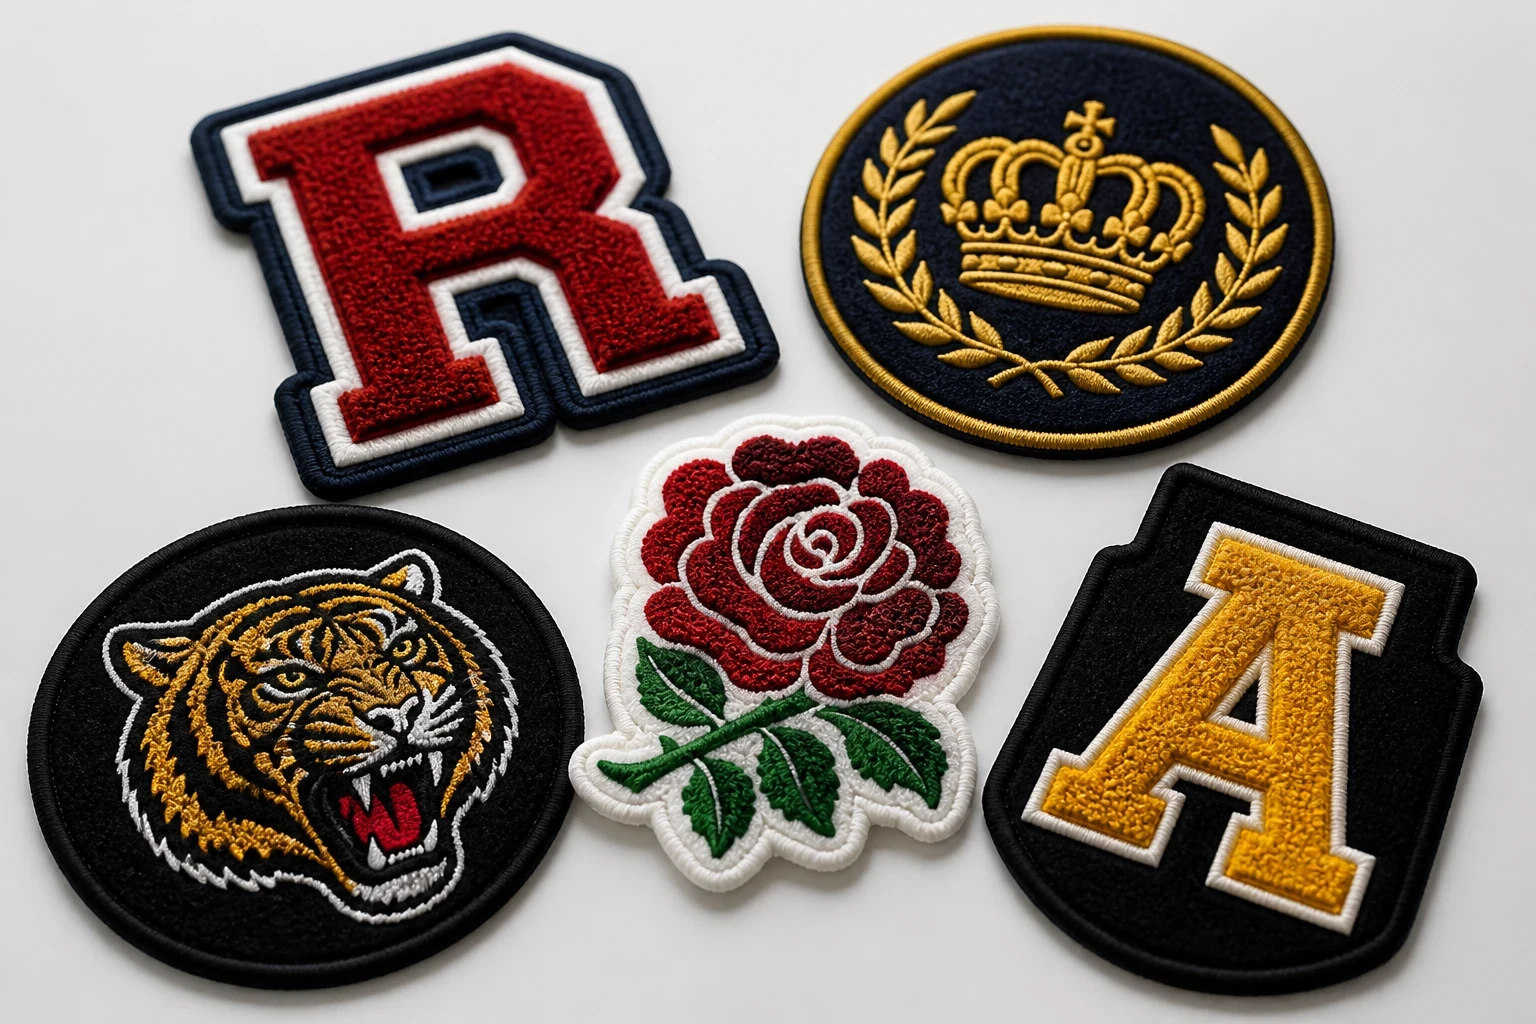
The right varsity chenille patches UK choice depends on three things: the artwork, the garment and the job the patch must do. For bold school letters, football squad initials or a simple brand crest, chenille gives a raised yarn surface that is easy to see from a few steps away.
Start with the patch area, not the catalogue picture. Measure the chest, sleeve, back panel or blazer pocket in inches, then decide how much of that space should be covered. The Customized Patches supplies a free digital mockup usually within 12 hours, and production starts only after you approve the design. The minimum is 5 pieces per design.
What makes varsity chenille patches different?
Chenille is made with a soft, looped yarn surface. The pile catches light differently from flat thread, so large letters and simple shapes have a strong, tactile appearance. That is why it appears on varsity jackets, school jumpers, college sweatshirts and sports clothing.
The finish is not a good match for every logo. A detailed restaurant mark with tiny wording, a fine line drawing or a photographic image can lose definition in raised yarn. For those jobs, embroidered patches may offer more line control, while woven patches use a flatter surface that can keep small lettering cleaner.
A varsity patch also needs a sensible border. A merrowed crest can give the edge a traditional, rolled finish, but the border must be large enough to hold its shape. If the artwork reaches right to the outside edge, the finished patch may look cramped and the outline may not read clearly.
Choose the patch type before choosing the colours
The first question is not simply which colour thread you prefer. Ask what the customer will see at the final distance, how much detail must remain legible and how the item will be used. A football club badge on a heavy jacket has different requirements from a small hospitality logo on a polo shirt.
Chenille for bold letters and simple crests
Choose chenille for initials, team names, mascots with clear outlines and traditional college-style lettering. It works particularly well on wool coaches, denim jackets, thick hoodies and school blazers where the raised face feels like part of the garment rather than a thin label.
Do not squeeze a long slogan into a narrow chest patch. A short name in large letters will usually look stronger than six lines of small text. If the name must remain long, consider a wider back design or split the information between a main chenille letter and a separate flat patch.
Embroidered, woven and printed alternatives
Flat embroidered patches suit logos that need a stitched texture and a conventional badge appearance. 3D embroidered patches can add height to selected areas, but they are not the same as a full chenille face and may not give the broad varsity look you expect.
Printed is flatter; that is the point. A printed patch can reproduce gradients, small illustrations and detailed artwork without forcing those details into yarn or stitch. PVC patches are useful for weather-exposed kit and practical Velcro panels, although their rubber surface has a very different feel from chenille.
| Patch type | Best for | Surface and detail | Typical garment fit | Main trade-off |
|---|---|---|---|---|
| Chenille | Varsity letters, bold initials and simple crests | Raised looped yarn; strongest with broad shapes | Wool jackets, hoodies, sweatshirts and blazers | Small text and fine lines may lose clarity |
| Flat embroidered | Traditional logos and stitched badges | Thread texture with more outline control | Polos, jackets, uniforms and bags | Less plush and less visibly varsity than chenille |
| Woven | Fine lettering and compact logos | Flat, neat surface with small details | Caps, shirts, jackets and lighter clothing | Does not have the raised chenille pile |
| Printed | Gradients, illustrations and photographic detail | Smooth, flat ink surface | Fashion pieces, promotional clothing and light fabrics | The visual texture is flatter and can age differently |
| PVC | Outdoor kit, utility clothing and removable panels | Rubber-like raised or flat moulded surface | Rainwear, bags, tactical-style clothing and Velcro panels | Less traditional for a school or college varsity look |
This comparison is a starting point rather than a rule. A brand can combine methods: a raised chenille letter for the front of a jacket and a small embroidered or woven information patch elsewhere. If you are deciding between surfaces, the guide to the difference between chenille patches and embroidered patches gives a useful production-focused comparison.
Set the size from the garment, not the screen
A design that looks balanced on a laptop can be too large for a sleeve or too small for the back of a jacket. Place a paper rectangle over the actual garment and mark the available width and height. Include seams, pocket openings, zips and any existing badge in the measurement.
For a left-chest patch on a jacket or polo, measure across the flat area beneath the shoulder seam. For a back patch, check the gap between the collar and the hem, then leave space around the side seams. On a school blazer, the breast pocket, lapel and button line can restrict the usable area more than expected.
Common starting sizes in inches
- Small chest or sleeve mark: often around 2.5 to 4 inches wide, depending on the wording and shape.
- Medium team or club crest: often around 3.5 to 5 inches wide for a balanced jacket or blazer placement.
- Large back letter or mascot: commonly around 8 to 12 inches wide, with the final height set by the artwork proportions.
- Long rectangular name patch: measure the full available width first, then allow enough height for the lettering to breathe.
- Circular or shield crest: check both the diameter and the surrounding seams before approving the size.
These are working ranges, not fixed product sizes. A wide word will need more width than a single initial, while a tall mascot may need more height than a horizontal logo. The Chenille patches Sizing and Backing Options Explained guide covers the checks that are easy to miss when ordering from a screen.
Make the lettering readable
Varsity lettering normally benefits from a clear contrast between the face, outline and background. White yarn on navy, gold on black or cream on burgundy can read well, but close shades may merge under indoor lighting. A mockup should show the relationship between colours, not just list them.
Avoid narrow gaps between letters. The yarn and border need room to form a clean shape, particularly around A, R, B and S. If a logo has a thin internal line, ask whether it is essential or whether removing it will make the finished patch more legible.
If you are supplying a school crest or club badge, send the clearest version you have. A low-resolution screenshot can be used as a reference, but it may not show exact lettering or colour values. We can flag areas that need simplifying before the mockup is approved.
Pick the backing for the garment and the job
Backing is not a decorative afterthought. It affects how the patch is fitted, how it behaves in the wash and whether it can be removed later. The three common decisions are sew-on, iron-on and Velcro, although a sew-on patch can also be reinforced with adhesive during application.
Not sure whether your logo should be chenille, flat embroidery or printed? Send the artwork and the garment details. Get a free digital mockup usually within 12 hours, with production starting only after you approve it.
GET A FREE MOCKUPSew-on backing
Sew-on is usually the dependable choice for wool coaches, denim, heavy jackets, school blazers and clothing that will be worn repeatedly. It is also useful when the fabric cannot take direct heat or when the patch is too large for an iron-on bond to carry by itself.
A sew-on chenille patch can be stitched around the edge by hand or machine, provided the garment and patch position allow it. On a structured jacket, check the lining before sewing so the needle does not catch internal construction or pockets.
Iron-on backing
Iron-on backing is convenient for suitable cotton or cotton-blend garments and is often chosen for club clothing supplied in batches. It still needs correct heat, pressure and cooling time. A rushed application or an unsuitable nylon shell can result in lifting at the corners.
It is common to see iron-on patches peel after a dryer cycle, particularly where the garment was washed hot, the adhesive was not fully bonded or the surface was water-repellent. For valuable jackets, high-use kit or anything that will be washed frequently, sewing is often the safer plan.
Velcro backing
Velcro makes sense for uniforms, event clothing, tactical-style kit and panels where the wearer needs to change a name or role patch. It adds thickness and weight, so measure the panel and consider how the hook side will affect nearby fabric when the patch is removed.
Do not request Velcro simply because a photograph shows it. Tell us whether the garment already has the hook or loop panel, which side is required and whether the patch must be swapped regularly. A backing note on the quote prevents an avoidable fitting problem.
Match the design to real UK garments
A school blazer needs a restrained size and a firm edge that sits neatly near the pocket or crest position. A football club jacket may have more room for a large back name, but the patch should not cover a zip, ventilation panel or sponsor mark. A hospitality polo may need a smaller, flatter badge because a large raised patch can feel heavy on lightweight fabric.
For a nylon shell, check whether the fabric is heat-sensitive and whether the surface has a water-resistant coating. Iron-on is not automatically suitable. For a wool coach jacket, sew-on is usually more practical, especially if the patch is large or the garment will be worn outdoors.
Biker and motorcycle club garments bring another set of checks. Leather, thick denim, lining and existing badges can make stitching difficult, while the back panel may need a broad shape with a clear border. See the biker and motorcycle club patches hub for related placement and construction considerations.
Practical examples
- A football squad wanted large initials on nylon training jackets. The artwork was simplified, the placement was reduced to avoid the zip and sew-on was discussed instead of relying on heat.
- A cadet unit needed removable name patches. Velcro was specified from the start, with the hook-and-loop orientation confirmed against the existing uniform panels.
- A hospitality group wanted a small chest emblem on polos. Chenille was considered, but a flatter embroidered badge was more practical for the lightweight fabric and smaller wording.
- A school wanted a traditional crest for blazers. The border was kept clear, the size was checked against the pocket and the backing was chosen with repeated wear and washing in mind.
These examples show why the same logo may need different treatment on different garments. A patch specification is not complete until it states size, backing, placement and garment type.
Prepare artwork that can become a chenille patch
Send the original logo if you have it, ideally as a vector file or a high-resolution image. Include the wording exactly as it should appear, the preferred colours and any brand rules that must be followed. If there are several versions, identify the one to use rather than leaving the choice to production.
Simple artwork is not lesser artwork here. Strong silhouettes, generous letter spacing and two or three clear colours often produce a better varsity result than a crowded badge. Small stars, narrow outlines and tiny internal marks may need to be removed or enlarged.
What to check on the digital mockup
- The finished width and height in inches, including the border.
- The exact wording, spelling, initials and number positions.
- The order of the face, outline and background colours.
- The border or merrowed edge and whether it is visually wide enough.
- The backing: sew-on, iron-on or Velcro, plus the correct Velcro side if needed.
- The intended garment, position and orientation.
- Any details that have been simplified for production.
A digital mockup is a planning document, not a photograph of the finished patch. Screen colours can vary, and the raised yarn texture is represented visually rather than physically. Its value is that you can check the design, proportions and specification before anything is produced.
For more artwork preparation advice, read How to Design Artwork for chenille patches That Production-Ready. It is worth checking the design before requesting a quote if you already know the approximate size and garment.
Order quantities, pricing and production details
The Customized Patches has a 5-piece minimum per design. That means five identical patches is the normal starting point; five different names or five separate logos are treated as separate designs unless agreed otherwise. Tell us the quantity for each version so the quotation reflects the actual order.
Pricing depends on size, shape, colours, backing, stitch or yarn coverage and quantity. A large back patch uses more material than a small chest crest. Complex artwork may also need more preparation than a single varsity letter. It is better to compare quotes using the same dimensions and backing rather than comparing a small sample with a large one.
Include the delivery address in the United Kingdom, the required date, garment information and whether the patches are going to one site or several. If a club has different age groups or a business has multiple branches, list each design and quantity clearly.
A sensible ordering sequence
- Send the artwork, desired wording, approximate size and a photograph or description of the garment.
- State the preferred surface and any alternative you are willing to consider.
- Confirm the backing and placement, especially for nylon, wool, leather, blazer pockets and Velcro panels.
- Review the free digital mockup, normally supplied within 12 hours.
- Check spelling, dimensions, colours, quantities and delivery details.
- Approve the mockup in writing. Production takes place only after approval.
- Keep a copy of the approved specification for repeat orders and future colour changes.
Name sew-on, iron-on or Velcro on the quote and include the garment type. We will show the intended backing on a free digital mockup usually within 12 hours, then produce only after you approve the details.
GET A FREE MOCKUPAllow time for questions before a school term, tournament, launch or event. The mockup is usually quick, but artwork revisions, approval delays and unusual garment requirements can affect the schedule. If the date is fixed, state it in the first message rather than after the design has been approved.
For a wider checklist, see 10 Questions to Ask Before Ordering chenille patches. It covers the practical details that often cause a second email, including backing, size and repeat production.
Care for varsity chenille patches after fitting
Care starts with the garment, backing and application method. Follow the clothing manufacturer’s washing instructions and avoid assuming that a patch can handle the hottest cycle simply because the jacket can. Raised yarn can catch on rough surfaces, and aggressive tumble drying can affect adhesive or distort the surrounding fabric.
For iron-on applications, allow the adhesive to cool and set fully before washing. Do not drag a hot iron across the chenille face, as direct heat and pressure can flatten the pile. If the edge begins to lift, stop using high heat and have the patch secured by stitching rather than repeatedly reheating it.
Sew-on patches should be checked at the corners and along the border after heavy use. A loose thread can be trimmed carefully, but do not pull through the face yarn. For Velcro patches, keep the hook side covered when not in use so it does not catch jumpers, lining or other garments.
When varsity chenille is not the right choice
There are projects where the traditional varsity effect is not the priority. If the logo depends on tiny text, smooth gradients or a detailed illustration, printed or woven construction may communicate it better. That is not a failure of chenille; it is a mismatch between the artwork and the surface.
A rain-facing bag, technical shell or frequently swapped identity panel may be better served by PVC patches, particularly where cleaning and Velcro removal matter more than a soft yarn face. A premium leather label may suit a heritage brand, while leather patches offer a different material statement.
If you are still unsure, request two mockup routes. We can compare a bold chenille interpretation with a flatter embroidered, woven or printed version so the decision is based on the actual logo and garment rather than a general preference.
A final varsity patch specification checklist
Before approving, read the specification as if somebody else had to fit the patch without speaking to you. It should make the design, dimensions, backing and destination clear. This is especially useful for team managers, school offices and brands placing repeat orders through different suppliers.
- Brand, club, school or business name.
- Exact patch wording and any numbers, initials or dates.
- Finished width and height in inches.
- Patch shape, border and edge finish.
- Face, outline and background colours.
- Chenille, embroidered, woven, printed, PVC or another agreed construction.
- Backing type and Velcro orientation if relevant.
- Garment type and placement.
- Quantity for each separate design, with at least 5 pieces per design.
- Required date and UK delivery address.
- Approved mockup attached to the order record.
The best varsity chenille patches UK orders are not necessarily the largest or most colourful. They are the ones where the lettering remains readable, the size suits the garment, the backing matches the use and everybody approves the same version before production. A clear brief saves more time than a rushed redesign.
For broader product choices, visit embroidered patches or compare the dedicated chenille patches hub. Customers across the United Kingdom can also view the UK city pages for location-focused ordering information.
Frequently asked questions
What are varsity chenille patches UK buyers usually using?
They are commonly used on school blazers, varsity jackets, football and rugby team clothing, college sweatshirts, club jackets, wool coaches and selected branded garments. They suit bold initials, numbers, names and simple crests. The raised yarn face gives a traditional varsity appearance, but very fine logos may be clearer as embroidered, woven or printed patches.
What is the minimum order for varsity chenille patches?
The minimum is 5 pieces per design. Five identical patches count as one design. If the lettering, logo, size or backing changes, ask us to confirm whether those versions need to be quoted separately. Listing each design and quantity helps avoid confusion on a club, school or business order.
How quickly can I see a chenille patch mockup?
The Customized Patches usually provides a free digital mockup within 12 hours. Send the artwork, approximate size, garment type and preferred backing so the mockup can show a useful specification. Production begins only after you approve the mockup, so allow time for any requested changes before a fixed event date.
Should I choose sew-on or iron-on backing for a varsity jacket?
Sew-on is often the safer choice for wool, denim, heavy jackets and garments that will be worn or washed repeatedly. Iron-on can be convenient on suitable cotton or cotton-blend fabric, but it needs the correct heat, pressure and care. Nylon shells and water-resistant fabrics need particular caution because adhesive may not bond reliably.
Can chenille patches include small text and detailed logos?
They can include detail, but chenille is strongest with bold shapes, broad letters and clear contrast. Very small text, narrow lines and gradients may lose definition in the raised yarn. Ask for a mockup and consider woven patches, printed patches or flat embroidered patches if fine detail is central to the design.
How do I choose between chenille and embroidered patches for a UK brand?
Choose chenille for a soft, raised varsity effect on bold letters and simple crests. Choose embroidered patches for a more conventional stitched badge, greater line control or a smaller logo. The correct option depends on the artwork, garment, viewing distance, backing and care routine. The Chenille patches vs embroidered patches: Which Is Right for Your Project? guide gives a fuller comparison.
Ready to produce custom patches for your UK team or brand?
GET A FREE MOCKUP