
How to Design Artwork for chenille patches That Production-Ready
Production-ready artwork for chenille patches uses bold shapes, limited colours, clear lettering and enough separation for chenille yarn to form cleanly. Supply a high-resolution vector or clear image, confirm the finished size and backing, then approve a digital mockup. The Customized Patches has a 5-piece minimum and produces only after approval.
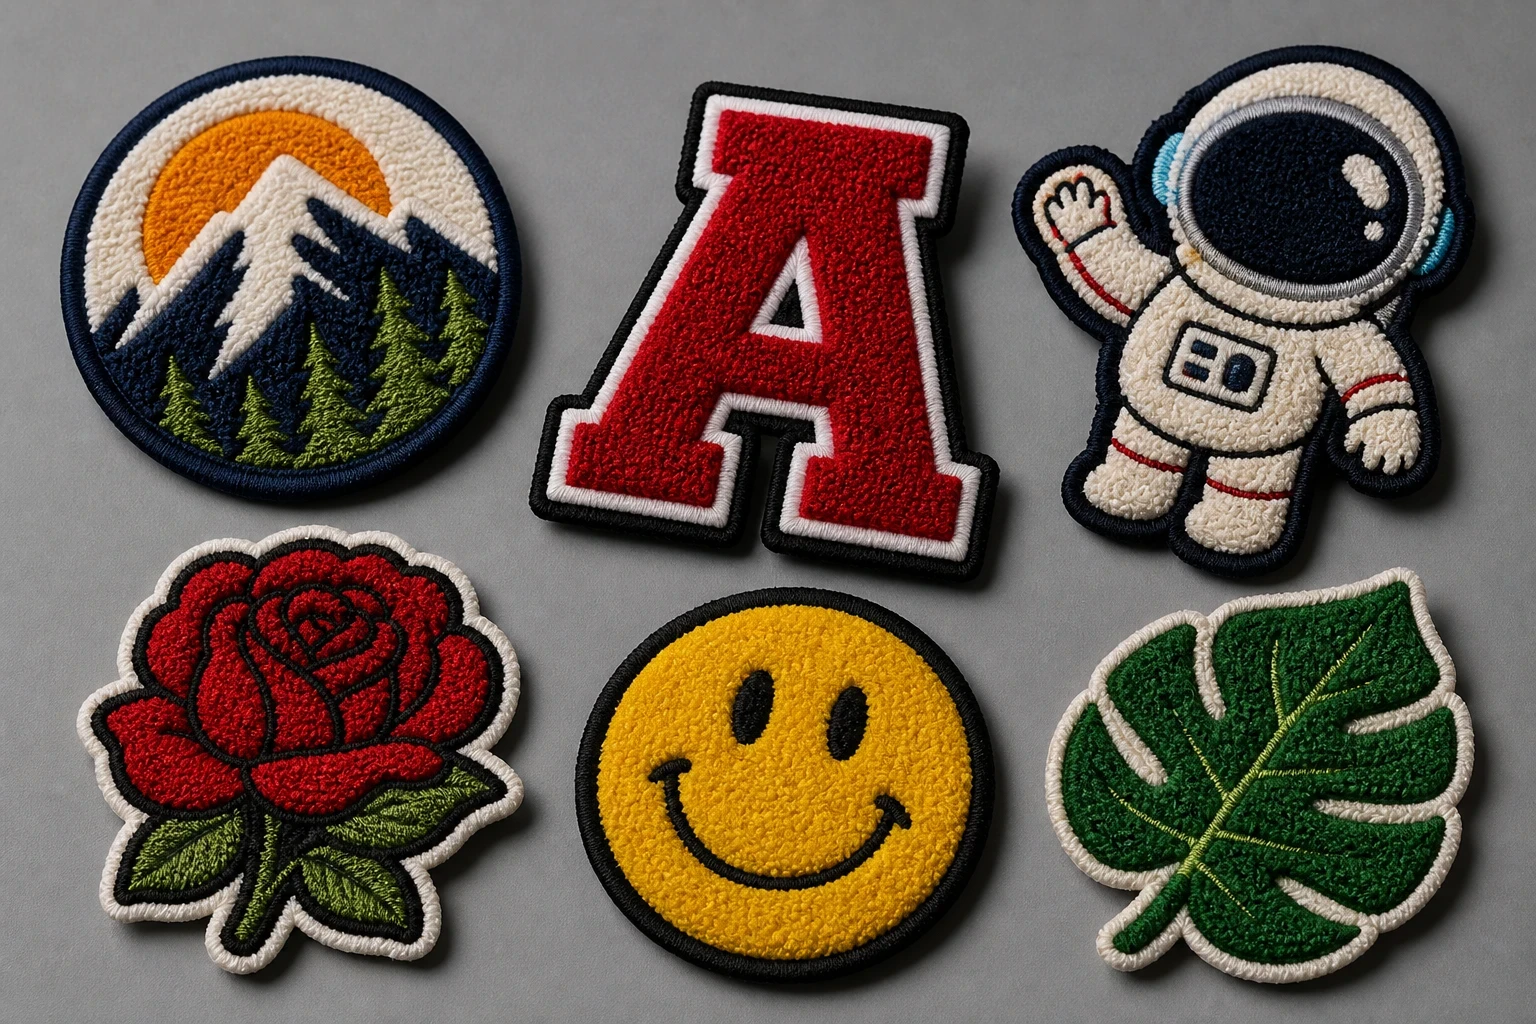
Key takeaways
- Use bold artwork with fewer, stronger shapes because chenille yarn has a visible pile and does not reproduce fine detail like print.
- Set the finished width and height before judging the design; small lettering that looks acceptable on screen may close up on a 3-inch badge.
- Choose sew-on, iron-on or Velcro backing according to the garment and washing routine, not simply the lowest quoted price.
- The Customized Patches has a 5-piece minimum per design, sends a free digital mockup usually within 12 hours, and produces only after approval.
To make artwork production-ready for chenille patches, simplify the design into bold shapes, readable lettering and a small number of strong colours. Set the finished size before judging detail, then check the border and backing against the garment. Chenille yarn has a raised pile, so a logo that works for print may need careful editing before it works as a patch.
The Customized Patches supplies UK customers with a free digital mockup usually within 12 hours. There is a 5-piece minimum per design, and we produce only after you approve the mockup. That approval stage is where we check the details that matter in real use: a football shirt, a wool coaches jacket, a school blazer, a hospitality polo or a Velcro panel.
Start with the garment, not the artwork file
A badge is only production-ready when it suits the item it will be attached to. A 3-inch crest on a football jacket has different requirements from a wide back patch on a biker vest. A narrow chest area on a nylon shell may need a lighter patch and a secure sew-on finish, while a school blazer usually needs a neat edge and an attachment method that survives regular pressing and washing.
Before editing the logo, measure the usable area in inches. Record the maximum width, maximum height and the space needed around the patch. If it is going on a Velcro panel, measure the loop area rather than the whole panel, because a patch that overhangs the loop may catch on other garments or pull at the corners.
- Football clubs: check the distance from the zip, sponsor mark, sleeve seam and existing crest.
- Cadet units: confirm the panel size, uniform rules and whether the badge must be removable.
- Hospitality polos: allow for the curved chest area and choose lettering that remains clear at arm's length.
- School blazers: test the patch placement against the pocket, button line and blazer seam.
- Biker and motorcycle club patches: allow for the jacket's heavy leather or denim, the rocker shape and the required border.
- Nylon shells and waterproof-style jackets: avoid assuming iron-on will be suitable; heat, coating and washing can affect adhesion.
If you are unsure of the correct product family, compare chenille patches with embroidered patches before reducing the artwork. Chenille gives a soft, raised varsity appearance. Flat embroidery is better at holding small lettering and fine outlines. Neither is automatically the right answer for every logo.
Build a chenille-friendly logo
The most reliable chenille artwork has a clear silhouette. Think of the design as a set of large pieces: background, main letter or emblem, contrasting detail and border. If the viewer has to inspect the patch to understand it, the artwork is asking the yarn to do too much.
Remove tiny highlights, fine strokes and photographic shading unless they are essential to recognition. A football club crest may need its shield, initials and founding year, but a small motto around the edge could become crowded. A hospitality logo may need its symbol and name, while a soft gradient behind the symbol can be dropped without weakening the identity.
Use shapes that have room to form
Chenille yarn is thicker and more tactile than a printed line. Narrow gaps can close, especially where two dark areas meet. Keep enclosed spaces open enough to remain visible at the finished size, and avoid placing several thin outlines around one small object.
A strong approach is to convert the logo to a one-colour silhouette first. If the shape is still recognisable in one colour, it usually has a sound foundation. Add only the colour divisions and internal details that improve recognition. This is more dependable than leaving every layer from a full branding file in place.
Treat lettering as a separate production problem
Small text is one of the first things we query on a quote. A typeface with thin strokes, tight counters or delicate serifs may look excellent on a laptop but lose its character in yarn. Use a heavier font, increase spacing where necessary and check the lettering at the actual patch size rather than at 100 percent on a large monitor.
- Use short words or initials for small chest badges.
- Keep letters away from the merrowed edge so the border does not crowd the first or last character.
- Avoid putting a long sentence around a narrow oval unless the finished size is large enough.
- Check numbers separately; 3, 5, 6, 8 and 9 can lose their counters when compressed.
- Ask for a mockup if the wording is important. It is better to edit a phrase before production than to discover that it cannot be read on the garment.
For very fine names, dates or sponsor information, woven patches may be more suitable because the surface is flatter and the weave can hold finer text. For photographic artwork or a detailed illustration, printed patches are flatter still; that is the point. The correct comparison is not which method sounds more premium, but which surface preserves the information you need.
Choose colours that remain clear in yarn
Start with contrast, then refine the colour match. A navy background with black lettering may be correct in a brand guide but difficult to read on a three-inch chenille badge. A cream border around a yellow centre can also disappear under indoor lighting. Strong light-versus-dark separation usually matters more than a small difference between two close shades.
Supply colour references from your brand guide if you have them, but expect the physical yarn to have a texture and sheen that differs from a screen. Do not judge the final appearance from a flat RGB preview alone. The mockup helps confirm the colour order, while the production team checks what can be represented cleanly in the selected material.
| Artwork issue | What can happen on chenille | Practical fix |
|---|---|---|
| Two similar dark colours | The sections merge when viewed from a short distance. | Use a lighter centre, a stronger outline or a clearer separation. |
| Very thin outline | The line may look uneven or disappear into the pile. | Increase the stroke weight or remove the outline. |
| Many gradient tones | The gradual transition cannot be represented as a smooth screen effect. | Choose two or three deliberate colour blocks. |
| Light lettering on a light field | The wording loses contrast, particularly on a pale polo or blazer. | Darken the lettering or change the background. |
| Tiny internal icon | The icon becomes a small patch of colour rather than a recognisable symbol. | Enlarge it, simplify it or remove it. |
Some customers want an exact corporate shade, while others mainly need the badge to look right beside an existing uniform. Tell us which priority applies. A football club may need the club red and blue to be visually balanced; a business may need a close brand match across patches, woven labels and embroidered polos. Those are useful production instructions, not unnecessary detail.
Set the border, shape and edge correctly
The border is part of the artwork, not an afterthought. It frames the design, hides the edge and gives the patch a defined shape. A merrowed crest has a raised stitched edge that suits traditional football badges, school insignia and club patches. The border must still leave enough room for the main artwork inside it.
If the design already contains a heavy outline, adding a heavy merrowed border can make the badge look cramped. In that case, reduce the internal outline, enlarge the patch or simplify the edge. A wide outer shape with generous internal space will usually look more considered than a detailed design pushed right up against the border.
Not sure whether your colours and lettering will hold in chenille? Send the artwork and the intended size. We will prepare a free digital mockup usually within 12 hours so you can compare the layout before production.
GET A FREE MOCKUPCommon shape decisions
- Shield: useful for school, sports and organisational crests, but allow room at the pointed lower edge.
- Circle: easy to place on caps, polos and chest areas, although curved lettering needs generous spacing.
- Oval or rocker: useful for club names and motorcycle patches, but long words may need a wider finished size.
- Custom silhouette: effective for animals, mascots and distinctive brand marks, provided narrow projections are not too fragile.
- Rectangle: practical for names, departments and Velcro panels, but corners should suit the garment rather than fight its seams.
For biker and motorcycle club work, look at the complete biker and motorcycle club patches range and consider how the top and bottom rockers will sit on leather or denim. For a lightweight jacket, a large, heavy patch can change how the fabric hangs. Artwork and garment choice need to be discussed together.
Select backing for the way the patch will be used
A good design can still fail if the backing does not suit the garment. Sew-on is the dependable choice for many football jackets, wool coaches jackets, school blazers and heavy denim. It gives a direct mechanical attachment and can be reinforced around corners or along a border.
Iron-on is convenient on suitable fabrics, but it is not a universal answer. Heat-sensitive nylon, coated shells and some outerwear can react badly to pressing. We have also seen iron-on patches peel after a dryer cycle when the garment care routine was harsher than the adhesive could tolerate. If the item is washed often, tell us before choosing the back.
| Backing | Best suited to | Points to confirm |
|---|---|---|
| Sew-on | Football jackets, wool coaches jackets, denim, blazers and long-term uniforms | Allow access for stitching and check the border can be sewn securely. |
| Iron-on | Suitable cotton or blended garments where quick attachment is useful | Check heat tolerance, washing temperature and dryer use before ordering. |
| Velcro | Removable unit badges, cadet equipment, bags and loop panels | Measure the loop panel and confirm the hook or loop side required. |
For a cadet unit or work team with changing names, Velcro can be more practical than sewing each badge to a new garment. For a school blazer, sew-on may be the safer long-term route. The backing changes the final thickness, attachment method and sometimes the usable edge, so include it in the original artwork and quote request.
Prepare files a production desk can use
The best file is usually a clean vector supplied as PDF, AI or EPS, with the text converted to outlines. A vector file allows the artwork to be checked at the intended size without the jagged edges that appear when a small screenshot is enlarged. If the original logo is unavailable, a clear PNG or JPG can still be useful, especially when it shows the design at a sensible resolution.
Do not send only a photograph of a patch on a jacket if you can avoid it. The angle, folds, shadows and stitching can hide the true shape. Send the original logo as well as any reference image, then state the required finished size, quantity, garment and backing in the message.
- Name the file with the club, business or project name and the version number.
- Include the finished width and height in inches, not just the artwork canvas size.
- Mark the intended front of the design and identify any wording that must remain exact.
- List the thread or yarn colours you want, plus a reference if colour matching matters.
- State the patch quantity; The Customized Patches has a 5-piece minimum per design.
- Include the garment type and backing request, especially for nylon shells, Velcro panels and heat-sensitive fabrics.
- Keep an editable master file so changes can be made without rebuilding the artwork.
Raster artwork is not automatically unusable
A customer may only have a JPEG from a club website or a scanned school crest. That is common. We can assess it, but a small image may need redrawing or simplification before it becomes suitable. Enlarging a blurry image does not create missing detail; it only makes the blur larger.
If the logo contains a registered typeface or a detailed emblem, send the cleanest source available. A brand guideline PDF, a large sign file or an original vector from the designer can save time. If there is no better source, approve the simplified interpretation on the mockup rather than assuming every tiny feature will transfer.
Review the mockup at the actual finished size
A digital mockup is not just a presentation image. It is the last practical check before production. Look at the finished dimensions, wording, border thickness, colour order, backing and how the patch sits on the stated garment. View it on a phone as well as a large screen; many people first see a badge from a few feet away.
The Customized Patches usually sends the free digital mockup within 12 hours. We produce only after approval, so use that stage properly. Ask for a change if the initials are too small, the border is too wide or the patch needs to fit a particular Velcro panel. Once approved, the production version follows the confirmed design rather than an earlier email attachment.
- Check the name, initials, numbers and punctuation letter by letter.
- Compare the mockup with the original brand or club reference.
- Confirm the width and height in inches, including the border.
- Check whether the shape leaves room around corners, seams and fasteners.
- Confirm sew-on, iron-on or Velcro backing.
- Confirm the quantity and remember that each design has a 5-piece minimum.
- Reply with clear approval or a numbered list of corrections.
For a detailed comparison of surface types, read Chenille patches vs embroidered patches: Which Is Right for Your Project?. The question is often settled by the smallest important detail: a tiny school motto, a club rocker, a sponsor line or the need to remove a badge after an event.
Order with enough information to avoid delays
A clear first enquiry can be quoted faster than a long email with the essentials missing. Send the artwork, finished size, quantity, intended garment, backing and any deadline. If there are several versions, list each design separately rather than describing them as a batch of similar badges.
The 5-piece minimum applies per design, so five football crest patches and five player-name patches count as two designs. If you need different colours, names or shapes, explain how they vary. That helps us confirm whether they can be treated as one repeat design or need separate setup and approval.
Lead time depends on approval and complexity
The free digital mockup is usually sent within 12 hours, but the total order time includes artwork changes, approval, production and UK-wide shipping. A simple repeat crest is easier to schedule than a new mascot with several size versions. A late artwork correction can move the practical dispatch date even when the original enquiry arrived early.
Name the garment, finished size, quantity and backing on the quote, then attach the best artwork you have. We will show the correct chenille layout on a free digital mockup usually within 12 hours, and production starts only after you approve it.
GET A FREE MOCKUPIf the patches are for a tournament, school presentation, launch or club event, give the date at the first enquiry. We can then discuss the realistic route rather than guessing from a generic turnaround. Approval is a customer decision as well as a production checkpoint, so return corrections promptly when timing matters.
Avoid the most common artwork failures
The most common problem is not a bad logo. It is a good logo used at the wrong scale. A detailed crest copied from a website may work at 10 inches wide but fail at 2.5 inches. The next is overcrowding: too many words, too many outlines and too many small colour blocks competing for the same space.
- Sending a screenshot and expecting every small mark to be reproduced exactly.
- Choosing the finished size after the artwork has been approved.
- Using thin script lettering for a badge that will be viewed from several feet away.
- Putting black on navy or white on pale yellow without checking contrast.
- Forgetting that the merrowed border takes up part of the overall width.
- Selecting iron-on for a nylon shell or a garment that regularly goes through a dryer.
- Ordering a Velcro-backed patch without measuring the loop panel.
- Assuming a digital preview has the same texture, pile and light response as physical chenille.
- Approving an old version of the logo because several files have similar names.
- Requesting one quantity for several designs without allowing for the 5-piece minimum per design.
Printed and PVC alternatives can solve particular problems. PVC patches cope well with bold waterproof-style graphics and a rubberised surface, while printed patches retain photographic and tonal detail. That does not make them better than chenille. Printed is flatter; that is the point. Chenille is chosen when the raised, varsity-style texture is part of the look.
Use a simple production-ready checklist
Before sending the final file, read the design as a customer would read it on the garment. Put it at the intended size on a photograph or a paper cut-out. This catches awkward placement, undersized wording and a border that leaves no breathing room.
- The patch size is stated in inches.
- The artwork remains recognisable as a simplified silhouette.
- The main wording is readable at the finished size.
- Important gaps are wide enough to remain open.
- The colours have clear contrast and are listed or referenced.
- The border and patch shape are confirmed.
- The garment and attachment method are confirmed.
- The quantity is at least 5 pieces for that design.
- The file is supplied as vector artwork where possible.
- The mockup has been checked for spelling, size, shape, colour and backing.
- Approval is given only after all changes are complete.
If your project involves a school or college, the guide to Chenille patches Best Practices for schools and colleges covers placement, group ordering and practical uniform considerations. For general UK buying information, see Chenille patches: Everything UK Buyers Need to Know.
Final advice
Good chenille artwork is edited, not merely exported. Keep the main idea, remove details that cannot survive the pile, make the lettering earn its place and choose a size that gives the design room. A clean two-colour badge will often look more deliberate than a crowded six-colour version.
Send the clearest file available and explain where the patch will be used. The Customized Patches serves customers across the United Kingdom, from local football clubs and cadet groups to brands, hospitality teams and schools. With a 5-piece minimum per design, a free digital mockup usually within 12 hours and production only after approval, the artwork can be checked before it becomes a finished patch.
For a wider product comparison, start with embroidered patches or review 3D embroidered patches if raised thread rather than chenille pile better suits the logo. If you already know the design and only need a quote, use the free mockup quote.
Frequently asked questions
What artwork file is best for chenille patches?
A clean vector PDF, AI or EPS file is usually best, with text converted to outlines. It allows the artwork to be checked at the finished size without pixelation. A high-resolution PNG or JPG can also be assessed, but a small blurry screenshot may need redrawing or simplification.
How detailed can chenille patches be?
Chenille patches work best with bold shapes, strong contrast and limited internal detail. Tiny lettering, hairline outlines, narrow gaps and soft gradients can close up or lose definition because chenille yarn has a raised pile. If fine wording is essential, compare the design with woven or printed patches.
What is the minimum order for chenille patches?
The Customized Patches has a 5-piece minimum per design. Five patches of one approved crest meet the minimum, but different names, colourways or artwork versions may count as separate designs. Include the quantity and each variation in your quote request so the order can be assessed correctly.
How quickly can I see a chenille patch mockup in the UK?
The Customized Patches usually provides a free digital mockup within 12 hours. The full order time also includes any artwork changes, customer approval, production and UK-wide shipping. Production begins only after the mockup has been approved.
Is iron-on backing suitable for a nylon jacket?
Not always. Nylon shells and coated outerwear can be sensitive to heat, and the adhesive may not suit the fabric or washing routine. Sew-on is often the safer option for long-term attachment, while Velcro may suit a removable badge. Confirm the garment material and care routine before selecting backing.
Should I choose chenille or flat embroidered patches for a detailed logo?
Choose chenille for a raised, soft varsity appearance with bold lettering and shapes. Choose flat embroidery when small outlines, fine text or detailed linework matter more. The right choice depends on the finished size, garment, viewing distance and desired texture. A free mockup can help you compare the layout before production.
Ready to produce custom patches for your UK team or brand?
GET A FREE MOCKUP