
Chenille patches for Small Businesses: A Practical Guide
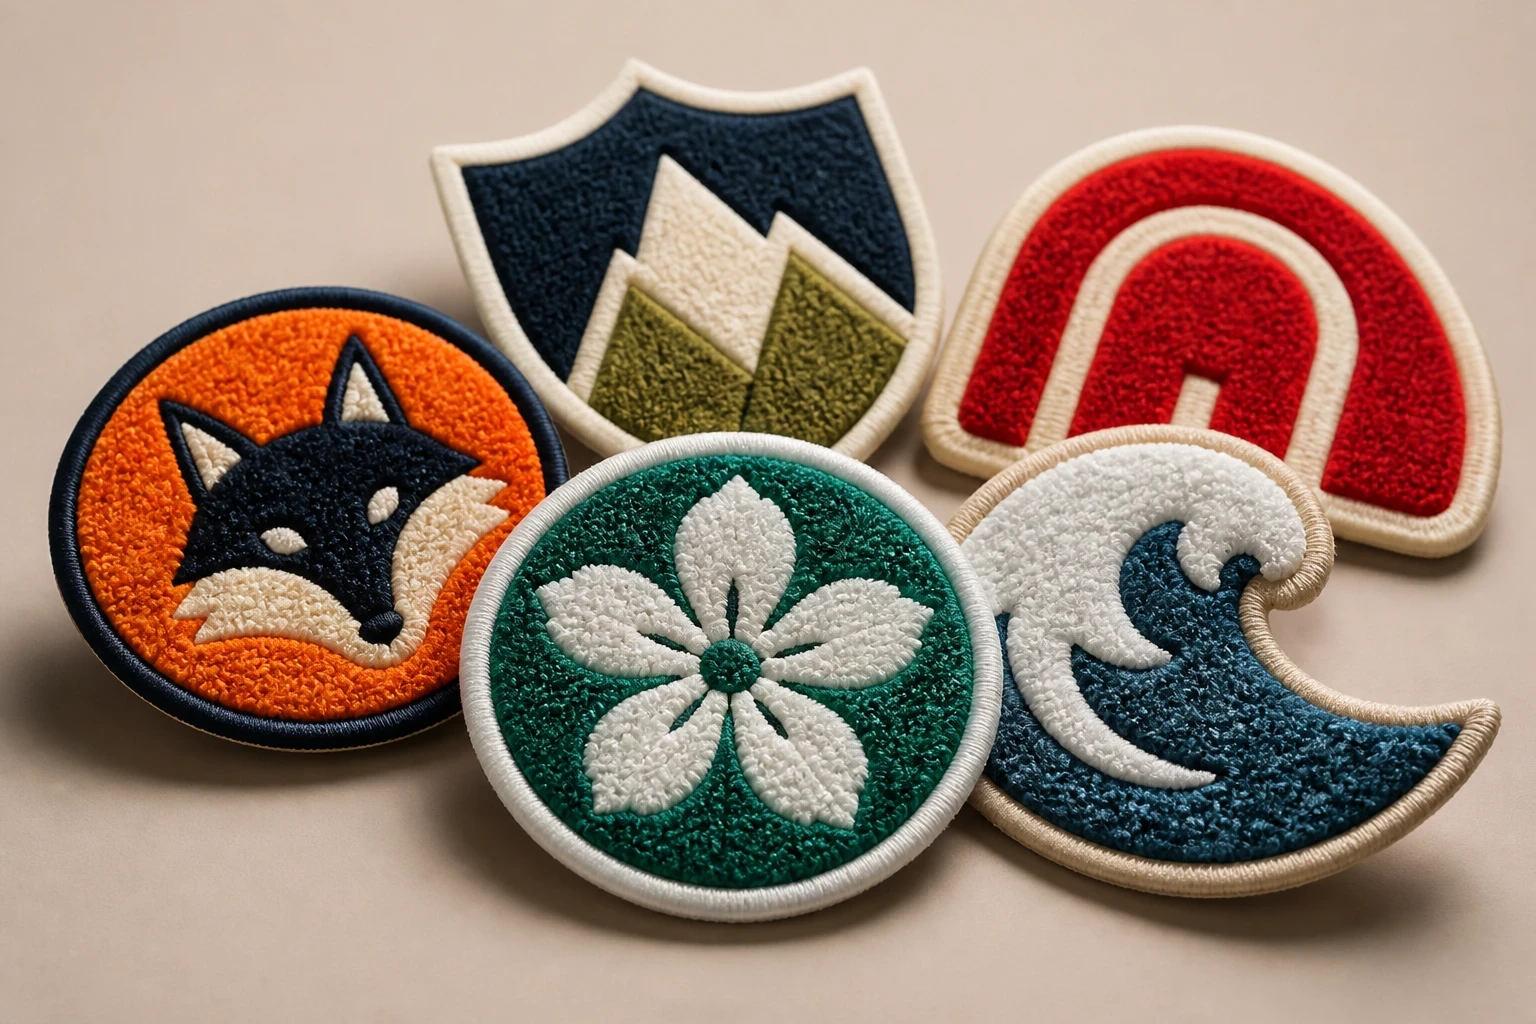
Chenille patches are raised, looped-fibre badges suited to small-business branding on jackets, sweatshirts, uniforms and merchandise. They give logos a soft, tactile finish but are less suitable for tiny lettering or photographic detail. The Customized Patches supplies UK orders from a 5-piece minimum and provides a free digital mockup, usually within 12 hours, before production.
Key takeaways
- Chenille patches suit bold, simple logos that benefit from a raised, tactile surface; very small text and fine artwork may need embroidery, woven, or print instead.
- The Customized Patches accepts a minimum of 5 pieces per design, making chenille practical for small UK businesses testing a uniform, merchandise line, or club launch.
- A free digital mockup is usually provided within 12 hours, and production starts only after the artwork, size, colours, backing, and placement have been approved.
- Backing should follow the garment: sew-on is the dependable choice for regular wear, iron-on suits suitable fabric and lighter use, and Velcro works best on compatible panels.
Chenille patches give a small business a raised, soft-textured badge for jackets, sweatshirts, uniforms and merchandise. They work best with bold logos, initials, mascots and simple crests rather than tiny copy or detailed photographs. For a UK order, The Customized Patches can produce from 5 pieces per design and provides a free digital mockup usually within 12 hours.
The sensible starting point is not the patch material on its own. Look at the garment, the artwork, the number of washes, and the way customers or staff will handle it. A chenille badge on a wool coach jacket can look exactly right; the same badge on a thin nylon shell may need a different backing and a more careful placement.
Why small businesses choose chenille patches
A chenille patch has a looped yarn surface that gives the design height and a soft, slightly fuzzy feel. That texture is the reason many independent brands choose it. A plain sweatshirt with a strong chest badge can look like a considered product rather than ordinary blank clothing with a small printed mark.
They are also useful when a business wants one design to do several jobs. A coffee roaster might use a patch on staff overshirts, sell it as a small piece of merchandise, and include it in a launch bundle. A barber can put a bold shop emblem on work jackets. A five-a-side team, brewery, record label, streetwear brand or climbing club can use the same crest across a limited run.
There is a practical limit. Raised yarn is not a magic way to reproduce every logo. Fine lines can close up, small lettering can lose definition, and gradients do not translate in the same way they appear on a screen. If your mark depends on tiny wording, a photographic image, or several subtle shades, compare it with woven patches or printed patches before deciding.
The visual character to expect
- A raised, tactile face rather than a flat inked surface.
- Strong blocks of colour and clear outlines.
- A traditional varsity, club, sportswear or workwear feel.
- A design that is easy to recognise from several feet away.
- Less suitability for very small text, fine shading and complex photographic artwork.
That last point is not a fault; it is a design decision. Printed is flatter; that is the point. Chenille is chosen because people notice and feel the raised surface. A good quote should tell you which method suits the artwork instead of forcing every logo into the same construction.
Artwork and sizing: make the logo work at patch scale
Small businesses often send a logo that was designed for a website header or invoice. It may contain a slogan, thin borders, a long web address and three small symbols. That can be fine on screen but crowded once it is reduced to a 3-inch badge. Start by identifying the one part people must recognise first: the initials, animal, object, wordmark or crest.
For a chest badge, many businesses begin around 3 to 4 inches wide, although the right size depends on the garment. A sleeve badge may need to be narrower. A back-of-jacket emblem can be much larger. Measure the actual area rather than choosing a size because it sounds familiar. Leave room around buttons, seams, pockets, zips and Velcro panels.
Lettering, borders and colour
Use short wording and generous letter shapes. If the business name is long, consider using initials on the patch and keeping the full name on a separate garment print or label. Thick outer borders help a crest hold together, especially on wool or textured clothing, but an overly complicated double border can make the centre feel cramped.
Colour contrast matters more than having every brand colour. A dark navy background with black yarn may look neat on a monitor and disappear on a jacket. A mockup should show the relationship between the patch colours and the garment, not just the artwork on a white page. Send a brand colour reference if you have one, but judge the final design by visibility as well as colour matching.
- Remove details that are decorative but cannot be read at the finished size.
- Keep the main lettering away from the outer edge and merrowed border.
- Use contrast between the base, raised yarn and outline.
- Supply a vector file if available, but include a clear image of the intended garment.
- Ask to see the design at its proposed finished dimensions, not only enlarged on a screen.
For more artwork checks, see How to Design Artwork for chenille patches That Production-Ready. The useful question is not simply, “Can this file be opened?” It is, “Will the important parts still read clearly once the patch has been made and attached to fabric?”
Choosing the face, border and backing
The face is only one part of the specification. The border gives the patch its finished edge, while the backing determines how it is attached. Typical enquiries cover merrowed crests for football clubs, shop logos for hospitality polos, and badges for biker jackets where a reliable attachment mattered more than a quick application.
Sew-on backing
Sew-on is the dependable choice for regular use. It is especially sensible for wool coaches, heavy cotton jackets, canvas overshirts and garments that will be washed repeatedly. A neat stitch around the edge helps the badge stay put. It takes longer to apply than an iron-on, but that extra step is often worthwhile for staff clothing or retail pieces that need to survive more than a single season.
Iron-on backing
Iron-on backing can be convenient for suitable cotton, denim and some uniform fabrics. The adhesive needs proper heat, pressure and a clean surface. It is not suitable for every nylon shell, coated material, waterproof fabric or heat-sensitive garment. An iron-on that peels after a dryer cycle is a common disappointment, usually because the fabric, temperature, pressure or washing method was not considered.
Velcro backing
Velcro is useful for uniforms and equipment that already have a compatible loop panel. It lets a team change a name, role or event badge without sewing each version onto the garment. It can feel bulky on a light polo and serves little purpose if there is no matching panel, so confirm the garment before asking for it.
| Option | Best fit | Advantages | Points to check |
|---|---|---|---|
| Sew-on | Wool coaches, denim, canvas, heavy cotton, biker jackets and long-term workwear | Strong attachment and suitable for repeated use | Needs stitching; allow for a clean edge and a suitable sewing route |
| Iron-on | Suitable cotton, denim and some uniform fabrics | Quick application without sewing | Heat-sensitive or coated fabrics may not suit it; washing and tumble drying can affect adhesion |
| Velcro | Uniforms, tactical-style garments and existing loop panels | Patch can be removed or changed | Requires a compatible loop panel and may add bulk |
| Sew-on plus compatible panel | Teams that want a more secure removable system | Combines a fixed panel with interchangeable badges | More preparation and cost than a standard sew-on patch |
If you are comparing surface styles rather than backing, our guide to The Difference Between chenille patches and embroidered patches, Explained sets out the practical distinction. Standard embroidered patches usually handle finer outlines and smaller wording, while chenille brings more height and texture.
Send the artwork, garment photograph, desired size and intended backing together. A free digital mockup usually arrives within 12 hours, and The Customized Patches produces only after you approve it. That gives you a chance to spot a crowded border, weak contrast or unsuitable placement before any batch is made.
Chenille patches compared with other patch types
There is no universal best patch. The right choice depends on what must be visible, how the garment will be used, and how much texture you want. A pub team may want a substantial crest on a jacket, while a tradesperson may need small lettering that stays sharp on a hard-wearing polo.
| Patch type | Surface and detail | Good choice for | Trade-off |
|---|---|---|---|
| Chenille | Raised, looped yarn with a tactile finish | Bold crests, mascots, initials, sportswear, jackets and merchandise | Tiny lettering and fine detail may need simplifying |
| Flat embroidered | Thread texture with defined stitched detail | Workwear names, club badges, uniforms and general branding | Less plush and raised than chenille |
| Woven | Flat woven surface suited to small lines and lettering | Detailed logos, labels and compact designs | Flatter appearance with less yarn height |
| Printed | Flat ink or printed image with broad artwork flexibility | Gradients, photographs, subtle shading and very detailed graphics | Does not provide the raised textile surface of chenille |
| PVC | Moulded rubber-like surface, often suited to outdoor or technical use | Outdoor clubs, equipment bags, workwear and bold utility marks | Different look and feel from a soft textile badge |
| Leather | Natural or synthetic leather surface | Heritage brands, premium accessories, hats and bags | Less suitable for yarn-led varsity styling |
Not sure whether the raised yarn, backing or size will suit your garment? Send the logo and a photo of the clothing for a free digital mockup, usually within 12 hours, so you can compare the finished direction before production.
GET A FREE MOCKUPFor a small logo with clear lettering, 3D embroidered patches may offer height with more stitched definition. For a hard-wearing technical garment, PVC patches could be a better match. If the brand is built around heritage clothing or accessories, leather patches may give the right material story without trying to make chenille do a job it was not designed for.
A simple decision test
- Choose chenille if texture and a bold, recognisable emblem are central to the design.
- Choose flat embroidery if you need general-purpose branding with more stitch definition.
- Choose woven if compact lettering and small linework matter most.
- Choose printed if the artwork depends on gradients, photographs or a broad range of visual detail.
- Choose PVC if the garment or equipment needs a moulded, technical-looking badge.
- Choose leather if the product needs a natural, heritage or accessory-led finish.
The chenille patches vs embroidered patches: Which Is Right for Your Project? guide is useful if two options remain close. Our team can also show both directions on a mockup rather than asking you to make the decision from a material name alone.
Where small businesses use chenille patches
The most successful business orders usually have a clear garment and a clear audience. A badge made for a retail hoodie can be more expressive than one made for a hospitality shirt, even if both carry the same company initials. Think about where the patch will sit, how far away it will be viewed, and whether the wearer wants a uniform appearance or an item with personality.
Retail brands and product drops
Chenille works well for limited clothing runs because the patch becomes part of the product rather than a hidden branding detail. A small streetwear label might use a 4-inch back badge and a smaller chest version. A maker selling work jackets could use an oversized emblem with a short wordmark. Confirm that the design is distinctive enough to stand alone if customers buy the patch separately.
Hospitality, cafés and food businesses
Hospitality clothing gets handled, washed and moved around. A bold patch on a jacket or overshirt can work well for front-of-house teams, pop-up events and market stalls. On a lightweight polo, check the weight and backing carefully. A very large badge may pull at the fabric or look out of proportion, while a simple chest emblem can remain tidy.
Clubs, teams and community organisations
Football clubs, cadet units, music groups, cycling teams and motorcycle clubs often use crests that already suit the chenille treatment. A merrowed edge can make a simple shield feel finished. For biker and motorcycle club clothing, check the patch dimensions against the vest panel and surrounding badges; the biker and motorcycle club patches hub covers that wider placement context.
Schools and colleges
A school or college may use patches on leavers' clothing, sports jackets, societies, event garments or blazers. A simple house emblem or year mark generally works better than a crest packed with tiny Latin text and fine heraldic detail. School orders also benefit from deciding early whether every item will be sewn on or supplied with a backing for application.
The 5-piece minimum per design can suit a small pilot order: five staff jackets, five committee garments, or a handful of samples before a larger launch. It does not mean five mixed designs; the minimum applies per design. If you need different wording, colours or shapes, ask for each version to be listed separately on the quote.
Quantity, pricing and the 5-piece minimum
The price of a patch depends on more than its width. Size, shape, number of colours, construction, backing, quantity and artwork complexity all affect the quote. A simple 3-inch badge ordered in a larger batch is not priced in the same way as a large back patch with several sections and a removable Velcro system.
For a small business, the sensible approach is to separate the test order from the eventual repeat order. You may begin with 5 or 10 pieces for staff and photography, then reorder once the garment and placement have been checked. A retail business might order more at launch but keep one approved design for later batches, helping the branding remain consistent.
- State the number of pieces required per design, not only the total across several designs.
- Give the finished width and height, or the maximum area available on the garment.
- List the backing separately for each design if some pieces will be sewn on and others will use Velcro.
- Mention if the patches are for resale, staff use, an event, or a one-off club order.
- Ask whether a repeat order can use the approved artwork without starting the design discussion again.
The Customized Patches has a 5-piece minimum per design. Prices are quoted in pounds sterling for UK customers, with the final figure based on the actual specification rather than a vague starting price. The How Much Do chenille patches Cost in the UK? guide explains the main variables in more detail.
Ordering and lead times in the United Kingdom
A clean order starts with five details: artwork, finished size, backing, quantity and delivery information. Add a photograph or link to the garment if the material is unusual. Nylon shells, waterproof fabrics, fleece, ribbed knitwear and padded coats each raise different placement questions, so the garment should not be treated as an afterthought.
The normal first step is a quote and digital proof. The free digital mockup is usually supplied within 12 hours. Check the spelling, dimensions, border, colours, backing, placement and the way the patch sits against the garment. Ask for changes at this point; production begins only after approval.
What to include in your quote request
- The logo file, preferably in a clear vector format, plus any notes about the important details.
- The requested finished size in inches, or a photograph showing the available area.
- The number of pieces for each design, remembering the 5-piece minimum per design.
- The intended backing: sew-on, iron-on or Velcro.
- The garment type, such as a nylon shell, wool coach jacket, polo, hoodie, blazer or biker vest.
- Your required delivery address in the United Kingdom and any date that affects the order.
Lead time can vary with the design, quantity, backing and current production schedule, so do not plan around an unconfirmed date. If the patches are for a launch, wedding party, tournament, open day or uniform changeover, ask for the expected production and UK delivery timing before approving the order. The A Step-by-Step Guide to Ordering chenille patches follows this sequence in a shorter checklist.
Once the proof is approved, save the confirmation and the final garment placement notes. If you later reorder, refer to the approved version rather than sending a slightly altered logo from a new software export. That simple habit prevents an old border, different colour or revised letter shape appearing in the next batch.
Application, washing and everyday care
The correct care depends on the garment and backing, but the general rule is to avoid treating a patch as indestructible. Sew-on badges should be attached with suitable stitching through the edge or a stable area of the patch. Iron-on badges need the recommended heat and pressure, with a pressing cloth if appropriate, and should not be applied blindly to a coated nylon shell.
Name sew-on, iron-on or Velcro on the quote and include the garment type. We will show the proposed backing and design on a free digital mockup, usually within 12 hours, with production starting only after your approval.
GET A FREE MOCKUPWashing inside out can reduce rubbing against zips and other garments. Follow the care instructions for the clothing first. If the garment must go through commercial laundry, say so before ordering; a patch that is fine for occasional hoodie washing may need a more secure attachment for an industrially handled uniform.
- Check the fabric and backing before applying heat.
- Use a clean, dry surface free from loose fibres and dirt.
- Stitch an iron-on patch as well if the garment will see heavy use or frequent washing.
- Avoid catching the edge on bags, machinery, hook-and-loop fasteners or rough surfaces.
- Keep spare patches and approved artwork records if the design is part of a staff uniform.
A nylon shell is a good example of why application needs planning. Heat can damage or mark some synthetic fabrics, while a curved or padded area may not give an iron-on adhesive enough even contact. In that situation, sew-on or a planned Velcro panel may be more appropriate.
Common mistakes small businesses can avoid
Most problems are specification problems rather than mysterious production failures. The logo was too detailed for the chosen size, the garment was assumed to be cotton, or the backing was selected without checking how the item would be washed. A few minutes at quote stage can save a batch of patches that does not suit the clothing.
Mistake one: copying a screen design without simplifying it
A logo may look crisp at 800 pixels wide and lose its small counters at 3 inches. Remove secondary copy, strengthen thin lines and keep the main mark recognisable. If the full logo must be retained, consider a larger patch or a different construction.
Mistake two: choosing backing by convenience alone
Iron-on is convenient until the garment is heat-sensitive or the patch goes through repeated drying. Velcro is flexible until the jacket has no loop panel. Sew-on takes more time but often makes sense for a work jacket intended to last. The right backing is the one that matches the garment and use, not the one with the shortest application time.
Mistake three: ordering several designs under one total quantity
The 5-piece minimum applies to each design. Five black badges and five red badges are two designs, even if the shape is identical. List variations clearly so the quote reflects the actual order and no version is missed.
Mistake four: approving without checking the real size
A design can look impressive on a large monitor and become too dominant on a polo. Print the mockup at the intended size or hold a paper version against the garment. Check the distance from seams, pockets and collars before approval.
For a fuller pre-production check, use Chenille patches Checklist: What to Confirm Before You Order. It is especially useful if several people are approving the design, as it gives everyone the same points to check.
A practical decision for your next order
Choose chenille patches if the business needs a visible, tactile emblem and the artwork can be kept bold. Choose another construction if the design depends on tiny wording, detailed shading or a technical surface. Neither decision says anything about the quality of the brand; it simply matches the production method to the job.
For most small UK businesses, a sensible first order is one approved design, a measured size, a backing chosen for the actual garment, and a small batch that can be checked in use. The 5-piece minimum makes that test manageable. Request the mockup, check it against the clothing, approve only when the details are right, and keep the approved specification for the next run.
The Customized Patches ships across the United Kingdom and can discuss chenille, embroidery, woven, printed, PVC and leather options around the same artwork. If you are still deciding, start with the free mockup quote and include the garment photograph. A clear production conversation is more useful than guessing from a product image.
Frequently asked questions
What are chenille patches best used for?
Chenille patches are best for bold logos, initials, mascots and crests on jackets, sweatshirts, clubwear, uniforms and merchandise. Their raised looped yarn creates a soft, tactile surface. They are less suitable for tiny lettering, fine linework and photographic detail, which may work better as woven, flat embroidered or printed patches.
What is the minimum order for chenille patches at The Customized Patches?
The minimum order is 5 pieces per design. If you require different wording, colours, shapes or artwork versions, each version should be listed as a separate design. This makes small test orders practical for UK businesses, clubs, teams and product launches.
How quickly can I receive a chenille patch mockup?
The Customized Patches usually provides a free digital mockup within 12 hours. Send the artwork, proposed size, backing, quantity and a photograph or description of the garment. Production begins only after the mockup has been reviewed and approved.
Are chenille patches suitable for nylon jackets?
They can be suitable for nylon jackets, but the backing and application method need checking first. Some nylon shells are heat-sensitive or coated, so iron-on application may not be appropriate. Sew-on attachment or a compatible Velcro panel may be more suitable, depending on the garment construction.
Should a small business choose sew-on, iron-on or Velcro backing?
Sew-on is generally the dependable option for regular wear, wool, denim, canvas and workwear. Iron-on can suit compatible cotton or denim when applied correctly, but heat and washing must be considered. Velcro is useful where the garment already has a matching loop panel and the patch needs to be removable.
Can chenille patches include small text?
They can include lettering, but the text must be large and clear enough for the finished patch size and yarn construction. Long slogans, web addresses and very small words may lose definition. A free digital mockup lets you check the proposed size and decide if the wording should be shortened or produced as woven, embroidered or printed detail.
Ready to produce custom patches for your UK team or brand?
GET A FREE MOCKUP