
A Step-by-Step Guide to Ordering chenille patches
Ordering chenille patches involves choosing the design, size, lettering, colours, border, backing and quantity, then checking a digital mockup before production. The Customized Patches supplies UK customers with a free digital mockup usually within 12 hours. Production starts only after approval, and the minimum order is 5 pieces per design.
Key takeaways
- The minimum order is 5 chenille patches per design.
- A free digital mockup is usually supplied within 12 hours, and production starts only after approval.
- Chenille suits bold lettering, large symbols and varsity-style crests, but fine detail may need simplifying.
- Choose the backing around the garment, washing routine and expected frequency of removal.
Ordering chenille patches is a straightforward process: send the artwork, explain the garment and intended use, choose the size and backing, check the digital mockup, then approve production. The Customized Patches supplies UK teams, brands, clubs and businesses, with a minimum order of 5 pieces per design.
You do not need finished vector artwork to start. A logo, photograph of a sketch or a clear description can be enough for an initial quote. A free digital mockup is usually sent within 12 hours, and production starts only after you approve the design.
Step 1: Decide if chenille patches suit the job
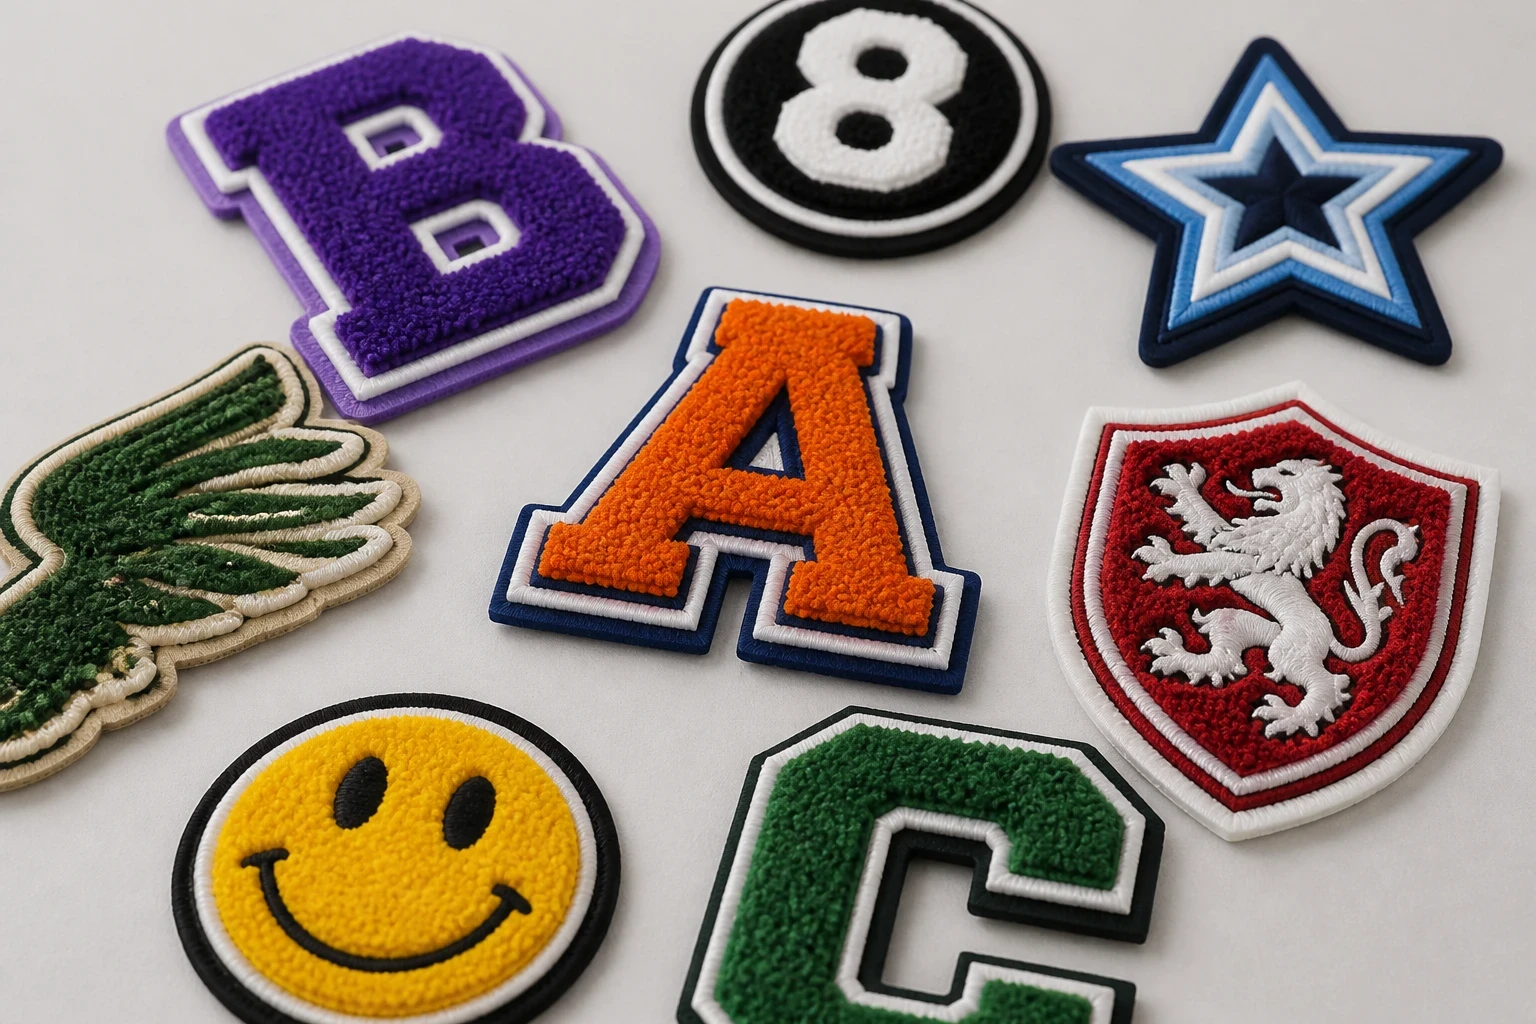
Chenille has a raised, looped yarn surface that gives lettering and simple symbols a soft, tactile finish. It is the familiar look seen on varsity jackets, college sweatshirts and traditional sports clothing. Large initials, club names, mascots and bold crests tend to work well because the material has presence from a few feet away.
That texture also sets a limit. Tiny lettering, narrow gaps and photographic detail can lose definition, especially on a small patch. If your logo depends on fine lines or several colour changes, embroidered patches or woven patches may reproduce it more clearly. Printed is flatter; that is the point when a detailed image needs a smooth surface.
Common uses we quote
- Football, rugby and hockey club initials on jackets, kit bags and coaches’ clothing.
- Varsity-style names and house emblems for schools, colleges and universities.
- Hospitality polos, work jackets and staff sweatshirts for restaurants, venues and events.
- Biker and motorcycle club lettering where a bold, traditional surface is part of the look.
- Brand marks on wool coaches, denim jackets and heavyweight promotional clothing.
- Small-run team or business orders, starting from 5 pieces per design.
Look at the garment before settling on the material. Chenille patches can work on a wool coach jacket or a heavy cotton sweatshirt, but a lightweight nylon shell may need a carefully chosen backing and attachment method. On a smooth rain jacket, the patch can also change how the fabric folds, so a flatter option may be more practical.
Step 2: Prepare artwork that can be made cleanly
Send the clearest version of the design you have. A vector PDF, SVG or high-resolution PNG is helpful, but it is not a condition of asking for a quote. Include any colour references, the exact spelling and a note showing which parts must remain visible.
The production question is not simply, “Can this logo be copied?” It is, “Can the important parts still read at the finished size?” A thin outline around a football badge may need to become a wider border. A five-word club name may need a taller patch than the original digital logo suggests.
Artwork checks before you send it
- Check every word, initial and date. A wrong spelling can survive several people looking at a screen.
- Mark the main colours and say if a close visual match is acceptable or if a particular colour reference matters.
- Identify the border, central motif and background so the hierarchy is clear.
- Avoid placing fine detail at the outside edge, where the border and cut shape need room.
- State the intended finished size instead of relying on the dimensions of the artwork file.
- Mention if the design is for a school blazer, nylon shell, Velcro panel, wool coach or another specific garment.
Do not redraw the logo repeatedly before speaking to us. Sometimes the best route is a simple production adjustment, such as opening a gap, enlarging a letter or removing a tiny interior line. The mockup lets you see that change before anything is made.
Step 3: Choose the size, shape and chenille specification
Measure the space on the garment, not just the logo on your computer. A chest patch on a polo may be around a few inches wide, while a large back crest needs a very different proportion. For a team order, place a paper printout on one jacket or sweatshirt and check it while worn.
The shape can follow the artwork or use a regular circle, shield, arch, rectangle or letter form. A merrowed crest with a clear outer border gives a traditional finish, but a shaped edge can make a mascot or large initial feel more intentional. Tell us if the patch needs to match an existing badge.
Specification choices to confirm
| Specification | What to decide | Practical effect |
|---|---|---|
| Finished size | Width, height or both in inches | Controls legibility, coverage and how the patch sits on the garment |
| Shape | Standard or custom outline | Affects the visual balance and the amount of border space |
| Lettering | Exact wording, font style and line arrangement | Bold, open lettering normally reads more clearly than fine script |
| Colours | Background, yarn colours and border colour | Contrast matters more than having many separate shades |
| Edge | Defined border or shaped edge | Helps protect the perimeter and gives the design a finished outline |
| Backing | Sew-on, iron-on, Velcro or another agreed option | Determines how the patch attaches and how easy it is to replace |
| Quantity | At least 5 pieces per design | The same design can be produced as a small club, team or business run |
The minimum order is 5 pieces per design. If you need two different club badges, they count as two designs even if the size and colours are similar. State the quantity for each version so the quote and mockup reflect the actual order.
Chenille compared with other patch types
| Patch type | Best suited to | Main trade-off |
|---|---|---|
| Chenille | Bold varsity lettering, large initials and tactile sports or college designs | Fine detail and very small text may need simplifying |
| Embroidered | Traditional crests, logos and designs needing thread detail | The surface is more textured than print and can be less suitable for photographic artwork |
| Woven | Small lettering and flatter detailed logos | It has less of the raised varsity feel associated with chenille |
| Printed | Gradients, photographs and highly detailed artwork | The surface is flat, so it will not provide a raised yarn finish |
| PVC | Outdoor use, bold shapes and a wipe-clean finish | The rubber-like appearance is different from a fabric patch |
| Leather | Simple premium marks on jackets, bags and accessories | Colour and detail options differ from textile patch methods |
There is no universal winner. A football club wanting a large raised initial may be better served by chenille. A hospitality business with a detailed single-colour logo may prefer embroidered patches, while a technical outdoor brand may ask about PVC patches. The right choice follows the artwork and garment rather than fashion alone.
Not sure if the lettering needs chenille, embroidery or a flatter method? Send the artwork and garment details for a free digital mockup usually within 12 hours, then compare the result before production.
GET A FREE MOCKUPStep 4: Select the backing for the actual garment
Backing is a practical decision, not a small afterthought. Sew-on is often the dependable choice for jackets, bags and items that will be washed regularly. It takes longer to attach, but the stitching gives the patch a direct connection to the fabric and makes sense for a club uniform intended to last.
Iron-on is quicker for many cotton garments, but the surface and heat setting matter. An iron-on patch can peel after a dryer cycle if it was applied to unsuitable fabric, pressed for too little time or washed harshly. We would not treat iron-on as a universal answer for nylon shells, coated materials or garments that cannot take heat.
Backing guide by garment
- Cotton sweatshirts and many casual garments: iron-on may be suitable, subject to the garment label and application instructions.
- Wool coaches and heavy jackets: sew-on is usually the safer starting point, especially where heat could mark the material.
- Nylon shells and coated outerwear: ask about sew-on or a suitable alternative before choosing heat application.
- Removable team identifiers: Velcro can work when the garment has a compatible loop panel.
- School blazers: sew-on is often preferred for a secure, tidy attachment, with the inside of the garment considered during stitching.
- Bags and kit equipment: sew-on commonly gives better control than relying on adhesive alone.
If you already have a Velcro panel, measure its usable area rather than the outside of the garment. The hook-and-loop match needs to be correct, and an oversized patch can catch on other clothing or sit beyond the panel. Tell us if the patch is replacing an existing one so the dimensions can be checked against the current fit.
Step 5: Request the quote with useful information
A useful quote request includes the artwork, quantity, finished size, backing, garment type, destination in the United Kingdom and the date you need the patches. If the order is for a school, club or company, say how many designs are involved and how many pieces belong to each design.
Prices depend on the design and specification rather than a single universal rate. Size, stitch or yarn detail, backing, quantity and the number of separate designs all affect the quote. If budget matters, tell us at the beginning; simplifying a border or reducing the number of versions may be more useful than making the finished patch too small.
Information to include in your first message
- The artwork file or a clear image of the design.
- The exact number of patches required, remembering the 5-piece minimum per design.
- The preferred finished width and height in inches, or a photograph showing the intended placement.
- The garment material and location, such as a chest, sleeve, back, blazer or Velcro panel.
- Your preferred backing: sew-on, iron-on, Velcro or advice requested.
- The UK delivery postcode and any event, match, launch or school deadline.
- Any colour references, spelling requirements or existing badge that the patch must match.
For a new logo, it is sensible to ask for two visual routes if the choice is not settled. For example, a club may compare a raised chenille version with a flatter embroidered version. This is easier to judge on a mockup than by reading a material name in a quote.
Step 6: Check the free digital mockup carefully
The mockup is the point at which you catch preventable problems. The Customized Patches usually provides a free digital mockup within 12 hours. Treat it as a production check, not merely a picture for approval.
What to inspect
- Spelling, initials, dates and the order of words.
- Overall width and height in relation to the garment.
- Letter spacing, especially in curved names and narrow shields.
- Border thickness and the amount of space around the design.
- Colour contrast between the background, lettering and edge.
- The shape of corners, points and any merrowed border.
- The chosen backing and its suitability for the named garment.
- The number of pieces and the number of different designs.
Place the mockup beside the real garment if possible. A patch that looks large on a laptop can look modest on the back of a rugby jacket. Conversely, a small chest patch can become crowded if a long club name is forced into a narrow shape.
Ask for changes in one clear reply where you can. “Make the second line larger, change the border to navy and use sew-on backing” is easier to action than several separate messages with different instructions. Production begins only after approval, so take the time to check the version you are actually ordering.
Step 7: Approve production and plan the lead time
Once the mockup is correct, confirm approval in writing and keep the approved version with your order records. That version should show the design, colours, size, quantity and backing. If the team later sends a revised badge, treat it as a new instruction and ask for a revised mockup.
Allow time for artwork checks, mockup amendments, production and UK delivery. A simple five-piece design may move differently from a large run with several colourways, custom shapes and individual names. If the patches are for a cup final, school presentation, product launch or club relaunch, give the deadline at the first enquiry rather than after approval.
The Customized Patches ships across the UK. Delivery timing depends on the confirmed specification and production schedule, so a precise date should be checked against your order rather than assumed from a generic online estimate.
Name sew-on, iron-on or Velcro on the quote and include the garment type. We will show the proposed backing on a free digital mockup usually within 12 hours, with production starting only after you approve it.
GET A FREE MOCKUPStep 8: Apply and care for the finished patch
Check one patch on the intended garment before applying the full batch. This is especially sensible for nylon, wool, coated fabrics and school clothing, where heat, stitching access or lining can affect the method. Follow the supplied application guidance and the garment’s own care label.
Sew-on patches should be stitched through a stable part of the garment, with attention paid to the inside so the thread does not catch on lining or pockets. Iron-on patches need a suitable heat-safe surface and firm, even pressure. Do not assume that a hot dryer will be harmless; repeated heat can loosen an adhesive edge.
Mistakes worth avoiding
- Ordering a small patch with long lettering that cannot breathe.
- Choosing iron-on for a garment that cannot take heat.
- Forgetting to mention a waterproof coating or nylon outer shell.
- Approving colours on screen without checking the full design contrast.
- Counting similar versions as one design when they are actually different badges.
- Washing or drying a newly applied patch before the attachment has settled.
- Sending the final approval without checking spelling and quantity.
A practical ordering checklist for UK teams and businesses
Before you send the final approval, use this short checklist. It is particularly useful when one person is collecting artwork from a committee, coach, head of year or marketing team and another person is placing the order.
- The design name or reference is clear.
- The finished dimensions are stated in inches.
- The quantity is at least 5 pieces for each design.
- All words, initials and dates have been checked.
- The background, yarn colours and border are understood.
- The shape matches the intended garment placement.
- The backing suits the garment and washing routine.
- The delivery postcode is in the quote request.
- The required date has been explained.
- The digital mockup has been reviewed and approved.
- No later artwork changes are expected.
For schools and colleges, keep a record of who approved the badge and which version was accepted. For clubs, ask one person to compare the mockup with the official crest. For businesses, check that the patch still matches the current brand colours and that the proposed size works on every garment in the order.
Further reading before you order
If you are still comparing finishes, read Chenille patches vs embroidered patches: Which Is Right for Your Project? for the main material trade-offs. The guide to chenille patches: Everything UK Buyers Need to Know covers broader questions about specifications and UK ordering.
For education orders, Chenille patches Best Practices for schools and colleges is a useful follow-on. If you are choosing a more general fabric option, compare printed patches, 3D embroidered patches and leather patches against the garment and design rather than selecting from appearance alone.
The main point is simple: start with the garment and the artwork, specify the patch clearly, then use the mockup to check the result. That process prevents most avoidable surprises and gives a small UK order the same careful review as a larger club or business run.
Frequently asked questions
What is the minimum order for chenille patches?
The minimum order is 5 pieces per design. If you need two different badges, names or colour versions, ask for the quantity of each design separately. The free mockup quote can show the versions before production.
How quickly can I receive a chenille patch mockup in the UK?
The Customized Patches usually provides a free digital mockup within 12 hours. This is a mockup review stage, not a delivery promise for finished patches. Production begins only after you approve the design, specifications and backing.
Can chenille patches be used on nylon jackets?
They can be considered for nylon jackets, but the fabric, coating, lining and attachment method need checking first. Iron-on may not suit a heat-sensitive or coated nylon shell. Sew-on or another agreed backing may be more appropriate.
Are chenille patches washable?
The patch and garment should be cared for according to the supplied guidance and the garment label. Sew-on is often chosen for items washed regularly. Iron-on patches can loosen after unsuitable heat, repeated dryer cycles or poor application, so test one garment before applying a full batch.
What artwork works best for chenille patches?
Bold lettering, large initials, simple mascots and clear crests usually work well. Fine lines, tiny text and photographic detail may need simplifying. If detailed reproduction is the priority, compare chenille with woven patches or embroidered patches.
Should I choose sew-on, iron-on or Velcro backing?
Choose based on the garment and how the patch will be used. Sew-on suits many jackets, wool garments, bags and regular washing. Iron-on can be convenient on suitable heat-safe clothing. Velcro is useful for compatible panels and removable identifiers. Include the garment details so the backing can be checked before approval.
Ready to produce custom patches for your UK team or brand?
GET A FREE MOCKUP