
Varsity chenille patches UK Sizing and Backing Options Explained
Varsity chenille patches UK are usually sized by their longest measurement, with common badges ranging from 3 to 12 inches. Sew-on backing suits wool, denim and heavy jackets; iron-on works best on suitable cotton or polyester; Velcro suits removable team and uniform panels. The Customized Patches provides a free digital mockup, usually within 12 hours, and produces only after approval.
Key takeaways
- Measure a varsity chenille patch by its longest side; common UK orders range from 3 to 12 inches.
- Sew-on backing is the safest general choice for wool coaches, denim, nylon shells with a suitable lining and hard-wearing club clothing.
- Iron-on backing is convenient but can peel after a dryer cycle or fail on coated nylon, stretch fabric and textured wool.
- The Customized Patches has a 5-piece minimum per design, sends a free digital mockup usually within 12 hours and produces only after approval.
Varsity chenille patches UK are normally specified by their longest measurement, with the right size depending on the garment, viewing distance and amount of lettering. For most school, team and club jackets, a badge between 3 and 8 inches works well; large back designs may run from 9 to 12 inches or more.
The backing matters just as much as the face of the patch. Sew-on is the dependable choice for wool coaches, denim and heavy jackets, iron-on is convenient on suitable smooth fabrics, and Velcro is useful when a team or business needs to move the same badge between garments. The Customized Patches supplies a free digital mockup usually within 12 hours, and production begins only after you approve it.
What makes varsity chenille patches different?
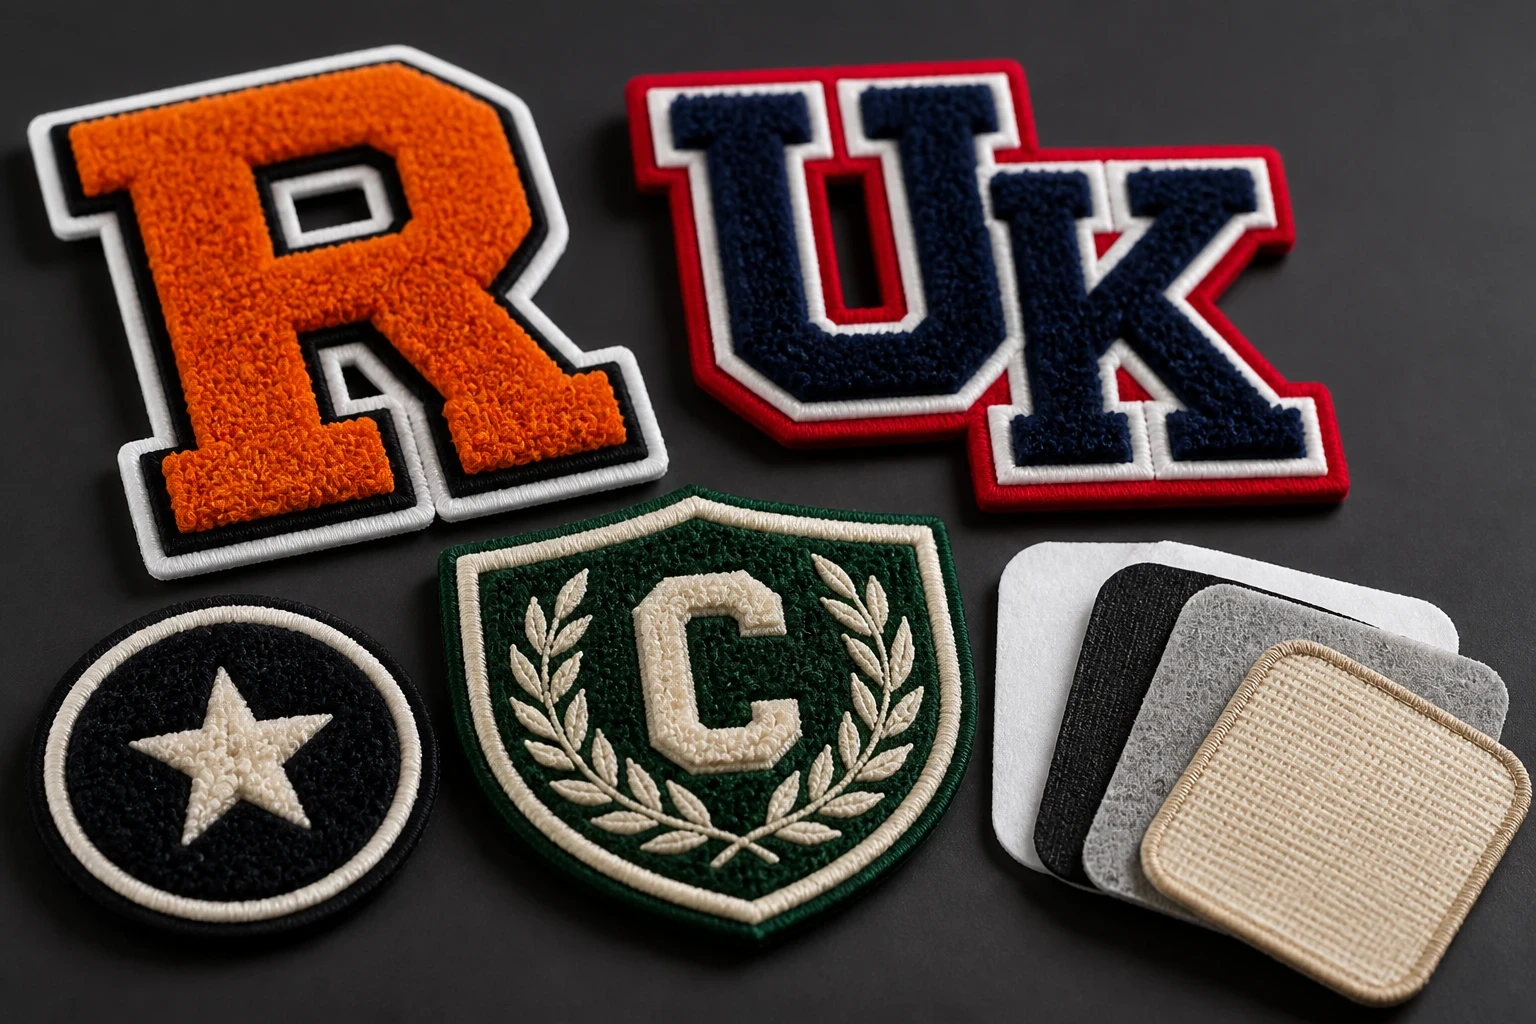
Chenille is the raised, looped yarn surface associated with traditional varsity lettering. It gives a large initial, number or crest a soft pile and a clear outline, rather than the flatter stitched appearance of ordinary embroidery. That texture is why the material works particularly well on letterman-style jackets, school awards, sportswear and bold club insignia.
The face is usually built from chenille yarn with a stitched border or merrowed edge. Fine detail has limits. A simple block letter can look strong at 4 inches, while a detailed shield with tiny wording may need to be larger or simplified. This is where a production mockup earns its keep: it shows the proposed lettering, proportions, border and approximate size before any patches are made.
A chenille badge is not automatically the best option for every logo. Printed is flatter; that is the point. It can reproduce a small photograph-style image or a colour blend more clearly, while chenille gives depth and a tactile surface. For a useful comparison, see The Difference Between varsity chenille patches UK and embroidered patches, Explained.
How to choose the right size for varsity chenille patches UK
Start with the garment, not the artwork file. A badge that looks balanced on an adult wool coach jacket may overwhelm a child’s blazer. Lay the garment flat, mark the intended area with masking tape and measure the maximum width and height available. Keep a little clearance from seams, pockets, zips and ribbed cuffs so the patch can be stitched without fighting the construction.
Common patch sizes by use
| Use | Typical size | What normally works | Main caution |
|---|---|---|---|
| Small chest or sleeve badge | 3–4 inches | A single initial, short name, simple icon or compact club mark | Small lettering may close up once raised yarn and border are added |
| School blazer crest | 3.5–5 inches | Shield, initial or school emblem with a clear outer border | Check the pocket, lapel and seam positions before confirming size |
| Football, rugby or hockey jacket front | 4–7 inches | Team initial, mascot, year or short club name | Make sure the badge does not cross the zip or sit under a fold |
| Large back letter or name | 8–12 inches | One large letter, number, name or simple mascot | Large chenille can become heavy, so confirm the jacket fabric and fixing method |
| Removable Velcro team identifier | 3–6 inches | Initials, squad role or simple department mark | Allow room for the loop panel and avoid placing it over a curved seam |
These are working ranges rather than fixed rules. A 4-inch circular crest and a 4-inch wide horizontal wordmark will not occupy the same visual space. We quote from the actual dimensions, not just a generic size label, because a patch described as 5 inches wide may need to be 3.5 inches high, 5 inches high or shaped around a shield.
Size and lettering need to be considered together
Short varsity words are forgiving. A single initial, two-digit year or three-letter club abbreviation can often be read from several feet away. Long business names are different. If the name must appear on a 3-inch chest badge, consider using an abbreviated mark, a separate woven label or a larger back design rather than forcing every word into the chenille.
A useful test is to view the artwork at its intended physical size on a phone or printed sheet. Do not judge a 4-inch patch from a logo displayed at full monitor width. Look for counters in letters such as A, B, P and R, gaps between adjacent characters and enough contrast between yarn colours. The How to Design Artwork for varsity chenille patches UK That Production-Ready guide covers these checks in more detail.
Backing options: sew-on, iron-on and Velcro
Backing determines how a patch is attached, removed and maintained. It also affects the garment you can use. A heavy chenille badge needs a fixing method that suits its weight and the fabric beneath it; choosing a backing because it is convenient on paper can lead to curling edges, poor adhesion or stitching that damages a thin shell.
| Backing | Best suited to | Advantages | Limitations |
|---|---|---|---|
| Sew-on | Wool coaches, denim, cotton twill, canvas, sturdy blazers and many heavy jackets | Strong, dependable and suitable for repeated washing when stitched correctly | Takes longer to attach and needs access for a needle or sewing machine |
| Iron-on | Smooth, heat-tolerant cotton or polyester garments with a firm surface | Quick to apply and neat when the adhesive bonds properly | Can peel after a dryer cycle, fail on coated nylon or damage fabrics exposed to heat |
| Velcro | Removable team panels, cadet uniforms, workwear identifiers and garments used by several people | Allows the badge to be swapped or removed for washing and different events | Adds a panel behind the patch and needs the matching loop side attached to the garment |
Sew-on backing for hard-wearing garments
Sew-on is usually our first suggestion for wool coaches, denim trucker jackets, heavy cotton, canvas and traditional school blazers. It does not rely on a heat-sensitive adhesive, so it suits garments that may be pressed, washed frequently or exposed to variable temperatures. A neat run of stitching around the border keeps the edge flat and makes later repair possible.
It is also the sensible choice for many nylon shells when there is a lining or stable area underneath. Nylon needs a careful approach: some shells are slippery, coated or heat-sensitive, and simply pressing an iron-on patch onto them can mark or melt the surface. For a football club ordering jackets for a wet-weather tournament, sew-on normally gives more confidence than relying on adhesive alone.
Iron-on backing for suitable smooth fabric
Iron-on backing is convenient for a batch of cotton sweatshirts, polyester polos or smooth garments that can safely take heat. It can save time when a customer is applying a small number of badges at home or in a school office. The garment’s care label still matters, and the bond should be tested before a full run is applied.
The common failure is assuming that an iron-on patch is permanent on every fabric. It is common to see adhesive lift after a dryer cycle, especially where the surface was textured, damp, stretched or not hot enough during application. Iron-on is not a good default for waterproof nylon shells, loosely woven wool or garments that cannot be pressed safely. If the jacket will be washed heavily, sew-on or a combined approach is usually safer.
Velcro for changeable uniforms and panels
Velcro backing makes sense when the same varsity badge needs to move between jackets, bags or uniform panels. Cadet units, event crews and businesses with shared outerwear may prefer a removable identifier. It can also help a team use one club badge on training kit and match-day kit without permanently fixing it to every garment.
If you are still choosing type, size, or backing, send the artwork and the garment. Free digital mockup in 12 hours — 5-piece minimum per design. We do not produce until you approve.
GET A FREE MOCKUPRemember that Velcro is a two-part system. The patch carries one side and the garment needs the matching loop panel, normally stitched firmly in place. The combined thickness is greater than sew-on, so check clearance around collars, shoulder seams and pockets. On a curved sleeve, a smaller patch and a properly sized loop panel will sit better than an oversized badge forced around the fabric.
If you are still choosing type, size, or backing, send the artwork and the garment. Free digital mockup in 12 hours and compare the proposed finish before you produce.
Matching the backing to real UK garments
The garment examples below are typical of what buyers ask about. A school blazer often has a smooth but structured face, a wool coach jacket has a dense nap and lining, while a nylon shell may have a water-resistant coating. They should not all receive the same backing.
- School blazers: sew-on is dependable for regular wear. Iron-on can work on some smooth, heat-safe blends, but check the care label and blazer construction first.
- Wool coaches and letterman-style jackets: sew-on usually gives the most secure result. Avoid pressing directly onto wool without checking heat tolerance.
- Football, rugby and hockey jackets: sew-on suits heavy outerwear; Velcro is useful if squad identifiers need to change.
- Nylon shells: inspect the coating and lining. Sew-on may be suitable in a stable area, while iron-on is often a poor choice because heat and adhesive can affect the shell.
- Hospitality polos: a smaller chenille mark can work for a bold brand initial, but a detailed menu-style logo may be clearer as embroidered patches or woven patches.
- Biker vests and club jackets: larger sew-on badges are common, with the garment checked for seams, leather panels and existing patches. See biker and motorcycle club patches for related layouts.
- Workwear with removable roles: Velcro can allow a team leader, department or event role badge to change without replacing the garment.
A merrowed crest can look especially tidy on a blazer or jacket because the raised edge gives the shape a finished outline. It still needs enough flat border for stitching and enough clearance from the garment’s own piping. If the badge is going onto a pocket flap, measure the flap both closed and open; a patch that looks fine when flat may catch when the pocket is used.
Colour, border and construction decisions
Chenille works best with a controlled colour plan. High contrast between the yarn and border helps a letter remain legible at distance, while a close tonal match creates a quieter premium look. Navy on royal blue may be attractive in a digital file but can lose definition on a dark wool jacket. A white or gold border may solve the problem without adding unnecessary detail.
Think about the border as part of the measurement. If a design has a 4-inch outside width, the internal letter is smaller once the border and spacing are included. A narrow border may not frame a large raised initial properly; a very wide border can leave little space for the lettering. The mockup should show the outside dimension and the main internal proportions so there is no confusion at approval.
When another patch type may be clearer
A large varsity initial is a natural chenille application. A small sponsor line, gradient, fine illustration or detailed company symbol may need another construction. Printed patches can retain small artwork and colour blends, while PVC patches suit some outdoor or utility garments where a rubber-like surface is preferred. 3D embroidered patches can add raised detail without using a full chenille face.
This is not a matter of one method being universally better. Printed is flatter; that is the point. Woven is cleaner for small text, embroidered gives a familiar stitched texture, and chenille provides the most recognisable raised varsity look. The correct choice depends on what the badge must communicate and how the garment will be used.
Artwork checks before ordering
Send the strongest artwork available, preferably a vector file or a clean, high-resolution image. Include the intended patch width and height if you already know them, the garment type, the preferred backing and the number of pieces required. If you only have a photograph of an existing badge, include a straight-on image and a ruler in the frame where possible.
- Confirm the longest outside measurement in inches, not just the size of the central letter.
- Check the spelling of school names, club names, initials and years before approval.
- Separate artwork colours clearly, especially on dark wool or navy nylon.
- Avoid tiny wording that cannot be read at the finished size.
- Mark whether the border should be straight, shaped, merrowed or integrated into the design.
- State whether the back should be sew-on, iron-on or Velcro.
- Tell us if the badge will sit near a zip, pocket, seam, cuff, collar or curved sleeve.
- Ask for a version shown at approximate physical size rather than judging only a large screen preview.
The Customized Patches applies a 5-piece minimum per design. That means a school can order five matching crest patches, a club can begin with five team badges, and a small business can test five branded jacket patches before committing to a larger batch. Different designs are normally treated separately, so include each crest, initial or colourway clearly in the enquiry.
Ordering varsity chenille patches UK from a UK supplier
A useful quote contains more than a logo attachment. Include the quantity per design, finished width and height, patch shape, border preference, backing, garment type, colour references and delivery postcode in the United Kingdom. If the patches are for several garments, tell us whether every garment uses the same placement.
- Send the artwork and explain where the patch will be used.
- Confirm the finished dimensions, quantity and backing preference.
- Review the free digital mockup, usually supplied within 12 hours.
- Check spelling, colours, border, proportions and the position of any lettering.
- Approve the mockup or request changes before production starts.
- Receive the finished patches through UK-wide shipping and attach them using the agreed method.
The approval stage is not a formality. It is where a 5-inch patch can be changed to 4 inches, an iron-on can be replaced with sew-on for a nylon shell, or a long school name can be shortened before materials are committed. The Customized Patches produces only after approval, so the customer has a clear opportunity to confirm the specification.
Lead time depends on the design, quantity, backing, material availability and the speed of approval. A simple repeat order is different from a first-time badge with several revisions. UK-wide shipping is arranged after production, but the delivery date should be considered alongside your event, new term, tournament or uniform issue date rather than left until the last week.
Name sew-on, iron-on, or Velcro on the quote. We show the correct back on a free 12-hour mockup so production matches the garment.
Common sizing and backing mistakes
The most frequent mistake is ordering from a screen image without confirming physical dimensions. A design can look balanced at 1,000 pixels and still be too small to read on a blazer. The second is selecting iron-on because it sounds quick, then discovering that the garment is a coated shell, textured wool or something that must not be exposed to high heat.
Ready to spec the run? Open the quote form for a free 12-hour mockup and UK-wide shipping after approval.
GET A FREE MOCKUP- Using the same patch size on adult and children’s garments without measuring each placement.
- Allowing lettering to run too close to the merrowed edge.
- Putting a large patch over a pocket, zip or seam that needs to move.
- Assuming iron-on will survive every wash and dryer cycle.
- Forgetting the loop panel when ordering Velcro.
- Approving a mockup without checking the physical width and height.
- Combining several colourways under one quantity when each design has its own minimum.
- Leaving no time for an artwork revision before a school term, match or launch.
A patch can also be technically secure but visually wrong. A 10-inch back letter on a lightweight nylon shell may pull the fabric, while a 3-inch crest on a large adult jacket may disappear. Balance the patch against the garment’s scale and intended viewing distance. The Varsity chenille patches UK Checklist: What to Confirm Before You Order is useful if several people need to sign off the order.
Choosing between chenille and other patch finishes
Choose chenille when the raised yarn surface is central to the look: varsity letters, school years, team initials, mascots and bold club badges. Choose ordinary embroidery when you need more stitched detail and a lighter, flatter badge. Choose woven when small lettering and a smooth face matter more than pile.
For a photograph, complex illustration or broad colour blend, printed construction may give the cleanest result. Leather can suit a heritage jacket or premium brand mark, while PVC may be practical for some outdoor and utility uses. The useful question is not simply which patch looks impressive in a product photograph; it is which surface, fixing method and size will still suit the garment after regular use.
| Finish | Best for | Visual character | Typical sizing thought |
|---|---|---|---|
| Chenille | Varsity initials, numbers, mascots and bold crests | Raised, soft and tactile | Give letters and borders enough room; avoid tiny wording |
| Embroidered | General crests, uniforms, logos and detailed stitched marks | Threaded, textured and versatile | Can carry more line detail than chenille at the same outside size |
| Woven | Small text, fine outlines and compact branded labels | Flatter and smooth | Useful where a low-profile finish is preferred |
| Printed | Gradients, illustrations, photographs and small colour changes | Flat and graphic | Suitable when exact image detail matters more than raised texture |
| Leather | Heritage, premium, biker and workwear applications | Solid, natural or smooth branded surface | Allow for the material’s weight and the garment’s stitch area |
There is no need to force a detailed corporate logo into chenille because the word varsity appears in the brief. A business may use a chenille initial on a wool coach jacket and a leather patch on a heavier lifestyle garment, while a school may use embroidered crests for daily uniform and chenille awards for team jackets. A mixed specification can be more practical than one finish for every item.
A practical UK specification example
Imagine a Manchester football club ordering patches for 18 navy coach jackets. The front badge is a 5-inch circular chenille crest with a gold merrowed border, a white initial and a small year. Because the jackets are nylon shells, the club asks for sew-on backing rather than assuming iron-on will bond to the coated fabric.
The club also wants 10 removable player-role badges for shared training jackets. Those are specified at 3.5 inches wide with Velcro, and the garment-side loop panels are included in the discussion. The two designs are counted separately for the 5-piece minimum, while the mockup shows the crest and role badge at approximate size on the actual navy jacket colour.
A school blazer order might be smaller: five 4-inch shield crests with sew-on backing, a simple gold border and no tiny motto. A hospitality company may choose a 3-inch chenille initial for a wool overshirt but use a flatter embroidered badge on polos. The right specification follows the garment and the job, not a generic product description.
Frequently asked questions about varsity chenille patches UK
If you are comparing sizes or trying to decide how a badge will attach, the questions below cover the points we are most often asked by UK schools, clubs, teams and businesses. For broader ordering advice, see 10 Questions to Ask Before Ordering varsity chenille patches UK and A Step-by-Step Guide to Ordering varsity chenille patches UK.
- Measure the longest outside edge in inches, then check the available garment area. A common chest badge is around 3 to 5 inches, while a large back letter may be 8 to 12 inches. The artwork, border and lettering should be judged at that finished size.
- A 5-inch width is a useful starting point for many adult jacket crests, but it is not a universal rule. A circular badge, horizontal wordmark and shield with the same width will have different heights and visual weight.
- Yes. The standard minimum is 5 pieces per design. Separate designs, such as a club crest and player-role badge, should be listed separately in the quote.
- Sew-on is usually the safest choice for wool coaches, denim, heavy blazers and hard-wearing jackets. It does not depend on heat-sensitive adhesive and can be repaired or restitched.
- Iron-on may peel after a dryer cycle or fail on coated nylon, textured wool, stretch fabric and garments that cannot take heat. It is better suited to smooth, heat-tolerant fabrics after the care label has been checked.
- Velcro is useful for removable badges, but the garment also needs the matching loop panel. It is common for shared team jackets, cadet uniforms, workwear roles and event clothing.
Frequently asked questions
What size are varsity chenille patches UK customers usually ordering?
Common sizes range from 3 to 8 inches for chest, sleeve and school blazer badges. Large initials, names and back designs may be 9 to 12 inches. The correct size depends on the garment area, viewing distance, lettering and border, so confirm the finished dimensions rather than relying on a small, medium or large label.
Which backing is best for varsity chenille patches UK?
Sew-on backing is usually the most dependable option for wool coaches, denim, heavy blazers and hard-wearing jackets. Iron-on suits some smooth, heat-safe cotton or polyester garments, while Velcro is useful when a badge needs to be removed or moved between uniform panels.
Can I use iron-on chenille patches on a nylon jacket?
It is not a safe default. Nylon may be coated, slippery or heat-sensitive, and the adhesive can fail or mark the shell. Sew-on backing is often more suitable where there is a stable area and lining. The garment care label and jacket construction should be checked before confirming the backing.
What is the minimum order for varsity chenille patches from The Customized Patches?
The minimum is 5 pieces per design. A school, club or business can therefore start with five matching patches, but separate crests, initials or colourways may be treated as separate designs. Include the quantity for each design when requesting a quote.
How quickly can I see a mockup for varsity chenille patches UK?
The Customized Patches provides a free digital mockup usually within 12 hours. The mockup can show the proposed size, lettering, border and backing. Production starts only after the customer has reviewed and approved the design.
Are chenille patches better than embroidered patches for a school or team jacket?
Chenille is a strong choice for bold varsity initials, numbers, mascots and raised school or team designs. Embroidery is often better for finer stitched detail, smaller wording and general uniform crests. The garment, artwork, desired texture and backing requirements should decide the finish rather than the word varsity alone.
Ready to produce custom patches for your UK team or brand?
GET A FREE MOCKUP