
How to Design Artwork for varsity chenille patches UK That Production-Ready
Production-ready artwork for varsity chenille patches UK should use bold shapes, limited thread colours, clear lettering and sufficient spacing for chenille’s raised yarn surface. Supply a clean vector or high-resolution file, state the finished size and backing, then review a digital mockup before approval. The Customized Patches offers a free digital mockup usually within 12 hours and produces only after approval.
Key takeaways
- Use bold artwork with simple lettering because chenille yarn has a raised, textured surface.
- Design at the finished patch size and keep small details, narrow gaps and fine outlines to a minimum.
- A 5-piece minimum applies per design, with a free digital mockup usually supplied within 12 hours.
- The Customized Patches produces only after you approve the mockup, backing and final specifications.
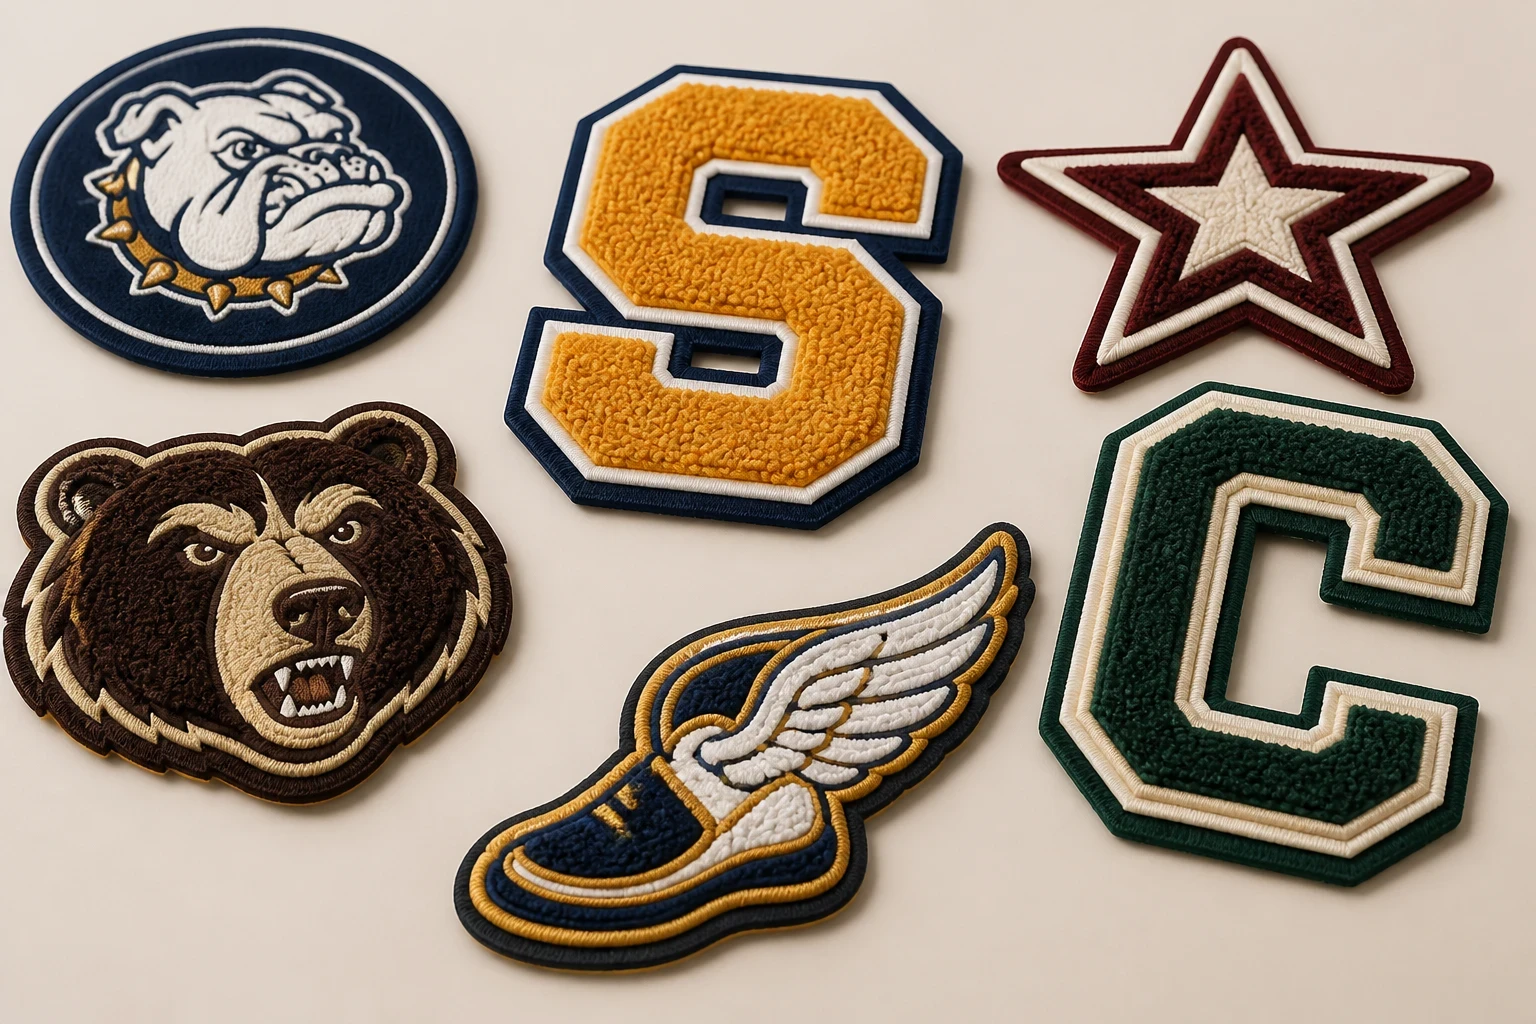
To design production-ready artwork for varsity chenille patches UK, keep the shapes bold, the lettering clear and the number of colours controlled. Chenille uses raised yarn, so a badge that looks detailed on a monitor can lose fine lines or small text once made at two or three inches wide. Start with the finished patch size, not an oversized screen file.
The safest route is to send the original logo or vector artwork, state the patch dimensions and explain the garment it will be attached to. The Customized Patches sends a free digital mockup usually within 12 hours, and produces only after you approve the design, colours, backing and placement. There is a 5-piece minimum per design.
What makes varsity chenille artwork production-ready?
Production-ready means the artwork gives the maker enough information to build the patch without guessing. It should show the outside shape, letter order, border, main colours, approximate proportions and finished size. If the patch is for a football club, that might be a block initial over a shield. For a school blazer, it could be a simple crest with a year or house letter.
A clean vector file is helpful because it can be resized without soft edges. Accepted formats depend on the project, but PDF, SVG, AI or a high-resolution PNG are sensible starting points. If all you have is a photograph of an old merrowed crest, send it anyway. A production desk can assess it and explain what needs redrawing rather than treating the photograph as final artwork.
- State the finished width and height in inches, such as 3.5 inches wide by 3 inches high.
- Separate the background, lettering, border and mascot into clear visual elements.
- Use solid colour areas rather than gradients, shadows or photographic texture.
- Keep important details away from the outer edge and allow room for the border.
- Name the garment and attachment method, such as a wool coaches jacket with sew-on backing.
- Provide one file for each genuinely different design or colourway.
The word “production-ready” does not mean the design has to be technically perfect before you ask for a quote. It means the intention is clear enough to mock up. A rough sketch with the correct initials, colours and size can be more useful than a polished logo supplied without dimensions or garment information.
Build the design around chenille’s raised surface
Chenille has a soft, tufted face rather than the flatter surface of standard embroidery. That texture gives varsity patches their familiar letterman look, but it also affects the artwork. Fine lines do not behave like printed ink. Tiny counters in letters can close up, and narrow gaps can disappear into the yarn.
Use strong silhouettes first. A large initial, broad number or simple mascot usually works well. A detailed football, animal face or building can work if it is simplified into a few clear shapes. It is better to remove three minor details than to keep them as weak marks that do not read on the finished patch.
Lettering and numbers
Block fonts are usually the most reliable starting point for varsity chenille patches UK. Choose letters with open counters and enough width for the yarn. Thin script, narrow condensed type and small words need careful checking. A club name that fits comfortably across a 6-inch patch may become unreadable if the same line is reduced to 2.5 inches.
Do not rely on a font name alone. Convert the type to outlines or provide a flattened reference so the intended letter shapes are clear. Check letters such as A, R, B, S and G at the actual finished size. If you are using a year, compare “2026” with the full team name rather than assuming both will need the same treatment.
Borders, cut lines and negative space
A border gives a chenille patch a finished edge and helps separate the design from a wool, cotton or nylon garment. Show the border clearly in the artwork. If the border is intended to be a contrasting merrowed edge, mark its colour rather than leaving the edge implied by a thin line.
Negative space is the gap between design elements. It needs to remain visible after the yarn is made. As a practical check, zoom out until the patch is roughly the size it will be on the garment. If two colours merge on screen at that scale, they may need a wider gap or a stronger border.
| Artwork element | Safer choice for chenille | Common problem | Useful check |
|---|---|---|---|
| Main lettering | Bold block letters with open counters | Thin type becomes soft or closes up | View the wording at finished size |
| Small wording | Remove it or enlarge the patch | Club names become unreadable | Ask whether the text adds recognition |
| Mascot | Simple silhouette with a few strong features | Fine eyes, fur or equipment disappear | Keep only details visible from a short distance |
| Border | Clear, consistent outer border | Edge looks uneven or crowded | Leave space between the artwork and cut line |
| Colour | A small, contrasting palette | Similar yarn colours blend together | Compare the colours on the intended garment |
| Shading | Separate solid shapes | Gradients cannot be reproduced as shown | Convert shading into defined colour blocks |
If you need a very fine illustration, a woven patches or printed patches option may hold more detail. Printed is flatter; that is the point. It can reproduce a small photographic mark or subtle gradient that would be unsuitable for raised chenille. The right choice depends on the visual effect and reading distance, not on trying to force every logo into one patch method.
Choose size before you finish the artwork
Patch size controls nearly every artwork decision. A 2-inch chest patch has less room for lettering than a 4-inch back patch, while a long name across a jacket may need a horizontal shape rather than a shield. Measure the flat area of the garment and consider seams, pockets, zips and existing badges.
For a school blazer, check the space between the pocket and lapel. For a football jacket, check whether the badge sits over a seam or beside an embroidered sponsor mark. A biker vest may have a large back panel but limited space around a central club patch. Take a photograph with a ruler beside the area if you are unsure; it gives the mockup a useful reference.
- Measure the usable area, not just the total garment panel.
- Allow room for the border, backing and normal movement of the fabric.
- Print the design at full size and hold it against the garment.
- Check that the smallest wording is readable from the distance people will normally see it.
- Tell us if the patch must fit a Velcro panel or an existing badge space.
- If you need several sizes, list each size as a separate version on the quote.
A large design is not automatically better. A 10-inch back patch can carry a large mascot and curved text, but it may be awkward on a lightweight polo. A 3-inch crest can look well judged on a hospitality jacket, while the same crest may feel lost on a heavy wool coaches jacket. Artwork and garment should be considered together.
Not sure whether your lettering is bold enough for chenille? Send the artwork and intended size. We will prepare a free digital mockup usually within 12 hours so you can compare the design before production.
GET A FREE MOCKUPColour choices for varsity chenille patches UK
Start with the club, school or brand colours, then check how they will sit on the garment. Navy on black can be correct to a brand guide but difficult to read on a dark jacket. White and cream can look similar in a digital preview, so name the intended contrast clearly. If colour matching matters, supply Pantone references or a physical reference where available, while recognising that yarn has its own surface and appearance.
Most successful varsity designs use a limited palette: a background, one or two lettering colours and a border. More colours can be used, but each extra colour adds another decision and may reduce the bold collegiate effect. Ask whether a colour is carrying useful information or simply copying a gradient from the original logo.
Check contrast on the actual garment
A patch is not viewed on a white artboard. Place a rough version over a photograph of the garment, even if the photograph is taken on a phone. This catches common issues such as maroon lettering against a burgundy jacket, a black border disappearing into a black nylon shell or a pale chenille background making a blazer crest look washed out.
The digital mockup is particularly useful here. It should show the design as a patch rather than as a flat logo, with the proposed proportions, colours and placement. Treat it as a decision stage, not a formality. If the contrast or size feels wrong, ask for a revision before approval.
Select the backing and garment before ordering
Artwork cannot be separated completely from attachment. Sew-on backing is often a straightforward choice for wool coaches jackets, heavy cotton, denim and durable teamwear. It gives the patch a secure attachment and suits designs expected to stay on the garment for a long period, although the customer needs access to a needle and thread or a professional alteration service.
Iron-on backing is convenient on suitable fabrics, but it is not a universal answer. Heat, pressure and fabric composition all matter. An iron-on patch that looks secure on day one can peel after a dryer cycle if it was not applied correctly or the fabric does not suit the adhesive. Check the care label and follow the application instructions.
Velcro is useful for removable identifiers, cadet units, security teams and garments with interchangeable panels. The hook side can catch on other clothing, so confirm which side belongs on the patch and which side belongs on the garment. Nylon shells can also need extra care because high heat may mark or distort the fabric.
| Garment or use | Backing worth considering | Artwork or fitting point | Trade-off |
|---|---|---|---|
| Wool coaches jacket | Sew-on | Check the patch does not sit across a seam | Secure and traditional, but needs stitching |
| School blazer | Sew-on or suitable iron-on | Keep the crest proportionate to the pocket and lapel | Iron-on is quick, but heat and care instructions matter |
| Nylon shell | Sew-on or Velcro | Avoid high heat and show the panel location | Adhesive may not suit the fabric |
| Cadet or work uniform | Velcro | Confirm hook-and-loop dimensions and side | Removable, but can catch on other fabrics |
| Biker vest | Sew-on | Allow room around the central back patch | Durable attachment, with more sewing required |
| Hospitality polo | Sew-on or suitable adhesive option | Keep the badge light and readable at chest size | Heavy raised designs may not suit thin fabric |
If the garment needs a very flat finish, compare embroidered patches with chenille before approving the art. For a raised highlight, 3D embroidered patches may suit selected parts of a logo, while PVC patches can be practical for outdoor or hard-wearing uses. These alternatives are not interchangeable in appearance, so the mockup should reflect the material you are actually considering.
A practical artwork workflow for UK orders
The quickest orders are usually the ones that settle the basics early. Send the artwork, quantity, finished size, backing, garment type and delivery postcode together. If you are ordering for a team, include a named contact who can approve the mockup. A design that waits in a group chat for a week can affect the overall delivery plan more than the making time.
- Collect the original logo, badge or lettering reference.
- Measure the garment area and choose the finished width and height in inches.
- Simplify fine detail and check lettering at the actual size.
- List the yarn colours, border colour and preferred backing.
- Send the design and order information for a quote.
- Review the free digital mockup usually supplied within 12 hours.
- Request any changes to size, wording, colour, shape or backing.
- Approve the final mockup and confirm the quantity and UK delivery address.
- Keep the approved artwork and mockup with the order records.
The 5-piece minimum applies per design. Five identical school house badges meet the minimum, but three red versions and two blue versions may need to be treated as separate designs depending on the artwork. If you have several teams, years or departments, list the variations clearly so the quote reflects what is actually required.
The Customized Patches ships across the UK. Lead times can depend on artwork changes, quantity, backing, production capacity and delivery location, so do not promise a fixed date to your team until the order has been reviewed. If you have a match, presentation, graduation or launch date, state it at the quoting stage.
Common artwork failures
The most frequent issue is not a bad logo. It is a logo used at the wrong size. A football club sends a detailed crest intended for a website and asks for it as a 2-inch chest patch. The text and tiny symbols then compete for space. We normally recommend keeping the main shield and initials, enlarging the key mark or moving the detail to a larger version.
Another problem is using a thin outline to separate similar colours. On screen, a one-pixel line looks visible. In raised yarn, it may not provide enough separation. A broader colour block or a simpler two-colour treatment usually gives the patch a cleaner result.
- Sending a screenshot with no finished size or garment information.
- Using a long sentence where a short abbreviation would read better.
- Putting important detail directly against the outer cut edge.
- Assuming the garment colour will provide enough contrast.
- Using a gradient when the design needs defined yarn colours.
- Choosing iron-on for a fabric that cannot take the required heat.
- Approving the mockup without checking the spelling and year.
- Combining several colourways under one description when they are different designs.
An iron-on that peels after a dryer cycle is especially frustrating because the artwork may have been correct. The issue can be unsuitable fabric, incorrect application, repeated washing or insufficient heat and pressure. If the garment will be washed frequently, discuss sew-on or another suitable attachment before the patch is made.
Name sew-on, iron-on or Velcro on the quote and tell us what garment will receive the patch. We will show the proposed backing on a free digital mockup usually within 12 hours, with production starting only after approval.
GET A FREE MOCKUPWhen another patch method may be better
Chenille is chosen for its raised, soft texture and classic varsity appearance. It suits bold initials, numbers, mascots, school houses, sports clubs and statement back patches. It is less suitable if the design depends on tiny legal wording, fine map lines, small gradients or a photographic image.
A flat embroidered patch offers a familiar stitched finish and can handle many badge shapes. A woven patch can show finer small text with a flatter face. A printed patch is useful for detailed artwork where colour transitions matter. A leather patches option may suit a heritage brand or premium garment, while biker and motorcycle club patches often need a different scale and layout from a small school crest.
| Patch type | Best suited to | Surface and detail | Main compromise |
|---|---|---|---|
| Chenille | Varsity letters, numbers, mascots and bold crests | Raised, soft and textured | Fine detail and tiny text are limited |
| Embroidered | Traditional logos, uniforms and badges | Stitched with varied thread detail | Very small lettering still needs checking |
| Woven | Fine linework and smaller wording | Flatter with defined woven detail | Does not provide the same tufted varsity texture |
| Printed | Gradients, illustrations and photographic detail | Flat ink-based appearance | Less dimensional than chenille |
| PVC | Outdoor, hard-wearing and modern utility designs | Rubbery, moulded surface | Different visual character from fabric patches |
| Leather | Heritage, fashion and premium casual garments | Natural or synthetic leather face | Artwork and edge treatment need a different approach |
There is no benefit in choosing chenille simply because the word varsity appears in the brief. The patch should match the garment, reading distance, care routine and brand character. If you are undecided, compare the varsity chenille patches UK vs embroidered patches: Which Is Right for Your Project? guide before finalising the artwork.
Final approval checklist before production
Approval is the point where the design becomes an instruction. Read every letter and number. Check the crest shape, border, colour order, finished dimensions, backing and quantity. Put the mockup beside the garment photograph and confirm that the patch will not cover a zip, pocket opening, seam or existing logo.
- The wording is spelt correctly and the year is current.
- The finished size is stated in inches.
- The patch shape and border are clear.
- The colour names or references are confirmed.
- The garment type and placement are understood.
- The backing is listed as sew-on, iron-on or Velcro.
- Any separate colourway or size is counted as its own design.
- The order quantity meets the 5-piece minimum per design.
- The delivery address is in the United Kingdom and the required date is explained.
- The final digital mockup has been approved before production.
Keep the approved version in your records, especially if the patches will be reordered for new players, pupils or staff. A small change in border colour or letter spacing can create a visibly different batch. Referring to the approved mockup keeps future conversations clear.
Get a production-ready mockup for your patch design
You do not need to redraw a club badge from scratch before asking for help. Send the file you have, the finished size you are considering and a photograph or description of the garment. We can then identify the points most likely to affect the finished patch, such as small text, colour contrast, backing and edge space.
The Customized Patches offers a free digital mockup usually within 12 hours. A 5-piece minimum applies per design, and we produce only after approval. That gives UK teams, brands, clubs and businesses a clear checkpoint before they commit to the finished varsity patch.
For related ordering detail, see A Step-by-Step Guide to Ordering varsity chenille patches UK, Chenille patches Sizing and Backing Options Explained and Common Mistakes to Avoid When Ordering varsity chenille patches UK. You can also review the free mockup quote with your artwork, quantity and garment details.
Frequently asked questions
What file format is best for varsity chenille patches UK?
A clean vector file such as SVG, AI or PDF is useful because it keeps shapes clear when resized. A high-resolution PNG can also help, particularly for an initial quote. Include the finished size, colours, wording and garment information. If your artwork is only a photograph or screenshot, send it for assessment rather than trying to recreate it without guidance.
How detailed can artwork for a chenille patch be?
Chenille is best for bold shapes, large letters, numbers and simplified mascots. Very fine lines, tiny text, narrow gaps and subtle gradients may become unclear on the raised yarn surface. If the detail is essential, consider a woven, printed or flat embroidered patch. The free digital mockup usually supplied within 12 hours helps you judge the proposed design at its intended size.
What size should I make my varsity chenille patch?
Choose the size from the garment area and the distance at which the patch will be read. Measure around pockets, seams, zips and existing badges, then print the design at full size. A small chest crest may be around 2 to 3 inches wide, while a back design can be much larger, but the correct size depends on the garment and artwork.
Can I order five different chenille patch designs?
The 5-piece minimum applies per design. Five identical patches meet the minimum for one design. If you need five different badges, each design may need to meet the minimum separately. List every size and colourway clearly on the quote so the quantity and setup requirements can be checked before approval.
Which backing is suitable for a nylon jacket or Velcro panel?
Sew-on or Velcro is often worth considering for nylon shells and removable panels, but the correct choice depends on the garment and use. Iron-on adhesive may not suit fabrics that cannot take heat, and an iron-on patch can peel after a dryer cycle if application or fabric conditions are unsuitable. State the garment type and panel dimensions when requesting the mockup.
How does The Customized Patches approve artwork before making varsity chenille patches UK?
The Customized Patches usually sends a free digital mockup within 12 hours. You check the size, wording, colours, border, backing and general placement, then request any changes. Production starts only after approval. UK customers should also confirm quantity, delivery address and any required date, with a 5-piece minimum per design.
Ready to produce custom patches for your UK team or brand?
GET A FREE MOCKUP