
Chenille patches Best Practices for schools and colleges
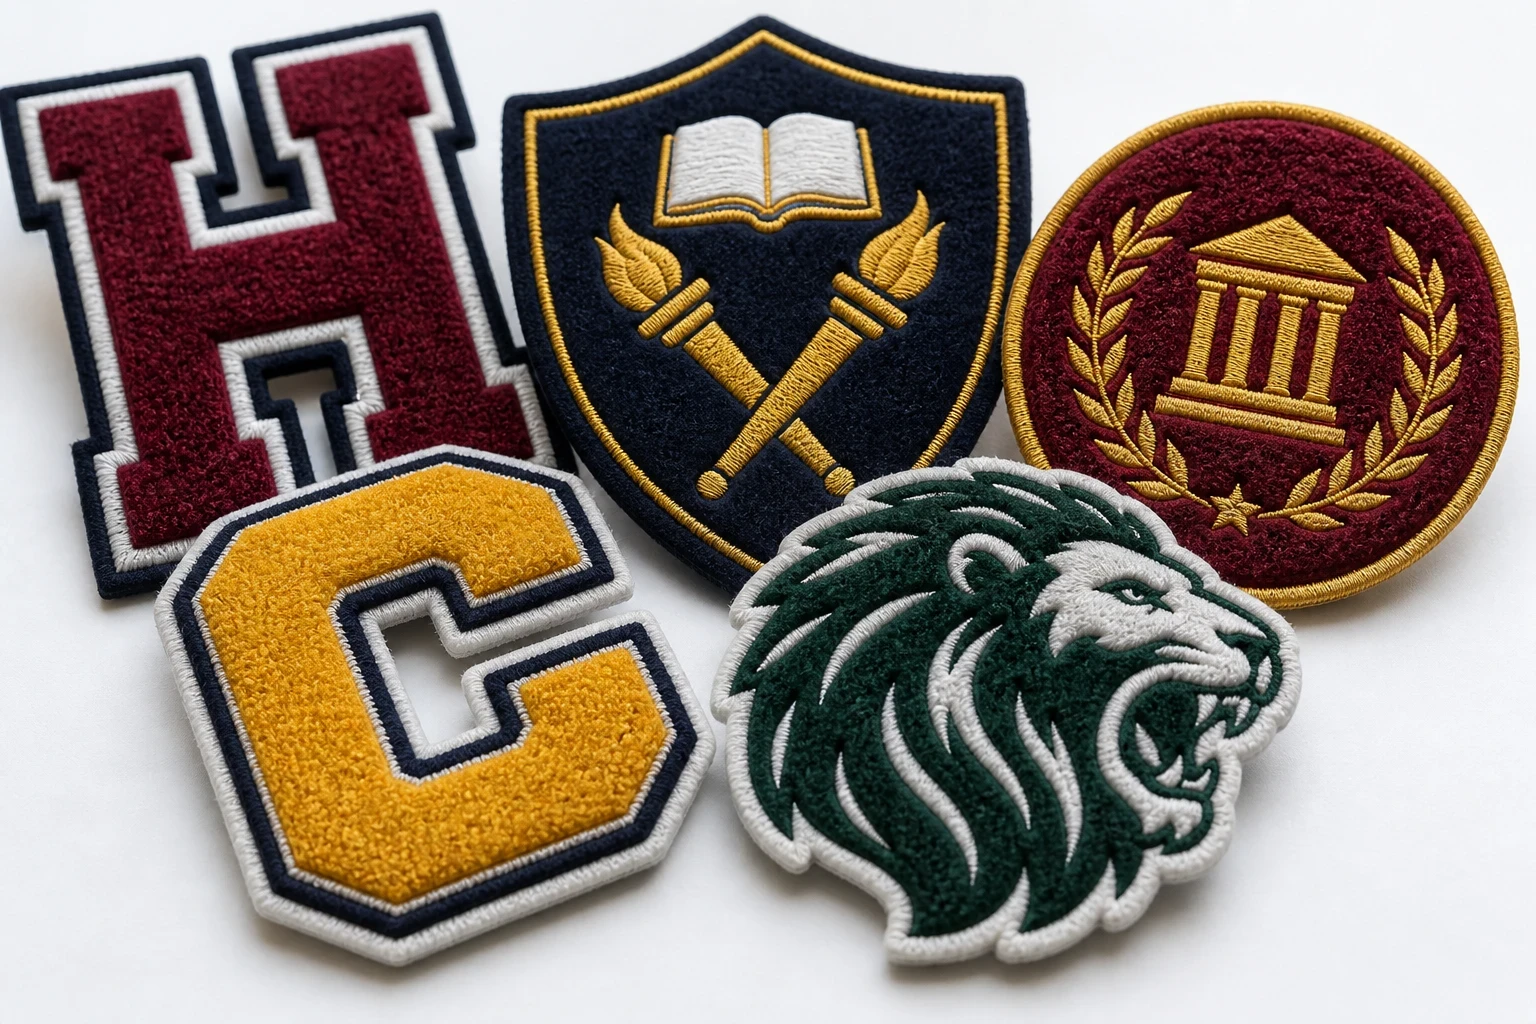
Chenille patches work best for school and college crests, varsity lettering, house teams and club badges where a raised, wool-like texture is part of the design. Use simple artwork, lettering at least 0.3 inches high where possible, a suitable sew-on or Velcro backing, and approve a free digital mockup before production. The minimum is 5 pieces per design.
Key takeaways
- Chenille patches suit bold school crests, house letters, varsity names and club badges better than tiny detailed artwork.
- A 5-piece minimum applies per design, so one approved crest can be ordered in a small batch for a trial, committee or team.
- The Customized Patches usually sends a free digital mockup within 12 hours, and produces only after the customer approves it.
- Choose backing and attachment method according to the garment: sew-on is dependable for blazers, while Velcro suits removable club or activity uniforms.
Chenille patches are a strong choice for UK schools and colleges that want a raised, wool-like crest, varsity letter or house-team badge. The best results come from bold artwork, sensible sizing, and a backing chosen for the actual garment rather than the lowest quoted option. For most blazer crests, sports jackets and student-club apparel, sew-on or Velcro is more dependable than relying on adhesive alone.
The Customized Patches supplies chenille patches across the United Kingdom with a 5-piece minimum per design. You receive a free digital mockup usually within 12 hours, and production starts only after you approve the design. That gives a school office, uniform supplier, sports department or student committee a chance to check the wording, colours, dimensions and backing before money is committed to production.
Why chenille patches suit schools and colleges
Chenille has a soft, raised surface that stands apart from a flat embroidered badge. It is closely associated with varsity jackets, school athletics and traditional club clothing, so it can make a house letter or team crest feel like a proper piece of kit rather than a printed decoration. The texture also gives a simple design visual weight on wool coaches jackets, cotton sweatshirts and heavier school outerwear.
That does not mean chenille is the right answer for every school garment. A blazer crest with very small Latin text, a long motto or a detailed heraldic illustration may read more cleanly as a standard embroidered patch. Printed is flatter; that is the point. It can reproduce gradients, fine lines and small lettering that raised yarn cannot. Our guide to chenille patches vs embroidered patches: Which Is Right for Your Project? gives a useful side-by-side decision.
- School and college crests with a simple shield, initials or mascot.
- House letters such as H, R, S or W on varsity jackets and team clothing.
- Sports team names, captain badges and tournament apparel.
- Student union, society and club badges on hoodies, overshirts or bags.
- Sixth-form or leavers' patches with a bold year and short name.
- Cadet, outdoor and activity-group identifiers where a durable textile badge is preferred.
The most successful school designs are not necessarily the most complicated. A large initial, two-colour border and clear school name will usually be easier to read at three feet than a crowded crest packed with small symbols. If the official crest must be retained exactly, ask for a production review rather than assuming every detail will translate into raised yarn.
Start with the garment, not just the logo
A patch is only successful if it sits properly on the item it is meant to identify. A blazer has a different surface and cleaning routine from a nylon shell, a wool coaches jacket or a polyester rugby top. Before ordering, take a photograph of the placement area and measure the available space in inches. This is especially useful when a school crest must fit above a pocket, below a name strip or on a narrow sleeve.
Nylon shells can be slippery and heat-sensitive, so an iron-on backing may not be the safe default. A sew-on patch is normally the more dependable route, provided the sewing machine or tailor can stitch through the garment without damaging a lining. On a wool coaches jacket, check the nap and seam position. On a Velcro panel, specify the loop side already fitted to the garment and make sure the patch has the matching hook side.
Blazers and formal school uniform
For a blazer, a moderate shield or round patch with a merrowed edge can look tidy and traditional. Measure from the pocket, lapel and side seam so the crest does not sit at an angle. A sew-on backing is generally the sensible option for a permanent school badge, particularly where the garment will be dry-cleaned or passed between pupils.
Check the school’s uniform policy before making a large batch. A student may need a removable patch for a sixth-form jacket, while a compulsory blazer crest may need to remain permanently attached. If the patch will be stitched by a local uniform shop, give them the approved dimensions and explain whether the border should be sewn down as well as the centre.
Sportswear, hoodies and team jackets
Sports clothing moves more than a blazer. A large chenille letter can work well on a heavyweight hoodie or varsity jacket, but it may feel bulky on a thin training top. Sweatshirts and jackets usually give the patch enough fabric support. Stretchy performance polyester is less forgiving, and a large heavy patch may pull the fabric or sit unevenly.
For a team that changes players or seasons, Velcro can be practical. It allows a school to swap captain, house or activity identifiers without unpicking stitches. It is not invisible, though, and the panel adds thickness. Agree its position before manufacturing so the finished patch covers the panel neatly without catching on backpack straps.
Bags, outerwear and activity clothing
Canvas bags, heavy overshirts and outdoor jackets tend to provide a good base. Waterproof nylon needs more care because stitching can create holes and heat can affect coatings. For scouts, cadets or Duke of Edinburgh-style activity clothing, ask for a sample placement or mockup showing how the patch will sit near pockets, zips and seams.
| Garment or use | Practical starting point | Backing to consider | Main caution |
|---|---|---|---|
| School blazer | Shield or round crest, often around 2.5 to 3.5 inches wide | Sew-on | Check pocket, lapel and dry-cleaning requirements |
| Varsity jacket | Large house letter, mascot or team name | Sew-on or Velcro | Keep the patch supported by the jacket body |
| Heavy hoodie | Bold club badge or short team name | Sew-on or iron-on with stitching | Avoid very fine details on a soft, moving fabric |
| Nylon shell | Moderate-sized identifier or crest | Sew-on, subject to garment construction | Do not assume heat application is safe |
| Removable activity uniform | Simple badge designed for repeat use | Velcro | Specify the matching hook or loop surface |
| Canvas tote or kit bag | Round, shield or rectangular club mark | Sew-on or iron-on | Place clear of handles and high-friction seams |
Artwork rules for readable chenille patches
Chenille is at its best when the artwork has clear blocks of colour and a small number of strong shapes. Start with the part pupils need to recognise from a distance: the school initials, house letter, mascot or team name. A detailed crest can often be simplified without losing its identity. Keep the outer silhouette distinctive and use a contrasting border to separate the patch from a dark blazer or jacket.
Tiny lettering is one of the commonest problems on school orders. A motto that looks fine on a computer screen may close up when translated into thick yarn. As a working guide, lettering around 0.3 inches high or larger has a better chance of remaining readable, although the exact result depends on the typeface, patch size and stitch structure. The mockup is where this should be checked.
- Use a short name or initials instead of forcing a full formal title into a narrow badge.
- Choose high contrast, such as cream on navy or gold on maroon, rather than nearby shades that merge.
- Avoid gradients, photographic shading and hairline outlines.
- Do not place small text across a busy mascot or shield.
- Use the school’s official colours, but supply colour references or a physical sample if an exact match matters.
- State whether the edge should be merrowed, flat or represented in the mockup.
Send vector artwork where possible, but do not delay a quote if the school only has a PNG or a photograph of an existing badge. A clear image can be reviewed and redrawn as part of the production discussion. The key is to tell the maker what must not change: the wording, crest proportions, house colour or mascot shape.
Choose size, shape and border with purpose
There is no universal school patch size. A blazer crest may need to stay compact so it does not dominate the uniform, while a varsity back patch can be much larger. Measure the garment first, then decide which dimension matters most. If the patch must fit a 3-inch-wide pocket area, say so rather than ordering a generic 3-inch badge and hoping the proportions work.
Simple circles, shields, arches and rectangles are straightforward to place. A custom silhouette can be worthwhile for a mascot or house emblem, but every corner and notch affects the finished edge. A merrowed crest gives a rounded, corded border and can make a basic shape look finished. For a modern, flatter appearance, a cut edge may suit the design better. The correct choice depends on the uniform and the school’s visual style.
| Purpose | Common finished size | Design approach | Why it works |
|---|---|---|---|
| Blazer crest | Approximately 2.5 to 3.5 inches wide | Shield, circle or compact emblem | Fits the chest without overwhelming formal uniform |
| House letter | Approximately 3.5 to 5 inches high | One bold letter with a contrasting border | Reads clearly on a jacket from several feet away |
| Team jacket front | Approximately 3 to 4 inches wide | Short name, mascot or initials | Balances the front panel and leaves room for names |
| Varsity back | Approximately 8 to 12 inches across | Large arch lettering or central mascot | Uses the broad back panel for visual impact |
| Student society badge | Approximately 2.5 to 4 inches wide | Simple symbol and short society name | Works on hoodies, bags and overshirts |
Not sure whether chenille, flat embroidery or a printed finish will suit the uniform? Send the artwork and garment details for a free digital mockup, usually within 12 hours, so you can compare the proposed size and finish before production.
GET A FREE MOCKUPThese are starting points, not fixed specifications. A petite blazer, an oversized university hoodie and a children’s sports jacket do not offer the same space. Provide the garment brand or a photograph if the fit is difficult. A digital mockup can show the patch beside the garment, but a real measurement remains the safer check.
Select the right backing for school use
Backing is not a minor extra. It determines how the patch is attached, how easily it can be moved, and what happens after washing or cleaning. Sew-on, iron-on and Velcro can all be useful, but they solve different problems. A school ordering for long-term blazer use should not make the same backing decision as a college society issuing removable patches for several events.
Sew-on backing
Sew-on is the dependable choice for a permanent crest. It avoids relying on adhesive and gives a uniform shop, tailor or alterations department a clear application method. It takes longer to apply, particularly across a large order, but it is usually the better fit for blazers, wool jackets and frequently worn team clothing.
Ask the person applying the patch whether the border can be stitched securely without catching a lining or pocket bag. On thick varsity jackets, a longer needle and suitable machine may be needed. Hand stitching can work for a small number of items, but the thread tension should be even so the patch does not pucker.
Iron-on backing
Iron-on is convenient for suitable cotton or polyester garments with a flat, heat-tolerant surface. It can help a parent or student apply a badge at home, but it is not automatically permanent. Heat, washing, fabric softener and repeated tumble drying can weaken the adhesive. It is common to see iron-on patches peel after a dryer cycle, especially when the garment was not pressed at the recommended temperature.
Do not treat a nylon shell, coated rain jacket or delicate blazer as an ordinary cotton sweatshirt. Check the garment care label and, for important uniform, consider adding stitches around the edge even when an iron-on layer is used. If a patch must survive several school years, sew-on remains the safer discussion.
Velcro backing
Velcro is useful for cadet units, sports squads, activity groups and college teams where badges are swapped or removed. It also allows one garment to carry different house, role or event identifiers. The trade-off is extra bulk and the need for a matching loop panel on the garment.
State clearly whether the garment already has a loop panel. If it does not, the quote may need to include the panel as well as the hook-backed patch. A Velcro patch that is slightly larger than the panel can look untidy and may catch on other clothing, so the two dimensions should be checked together.
Chenille, embroidery, woven and printed: a practical comparison
Schools sometimes start with a request for chenille and discover that the actual requirement is a small, detailed badge or a large run of inexpensive event identifiers. Comparing the construction before approving artwork prevents a mismatch between appearance and use. There is no single best patch type; the best choice is the one that keeps the important information readable on the intended garment.
| Patch type | Surface and appearance | Good school or college uses | Main trade-off |
|---|---|---|---|
| Chenille patches | Raised, soft, wool-like yarn with bold shapes | Varsity letters, house teams, traditional crests and club jackets | Fine detail and tiny text need simplifying |
| Flat embroidered patches | Thread-based texture with defined outlines | Blazer crests, sports badges, uniforms and formal logos | Very small details may still need editing |
| Woven patches | Flatter surface with finer woven lines | Detailed society marks, narrow lettering and compact badges | Less raised and less traditional varsity texture |
| Printed patches | Flat printed artwork with broad colour flexibility | Gradients, photographs, event graphics and detailed illustrations | Can look less tactile and may need careful care |
| PVC patches | Raised moulded rubber-like surface | Outdoor clubs, modern activity groups and hard-wearing kit | Different visual character from a fabric school crest |
If you need a flatter badge with fine lines, see woven patches or printed patches. For a more structured outdoor look, PVC patches may be worth considering. A standard embroidered patches range is often the sensible middle ground for school crests that need thread texture without the heavier raised pile of chenille.
The choice also affects application. A detailed printed badge may suit a smooth bag, while a raised chenille letter belongs naturally on a varsity jacket. The visual language matters: printed is flatter; that is the point, and it should not be judged against chenille on the same scale.
Ordering quantities and managing a school budget
The Customized Patches has a minimum order of 5 pieces per design. That works for a small committee, a trial run, five house captains or a limited student society order, but it is worth planning designs separately. Five navy house letters and five red house letters are normally different designs, even if the shape is identical. Confirm this before budgeting.
For a school buying several hundred blazer crests, the main cost considerations are usually the finished size, number of colours, border and backing, artwork preparation, and the total quantity for each design. A large back patch uses more material than a compact chest badge. Multiple colourways can also require separate approval, so gather the full list before requesting a final quote.
- List each design separately: main crest, house letters, captain badge and club badge.
- Give the required quantity for every colourway rather than only the combined total.
- State the garment type and whether the patch is permanent or removable.
- Ask if artwork preparation or redraw work is needed before production.
- Set aside samples for the uniform office, head of sport or student committee.
- Keep one approved mockup with the purchase order for future repeat orders.
A repeat order is easier when the original specification is complete. Record the finished dimensions, thread colours, border style, backing and approved artwork file. This avoids a second batch being produced from an old low-resolution image or a verbal description such as “the usual blue”.
Lead times, approval and UK delivery
Allow time for decisions as well as manufacture. School orders often involve a bursar, head of department, uniform manager, sports lead and student committee. The digital mockup helps bring those decisions together, but the order should not move ahead until one authorised person confirms the final design, quantity, dimensions and backing.
The Customized Patches usually supplies a free digital mockup within 12 hours. That is a mockup for approval, not a physical sample, so check the colours and proportions on the screen and compare them with the garment where possible. Production starts only after approval. Ask for the expected production and UK delivery timing on the quote, especially if the patches are needed for a new academic year, freshers’ week, sports day or a tournament.
Build in a buffer for garment collection and application. A box of finished patches arriving on Friday does not help if the uniform shop has no appointment before Monday’s fixture. If a supplier is applying the badges, confirm their capacity and whether they need a sample garment, placement diagram or individually labelled bundles.
- Send the crest or artwork, quantity and garment details.
- Confirm the finished size and whether the design is chenille, flat embroidery or another construction.
- Review the free digital mockup and check every word, colour, border and dimension.
- Approve the final mockup in writing.
- Receive production and UK delivery timing for the approved order.
- Inspect the patches before sewing or attaching them to the full uniform batch.
Name sew-on, iron-on or Velcro on the quote and include the garment type. We show the proposed back on a free digital mockup usually within 12 hours, then produce only after you approve the final specification.
GET A FREE MOCKUPCare and application: avoid preventable failures
Most patch problems begin during application or washing rather than in the artwork. A patch sewn over a pocket opening, pressed onto a coated nylon shell or dried repeatedly at high heat may fail even if the construction was suitable. Give the person applying the badge the backing information and the garment care label.
- Place the patch on a clean, dry, flat area and check its alignment before fixing it.
- Keep stitching clear of zips, pocket openings, seams and lining edges.
- For iron-on application, follow the garment and patch temperature guidance and use a pressing cloth where appropriate.
- Do not assume adhesive alone will hold through repeated tumble drying.
- Wash according to the garment label and avoid unnecessary high heat.
- Inspect the border after the first wash, especially on sportswear and bags.
- For a permanent school crest, consider edge stitching even if an iron-on layer is included.
A good application should leave the patch flat, without lifted corners or puckered fabric. If an iron-on starts to lift, do not keep pressing blindly on a heat-sensitive jacket. A tailor or uniform supplier can often secure the edge with matching thread. For a large school programme, test one garment before applying hundreds of patches.
Common mistakes schools should avoid
The most expensive mistake is not always choosing the wrong material. It can be ordering a design that nobody has checked at its finished size, approving the wrong house colour, or discovering that the patch does not fit the panel on the jacket. A short production check is cheaper than replacing a full uniform batch.
- Using a full crest with tiny motto text when a simplified version would be clearer.
- Ordering one sample size for several garments with different chest or sleeve areas.
- Describing a colour as “blue” without confirming whether it is navy, royal or a school-specific shade.
- Choosing iron-on for a nylon shell or a garment that is regularly tumble dried.
- Forgetting to specify whether each house colour is a separate design.
- Sending a screenshot with no indication of the required finished dimensions.
- Approving a mockup without checking spelling, year numbers or initials.
- Assuming Velcro is included without confirming the garment-side loop panel.
- Applying patches over seams, pockets or stretch panels.
- Failing to keep the approved artwork and specification for the next academic year.
Our guide to Common Mistakes to Avoid When Ordering chenille patches covers the same issues in more detail. It is worth sharing with anyone collecting artwork or raising a purchase order, because a production note lost between departments can change the finished result.
A sensible school and college specification
A clear request does not need technical language. It needs enough information for the maker to quote the right item and for the school to approve the same item. Write the specification as if somebody who was not in the original meeting will use it six months later.
- Design name: for example, Year 12 House Falcon.
- Construction: chenille patch with raised yarn, or an alternative agreed after artwork review.
- Finished size: state width, height or maximum dimension in inches.
- Shape: shield, circle, arch, rectangle or custom outline.
- Colours: list the main fill, letter, border and background colours.
- Text: provide the exact spelling, capitalisation and numbers.
- Border: specify merrowed or another agreed edge treatment.
- Backing: sew-on, iron-on or Velcro, including any garment-side panel.
- Garment: blazer, wool jacket, hoodie, nylon shell, bag or other item.
- Quantity: minimum 5 pieces per design, with each colourway counted separately.
- Approval contact: name the person authorised to approve the mockup.
- Timing: state the event, term date or delivery deadline and allow time for application.
If you are still comparing finishes, the Chenille patches: Everything UK Buyers Need to Know guide covers material, backing and ordering questions. You can also review 3D embroidered patches if you want raised thread detail with a different visual finish, or leather patches for a more structured badge on clubs and outerwear.
Final checks before you approve
Before approving a school or college patch, look at the mockup as a finished object rather than just a logo. Ask whether a pupil can identify the house colour, whether the lettering is readable from the end of a corridor, and whether the backing makes sense for the garment. If the answer is no, change the specification now.
- Is the design name and wording correct?
- Does the proposed size fit the measured garment area?
- Are the main colours and border clearly identified?
- Has fine text been removed, enlarged or changed where needed?
- Is the raised chenille texture wanted, or would woven, printed or flat embroidery be clearer?
- Will the patch be permanent, removable or occasionally replaced?
- Has the correct backing been shown on the mockup?
- Are the quantities correct for every design and colourway?
- Has the authorised buyer approved the exact mockup?
- Has the school allowed time for production, UK delivery and application?
Good chenille patches are the result of a good brief. Measure the garment, simplify the artwork where necessary, choose the attachment method honestly and keep the approved version on file. The Customized Patches can then quote the job accurately, provide the free digital mockup usually within 12 hours, and produce only after approval.
Frequently asked questions
What are the best chenille patches for school blazers?
For most school blazers, choose a compact shield or round chenille patch with a clear crest, limited colours and a sew-on backing. Measure the space around the pocket and lapel in inches before confirming the size. If the crest contains very small text or fine heraldic detail, compare it with a flat embroidered or woven patch before ordering.
What is the minimum order for chenille patches?
The minimum order is 5 pieces per design. Different house colours, wording or artwork versions may count as separate designs, so list each one clearly when requesting a quote. A small order can suit a committee, trial batch, five captains or a new student society.
How quickly can a UK school receive a chenille patch mockup?
The Customized Patches usually provides a free digital mockup within 12 hours. It is sent for checking the artwork, dimensions, colours, border and backing. Production starts only after the customer approves the mockup, so the total delivery time also depends on approval, manufacturing and UK delivery.
Are chenille patches suitable for nylon school jackets?
They can be suitable, but nylon needs a careful backing and application decision. Do not assume iron-on is safe because some nylon shells are heat-sensitive or coated. Sew-on may be more dependable, subject to the jacket construction. Send a garment photograph or description so the attachment method can be reviewed before production.
Should a school choose sew-on, iron-on or Velcro backing?
Choose sew-on for permanent blazer crests and long-term jacket use, iron-on for suitable heat-tolerant garments where convenience matters, and Velcro for removable team, cadet or activity identifiers. Iron-on adhesive can peel after repeated washing or a dryer cycle, while Velcro requires a correctly sized loop panel on the garment.
Can chenille patches include a school motto or small lettering?
They can include lettering, but tiny text may close up in raised yarn. A practical starting point is lettering around 0.3 inches high or larger, depending on the font, patch size and design. Shorten the wording, enlarge the lettering or use a woven, printed or flat embroidered construction if the motto must remain fully readable.
Ready to produce custom patches for your UK team or brand?
GET A FREE MOCKUP