
How custom embroidered patches Can Strengthen Your Brand Identity
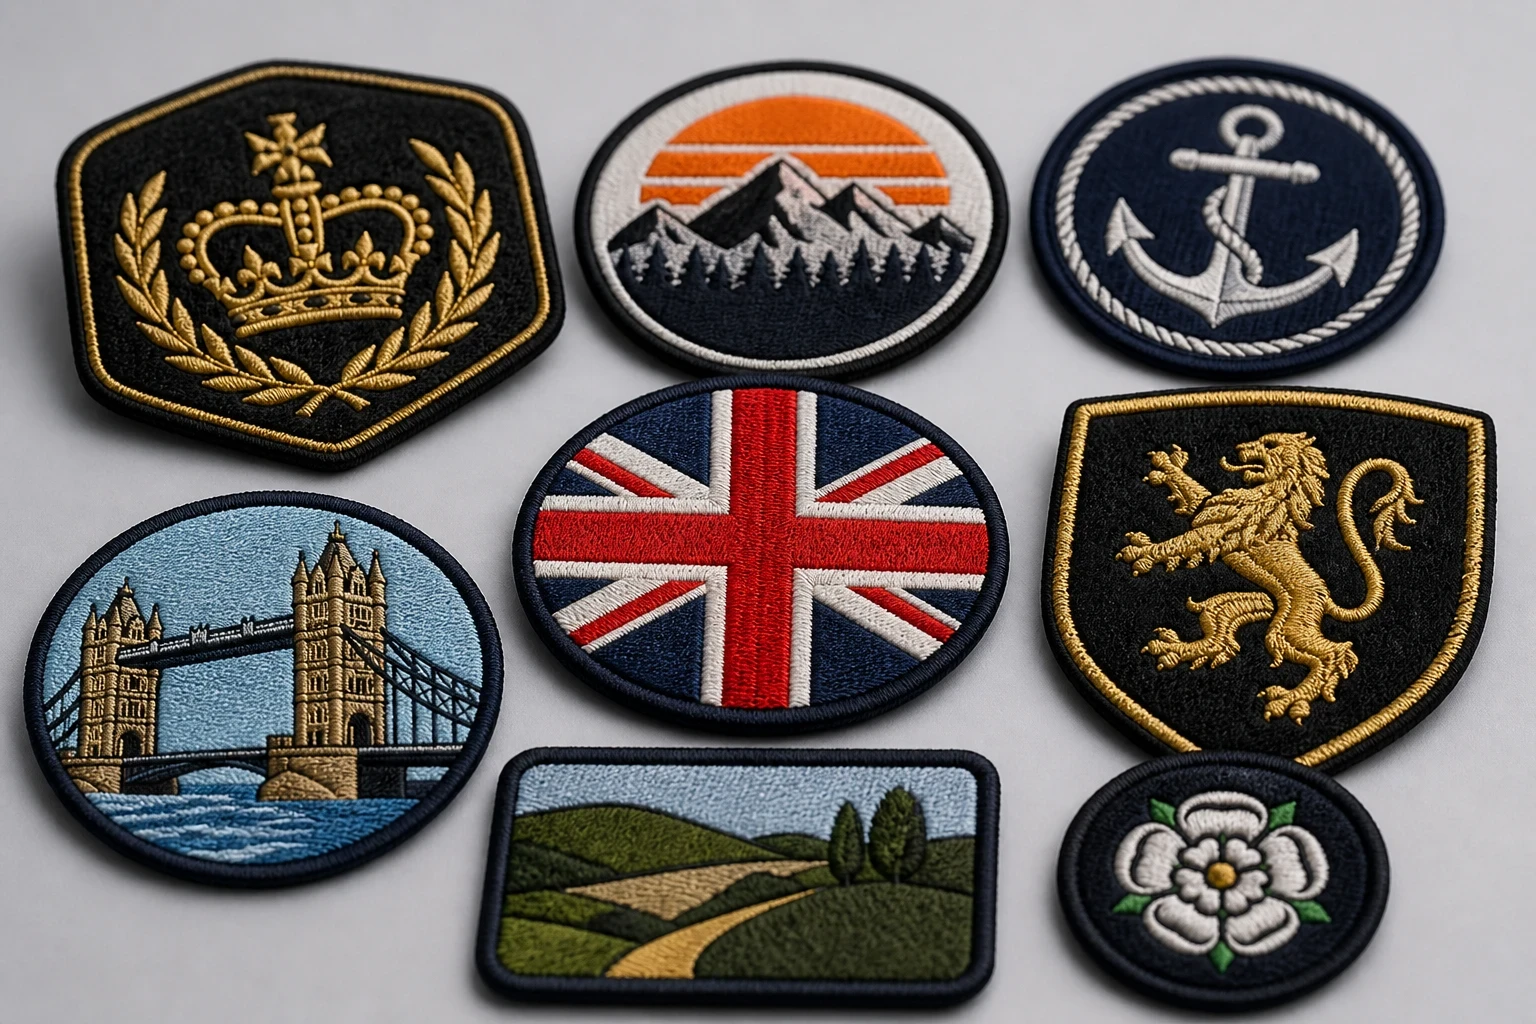
Custom embroidered patches strengthen brand identity by placing the same colours, symbols and wording across jackets, uniforms, bags and teamwear. Their stitched texture makes a logo feel tangible, while consistent sizing and placement create recognition. The best result comes from artwork approved on a digital mockup before production.
Key takeaways
- Custom embroidered patches turn a logo into a physical brand marker that can move across garments, bags and equipment.
- A limited colour palette, readable lettering and consistent placement matter more than adding every detail from a full logo.
- The Customized Patches accepts a 5-piece minimum per design and provides a free digital mockup usually within 12 hours.
- Production starts only after approval, so the mockup is the point to check size, thread, edge and backing.
Custom embroidered patches strengthen brand identity by putting the same colours, symbols and wording on the garments and equipment people actually use. The stitched surface gives a logo a physical presence, helping a team, club or business look consistent across jackets, polos, bags and uniforms.
For UK customers, The Customized Patches offers a 5-piece minimum per design, a free digital mockup usually within 12 hours, and production only after approval. That gives you a chance to check the patch on the intended garment before committing to the finished run.
Why custom embroidered patches make a brand easier to recognise
A brand is not only its logo on a website. People recognise it through repeated visual signals: a familiar colour combination, a particular badge shape, a line of wording, or a consistent position on a jacket. A patch carries several of those signals at once, and it remains visible after the garment has left the office, clubhouse or shop.
The raised thread also changes how the mark feels. A football club crest on a tracksuit top, a company badge on a workwear overshirt and a school emblem on a blazer all have more presence than a flat label. That does not mean embroidery suits every logo. It means the texture becomes part of the identity, which is useful for organisations that want a traditional, active or made-to-last appearance.
Consistency is the real gain. If a hospitality team wears the same crest on navy polos, black fleeces and winter jackets, customers see one organisation rather than several unrelated garments. The same principle works for a cadet unit, a motorcycle club, a university society or a small business building its first uniform.
- A repeated patch position helps people identify staff or members quickly.
- The same border and colour order make different garments look like part of one range.
- A physical badge gives teams something they can keep, swap or add to a jacket over time.
- A simple patch can retain the main identity even when the full logo is too detailed for a small print area.
- A standard design makes reordering easier because the approved artwork can be used as the reference.
Start with the brand mark, not the stitch count
The strongest patch designs usually begin with one recognisable idea. It might be a shield, a wordmark, an animal, a monogram or a simple symbol. Problems start when the artwork tries to carry the complete website logo, a slogan, a telephone number, three gradients and a fine illustration in a patch only 2.5 inches wide.
Make small artwork readable
Thread needs room to form clean shapes. Tiny lettering can close up, particularly on a curved cap or a patch viewed from several feet away. If the name is essential, increase the patch size or shorten the wording. If it is not essential, remove it. That is a design decision, not a failure of production.
Ask how the patch will be seen. A chest badge on a football jacket may be read from the touchline. A badge on the sleeve of a nylon shell may be seen while someone is moving. A backpack patch may be inspected at close range, but its shape still needs to make sense when the bag is hanging on a hook.
Use colour as a repeatable system
Choose colours that work on the main garment colours, not only on a white design screen. A bright yellow thread can disappear against a pale rain jacket. A black border can lose definition on a black hoodie. A narrow white keyline may help, but extra outlines also add visual weight.
If your business has formal brand guidelines, send them with the artwork. A screen colour and a thread colour are not identical materials, so the mockup is the useful stage for checking the proposed interpretation. The aim is a recognisable result, not a promise that a monitor colour will physically reproduce without change.
Choose an edge that supports the identity
A merrowed edge gives a traditional raised border and suits crests, club badges and many uniform applications. A heat-cut edge can suit a sharper shape or a patch with points and internal angles. The edge is part of the finished badge, so it should be considered alongside the logo rather than added at the end.
For a fuller look at the options, compare merrowed, heat-cut and laser-cut patch edges. If a brand wants a particularly raised surface, 3D embroidered patches may be worth considering, although raised foam is not the right answer for tiny wording or a very detailed emblem.
Pick the right patch construction for the brand job
Embroidered patches are a strong choice for logos that benefit from visible texture, a thread border and a classic badge appearance. They work well on football kits and jackets, club vests, school blazers, workwear and promotional clothing. They are not automatically the best option for every artwork, and being honest about that usually produces a better order.
| Patch type | Best suited to | Main visual result | Watch for |
|---|---|---|---|
| Embroidered | Crests, logos, team badges, uniforms and jackets | Raised thread, visible texture and a traditional badge finish | Very small text, fine gradients and highly detailed illustrations |
| Woven | Fine lettering, compact logos and detailed flat artwork | Smooth, flatter surface with a fine woven appearance | Less raised texture than embroidery and a different edge character |
| Printed | Photographic images, gradients, tiny artwork and colour-heavy designs | Flat ink with room for fine visual detail | It does not provide the same stitched texture; printed is flatter, and that is the point |
| PVC | Outdoor gear, tactical equipment, airsoft kit and technical bags | Rubbery, bold and easy to wipe clean | May feel too utilitarian for a heritage club or formal blazer |
| Chenille | Varsity-style lettering, sportswear and large statement badges | Soft, high-pile texture with a strong collegiate feel | Large texture can make small details unsuitable |
| Leather | Caps, heritage brands, craft products and premium casual goods | Stamped or engraved material with a natural surface | Artwork and shape need to suit the material and available detail |
A printed patch may be the sensible choice for a photographic coffee-roaster label or a logo with a soft gradient. Printed is flatter; that is the point. A woven patch may preserve fine lettering more neatly than heavy thread. PVC can make sense for a hiking group or airsoft loadout, while chenille can give a school sports jacket the right varsity character. See the guide to custom embroidered patches versus printed patches before deciding from appearance alone.
The construction should follow the brand and use. A premium restaurant may prefer an embroidered crest on a wool coach jacket but a printed detail on a fabric tote. A construction company may need a readable embroidered badge on a polo and a PVC patch on a hard-wearing equipment bag. There is no benefit in forcing one patch type across every item if the surfaces and jobs are different.
Size, placement and backing decide how the identity is used
A badge that looks balanced on a 4-inch jacket patch may feel oversized on a polo shirt. Measure the usable area rather than guessing from a product photograph. A chest logo often needs to stay compact so it does not cross a zip or pocket. A back patch can be larger because it has more uninterrupted fabric. A sleeve badge needs enough room for the arm seam and movement.
Not sure whether thread, woven detail or ink will hold your logo best? Send the artwork and intended garment to The Customized Patches for a free digital mockup usually within 12 hours. We produce only after approval, so you can compare the proposed result before the 5-piece minimum run begins.
GET A FREE MOCKUPCommon brand placements
- Left chest: familiar for businesses, hospitality teams, schools and sportswear. Keep the patch clear of buttons, zips and pockets.
- Upper sleeve: useful for role badges, club identifiers and secondary branding. Check the sleeve width and seam position first.
- Front of a cap: effective for a short wordmark or simple symbol, but curved fabric can make long text harder to read.
- Back of a jacket: suitable for a large club crest, campaign emblem or motorcycle club design. Confirm the garment panel is large enough.
- Bag or backpack: useful for portable brand visibility, particularly for events, societies and outdoor groups.
- Velcro panel: best where the wearer needs to change identifiers, names or roles. The panel size must match the hook-and-loop backing.
Backing is not a minor finishing choice. Sew-on backing is dependable for jackets, wool coaches, heavy bags and garments that will be washed regularly. Iron-on backing can be convenient on suitable cotton or polycotton fabric, but the wrong heat, a textured shell or repeated dryer cycles can cause an iron-on patch to peel. The failure is often the application or garment, not simply the badge.
Velcro is useful for tactical gear, event teams and organisations that change names or roles. It adds bulk and requires a compatible panel, so it can look awkward on a fine polo or fitted blazer. Read the comparison of sew-on, iron-on and Velcro backing before you approve a backing based only on convenience.
Garment material matters as well. Nylon shells can be sensitive to heat and may need sewing rather than a hot iron. Wool coaches and school blazers usually suit a sewn badge. A smooth polo may accept an iron-on application if the care instructions and temperature are suitable. If the patch will go on a technical fabric, send a photograph or name the garment in the quote.
Build a patch system that stays consistent as the brand grows
A single patch can strengthen identity, but a planned patch system prevents every new order becoming a fresh design exercise. Decide which elements remain fixed: the main colours, border treatment, badge shape, type style and logo proportions. Then decide which elements can change, such as a year, department, event name or member role.
For example, a UK youth football club might keep the shield, club name and two colours fixed while adding age-group wording to a secondary badge. A hospitality company could keep the same wordmark and border on staff polos while using a smaller name patch on aprons. A cadet unit may need a stable emblem with role or section identifiers on removable Velcro.
Use a master specification
Keep a simple record of the approved patch. Include finished width and height in inches, shape, thread or base colours, border, backing, intended garment and placement. Note the exact wording and whether the design is one-off or expected to be reordered. This prevents a supplier receiving an old logo file and a new colour request in the same email.
- Name the design clearly, such as Club-Crest-Left-Chest-3in-Sew-On.
- Keep the approved digital mockup with the artwork and quote.
- Record the garment photographs used for placement checks.
- Separate permanent identity patches from seasonal campaign badges.
- Avoid creating near-identical versions unless wearers genuinely need to tell them apart.
- Review the patch after a real garment wash, especially if it is used on workwear or sports kit.
This approach also helps with quantities. The Customized Patches accepts 5 pieces per design, so a club can test a new badge with a small group before ordering for every member. Larger organisations can use the approved version for repeat orders instead of changing the design each time a new batch of uniforms is needed.
Examples from teams, clubs and UK businesses
A football club often needs a crest that reads quickly from the sideline and remains clear on tracksuit tops, rain jackets and kit bags. A raised merrowed border can suit the club character, but the inner detail may need simplifying. Age-group or sponsor information should not compete with the main crest.
A cadet unit, scout group or youth organisation may need a badge that works on a uniform shirt, fleece and rucksack. Sew-on is often the practical base for garments that see regular washing, while Velcro can suit a removable identifier. A design intended for children should avoid tiny wording that will be difficult to read at normal viewing distance.
Biker and motorcycle club patches have a different visual language. Back panels may be large and strongly shaped, with a top rocker, central emblem and bottom wording. The lettering must remain legible around a curve, and the badge should be planned for leather, denim or a heavy vest rather than a light fashion jacket. See the guide to biker and motorcycle club patches for the construction and placement questions that matter.
For a small business, a patch can make a uniform feel less disposable. A café may use an embroidered wordmark on a cap and apron. A trades team may add a surname patch to a work jacket while keeping the company badge fixed. An independent clothing label may use a woven or embroidered mark on a sleeve, hem or tote so the branding is visible without taking over the garment.
Hospitality polos are a good example of a trade-off. A dense embroidered patch can feel too heavy or warm on a thin polo, while a compact badge with a clean border can work well. The patch must also survive laundering and the staff member’s daily movement. For workwear-specific decisions, compare the advice in custom patches for workwear and uniforms.
Ordering custom embroidered patches in the United Kingdom
A useful quote includes more than the artwork. State the finished size, quantity per design, patch type, backing, edge, garment, placement, delivery postcode and required date. If you need several versions, list each version separately. “Logo patch” is not enough information to price or produce the right item.
What to send with a quote request
- The clearest logo file available, preferably vector artwork or a high-resolution image.
- The name of the garment and its fabric, such as nylon shell, wool coach jacket, cotton polo or school blazer.
- The available area and preferred finished dimensions in inches.
- The location on the garment, including whether a seam, zip, pocket or curve is nearby.
- The required backing: sew-on, iron-on, Velcro or a request for advice.
- The number of each design, with a minimum of 5 pieces per design.
- Any fixed brand colours, wording, border requirements or compliance details.
- Your UK delivery address and target date.
Have the garment, quantity or deadline to hand? Name sew-on, iron-on or Velcro on the quote, and send the artwork for a free digital mockup usually within 12 hours. We confirm the design with you and produce only after approval.
GET A FREE MOCKUPThe Customized Patches provides a free digital mockup usually within 12 hours. Review the mockup for more than the logo itself: check the finished size, border thickness, lettering, colour balance, edge, backing and the way it sits on the garment. A mockup is most helpful when it shows the patch in its intended context.
Production starts only after you approve the design. That approval step protects both sides from a patch being made with the wrong wording, backing or dimensions. For a process-led checklist, use A Step-by-Step Guide to Ordering custom embroidered patches.
Lead time and delivery planning
Allow time for artwork review, mockup changes, approval, production and UK-wide delivery. A straightforward repeat design can move more quickly than a new badge with several versions, small text and unusual sizing. If the patches are for a tournament, launch, graduation, festival or uniform rollout, send the date before approving the quote.
Do not leave the garment decision until after production. A badge intended for a curved cap, a thick leather vest and a flat polo may need different dimensions or backing. Ordering the wrong format can create extra work, particularly if the patches are already made and the clothing has been printed or purchased.
Keep the patch working after delivery
Application and care affect the life of the identity as much as the patch specification. Sew a badge through stable fabric with thread that suits the garment. For iron-on patches, follow the supplied temperature and pressure guidance, protect the patch surface and avoid assuming that every nylon shell can take heat.
Repeated tumble-drying can stress adhesive, especially if the patch was applied to an unsuitable fabric or was not pressed correctly. Washing the garment inside out and following its care label is sensible. If a work jacket is washed every week, sewing is usually the safer conversation than relying on an adhesive alone.
Inspect the badge during normal garment checks. Loose corners, fraying thread or a lifting edge should be dealt with before the problem spreads. Keep the approved design record so replacement patches match the original rather than becoming a slightly different shade, size or border.
For practical maintenance advice, see How to Wash and Care for Custom Patches. If you are fitting badges yourself, the guide to how to sew on a custom patch covers placement, pins, thread and the basic sewing process.
The practical answer: make the identity repeatable
Custom embroidered patches are most effective when they make the same brand cues appear repeatedly and in the right places. They should suit the garment, stay readable at their actual size and use a backing that matches how the item will be worn and washed.
There is no need to force every design into embroidery. A clear specification may lead to a woven, printed, PVC, chenille or leather patch instead. The useful result is the one that preserves the important brand signal on the real garment, not the one that sounds most impressive on a quote.
For UK teams, brands, clubs and businesses, The Customized Patches keeps the first step straightforward: 5 pieces minimum per design, a free digital mockup usually within 12 hours, and production only after approval. That gives you a practical checkpoint before the identity goes onto clothing, bags or equipment.
Frequently asked questions
How do custom embroidered patches strengthen brand identity?
They repeat the same logo, colours, border and wording across jackets, uniforms, bags and teamwear. The stitched texture also gives the mark a physical presence that can feel more distinctive than a flat label. Consistent size and placement help customers, members and staff recognise the organisation across different garments.
What is the minimum order for custom embroidered patches at The Customized Patches?
The minimum is 5 pieces per design. This allows a UK club, small business or team to test a new badge on a limited run before ordering larger quantities. If you need several colourways, sizes or wording changes, each version may count as a separate design.
Can I see a mockup before ordering custom embroidered patches?
Yes. The Customized Patches provides a free digital mockup usually within 12 hours. You can use it to check the artwork, size, colour balance, edge, backing and placement on the intended garment. Production starts only after you approve the mockup.
Are embroidered patches suitable for nylon shells and wool jackets?
They can be, but the backing and application method need to match the material. Nylon shells may be sensitive to heat, so sewing can be safer than iron-on application. Wool coaches and heavy jackets often suit sew-on patches. Send the garment type or a photograph with your quote so the construction can be checked.
Should a business choose embroidered, woven or printed patches?
Choose embroidered patches for raised texture and a traditional badge appearance, woven patches for fine flat lettering, and printed patches for gradients, photographs or detailed artwork. Printed is flatter; that is the point. The best option depends on the logo, viewing distance, garment, washing routine and desired brand character.
How large should a branded patch be?
There is no single correct size. Measure the usable area on the garment and consider the viewing distance. A left-chest badge may be around 2.5 to 3.5 inches wide, while a back panel can be larger. Small text generally needs more space, so simplify the artwork or increase the finished dimensions rather than forcing it into a crowded patch.
Ready to produce custom patches for your UK team or brand?
GET A FREE MOCKUP