
Woven patches Sizing and Backing Options Explained
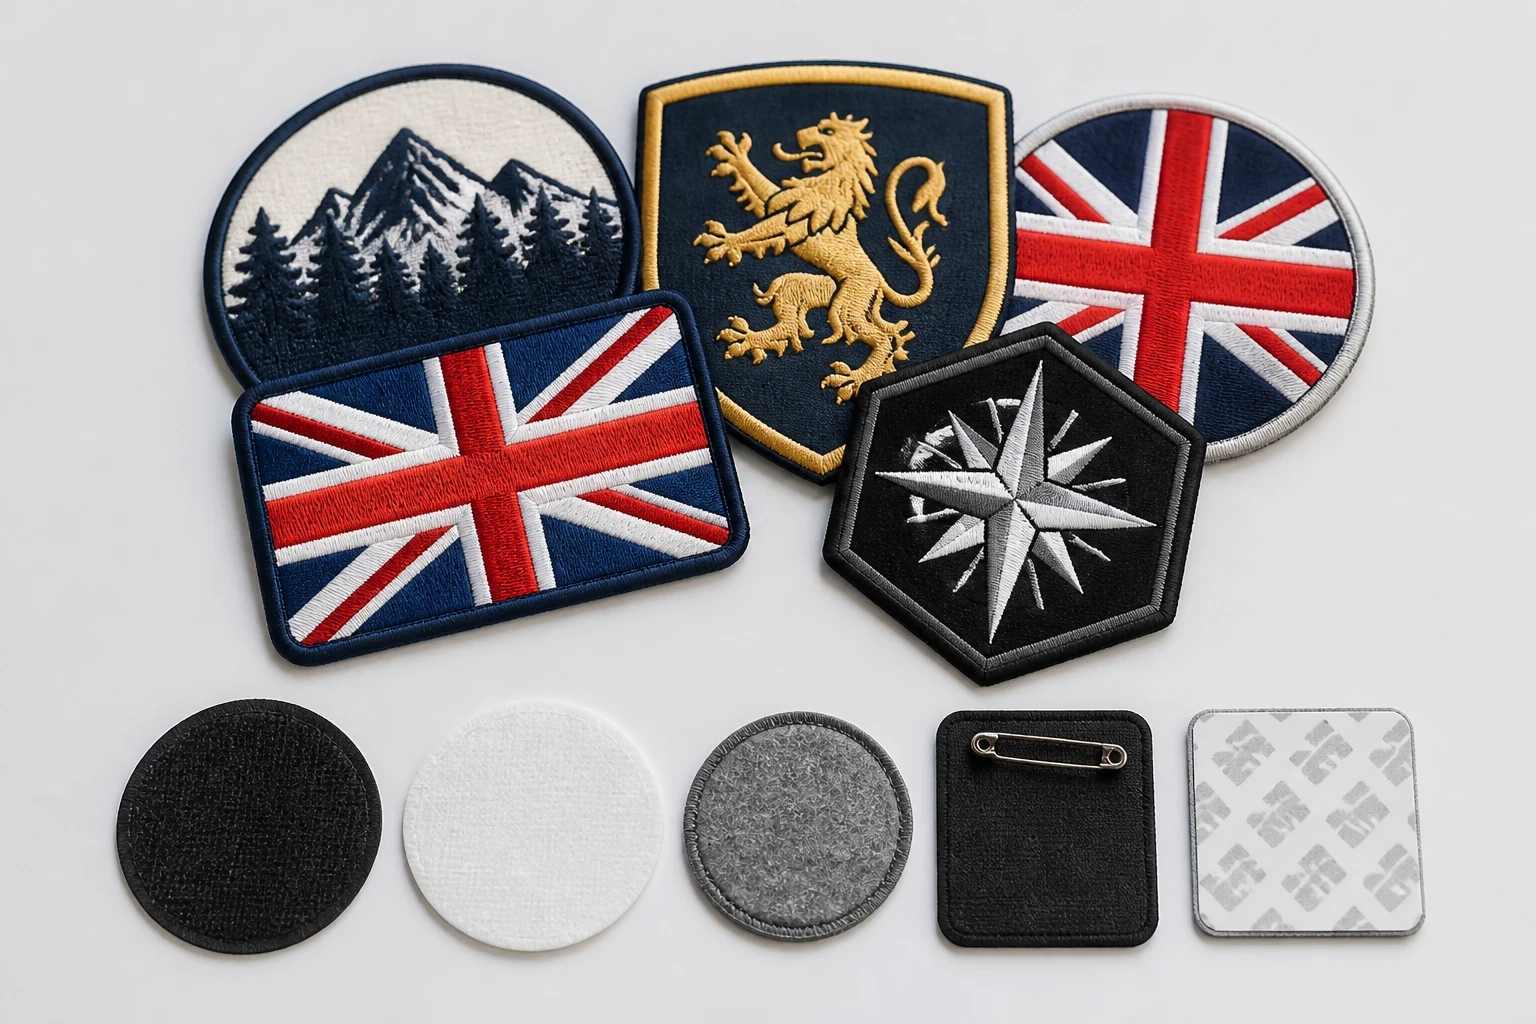
Woven patches are usually sized by their widest or tallest measurement, with common UK choices ranging from 2 to 4 inches. Sew-on backing suits permanent use, iron-on suits occasional garment application, and Velcro suits removable badges. The Customized Patches provides a free digital mockup usually within 12 hours and produces only after approval.
Key takeaways
- Measure the patch by its finished outer edge, not the artwork canvas.
- A 2 to 3 inch patch often works for chest logos, sleeves and small bags; larger badges need enough space for readable lettering.
- Sew-on is the dependable choice for permanent use, while iron-on and Velcro solve different fitting and removal problems.
- The Customized Patches has a 5-piece minimum per design, sends a free digital mockup usually within 12 hours and produces only after approval.
Woven patches are normally sized by their finished width and height, with 2 to 4 inches covering many chest, sleeve, bag and uniform applications. The correct backing depends on the garment and how often the patch will be removed: sew-on is the safest permanent option, iron-on is convenient on suitable fabrics, and Velcro is made for changeable badges.
The Customized Patches supplies UK customers with a free digital mockup usually within 12 hours, then produces only after approval. There is a 5-piece minimum per design, so a club, school, clothing label or small business can test a design without committing to a large production run.
How woven patches sizing is measured
Patch measurements describe the finished patch, not the blank space around the artwork. A rectangular badge might be quoted as 3 inches wide by 2 inches high. A circular badge is normally described by its diameter. An irregular shield is measured at its widest and tallest points, including the finished edge.
This sounds straightforward, but a few millimetres matter when a badge is going on a polo shirt or a narrow sleeve. Measure the usable area rather than the whole garment panel. Leave space for a zip, pocket opening, collar, seam or existing crest. A patch that technically fits can still look crowded if it sits hard against the stitching.
- Small logo or sleeve badge: around 1.5 to 2.5 inches, depending on lettering and detail.
- Chest logo on a polo, hoodie or work jacket: around 2.5 to 3.5 inches wide for many designs.
- Club, team or unit badge: around 3 to 4 inches, giving names and symbols more breathing room.
- Large back or event badge: 4 inches and above, provided the garment has a flat area to support it.
- Narrow vertical badge: check the height and width separately; a 1.5 by 3.5 inch design behaves differently from a 3 inch round badge.
There is no useful universal size for every logo. A bold two-colour initials mark may work at 2 inches, while a detailed hospitality crest with a date, motto and fine border may need 3.5 inches or more. If you are comparing methods, our guide to the difference between woven patches and embroidered patches explains why woven construction can hold small text more clearly than raised embroidery.
Choosing a size for real UK garments
The garment usually tells us more than the artwork file. A football club may need a compact badge on a tracksuit top, a cadet unit may want a clear shoulder identifier, and a hospitality business may need a restrained chest mark on a polo. All three can use woven patches, but the finished dimensions and backing should not be copied from one project to the next.
| Application | Common starting size | What to check | Practical backing choice |
|---|---|---|---|
| Polo or work shirt chest | 2.5 to 3.5 inches wide | Keep the patch clear of buttons, plackets and pocket seams | Sew-on for long-term uniform use; iron-on if the fabric and care label permit |
| Football or sports club jacket | 2.5 to 3.5 inches | Names and small numbers must remain readable at arm's length | Sew-on or Velcro for replaceable squad or role badges |
| Cadet, scout or uniform sleeve | 2 to 3.5 inches | Measure the sleeve curve and avoid placing the badge over a seam | Sew-on is usually the most dependable |
| Biker vest or denim jacket | 3 to 5 inches | Check the surrounding badges and the flat back panel | Sew-on; leather or heavy denim usually needs a needle suited to the material |
| Nylon shell or rain jacket | 2 to 3 inches | Heat can mark or damage the shell, and waterproofing may be affected | Sew-on with care, or a suitable removable system; avoid assuming iron-on will work |
| Canvas tote or work bag | 2 to 4 inches | Account for folds, handles and load-bearing seams | Sew-on for regular use; iron-on only if the canvas and care instructions allow it |
| School blazer | 2 to 3 inches | Match the existing school crest scale and keep the badge neat on wool | Sew-on is normally preferable to heat application |
These are starting points, not fixed rules. Put a paper version of the proposed patch on the garment and stand a few steps away. If the words disappear, increase the size or reduce the wording. If the patch dominates the garment, reduce the dimensions or move the badge to a larger panel.
Backing options: sew-on, iron-on and Velcro
Backing is not a decorative afterthought. It affects fitting, washing, removal and the kind of fabric that can safely carry the badge. We quote the backing as part of the product specification because an excellent design can still fail if it is fitted to the wrong garment.
Sew-on backing
Sew-on is the dependable choice for biker vests, denim jackets, wool coaches, school blazers, uniforms and workwear that will be washed repeatedly. The patch is stitched around its edge, either by hand or with a suitable machine setup. It takes longer to fit than an iron-on, but it avoids relying on adhesive alone.
For a heavy biker vest with several badges, sew-on also gives the wearer control over placement. A merrowed crest can be stitched firmly around the border, although a very thick edge may need a little more care from the person fitting it. On a nylon shell, use a method that does not create unnecessary holes or compromise a waterproof panel.
Iron-on backing
Iron-on backing uses heat and pressure to attach the patch. It is convenient for suitable cotton, denim and some polyester garments, particularly for one-off events, merchandise and casual jackets. It is not suitable for every fabric, and the garment care label should be checked before ordering this option.
The familiar failure is an iron-on that peels after a dryer cycle. Heat, steam, fabric coatings, curved panels and repeated washing can all reduce the bond. A patch that looks secure on day one may lift at a corner later. For workwear, school blazers or anything washed heavily, sew-on is often the more sensible specification.
Velcro backing
Velcro backing suits removable identifiers. A team can change a captain badge, a role marker or a name panel without replacing the garment. It is also useful for tactical-style jackets, kit bags and uniforms with a loop panel already stitched into place.
The important detail is the receiving loop panel. A Velcro-backed patch cannot attach securely to ordinary smooth nylon, wool or a plain cotton shirt. If the garment does not already have loop fabric, it may need a separate loop panel sewn on first. Velcro also adds thickness, so check that the patch will not catch under a tight sleeve or rub against the wearer.
| Backing | Best suited to | Main advantage | Main limitation |
|---|---|---|---|
| Sew-on | Denim, wool, uniforms, biker vests, workwear and long-term club kit | Strong permanent attachment with no reliance on adhesive | Takes more time to fit and leaves needle holes if removed |
| Iron-on | Suitable cotton, denim and selected polyester garments | Quick fitting with a clean appearance | Can peel with heat, washing, dryers or unsuitable fabric coatings |
| Velcro | Existing loop panels, removable badges, tactical jackets and kit bags | Allows the patch to be removed and replaced | Needs a matching loop panel and adds thickness |
| Plain adhesive | Temporary display or very light-duty use | Simple application without sewing equipment | Not a dependable choice for regular washing or active garments |
Not sure whether sew-on, iron-on or Velcro will suit the garment? Send us the artwork and a photograph of the application area for a free digital mockup usually within 12 hours. We compare the specification before production begins.
GET A FREE MOCKUPIf the garment is expensive, waterproof, delicate or issued as part of a uniform, tell us before the quote is finalised. A photograph of the application area helps. Our woven patches checklist covers the details that are easy to miss, including backing, border, quantity and garment placement.
Edges, shapes and the effect on size
A woven patch can be rectangular, circular, shield-shaped, oval or cut to follow a custom outline. The edge changes the visual size and the way the patch sits on fabric. A merrowed edge gives a traditional raised border and can work well for club crests, biker badges and uniform identifiers. A laser-cut edge follows sharper corners and detailed silhouettes more closely.
A merrowed border needs enough room to look intentional. If the border is forced around tiny points or narrow lettering, the result can appear crowded. Laser-cut edges are flatter and can suit modern brand marks, but the edge still needs to be strong enough for the intended handling. Printed patches are flatter; that is the point. If a low-profile finish matters more than texture, compare printed patches before deciding.
- Use a merrowed edge for a classic crest, round club badge or bold block shape.
- Use a laser-cut edge for a detailed outline, modern logo or irregular silhouette.
- Keep a narrow safety margin between lettering and the finished edge.
- Do not place tiny text inside a thick border unless the final size has been checked carefully.
- For raised texture, compare 3D embroidered patches or chenille patches, but expect a different surface and level of detail.
The edge should be shown on the proof, not assumed from a vague product name. A digital mockup gives the team or buyer a chance to check the outline against the garment before the order is made.
Woven patches compared with other patch types
Woven patches use tightly woven threads to create a relatively smooth face. They are a strong option for small lettering, fine lines and logos that need a flatter finish than traditional embroidery. They are not automatically the best answer for every design. A very bold college-style letter may look better in chenille, while a simple rubberised mark may suit PVC.
| Patch type | Surface and detail | Good use | Choose another option if |
|---|---|---|---|
| Woven patches | Smooth, detailed and comparatively low profile | Brand logos, names, small text, club badges and merchandise | You specifically need a thick pile or rubber finish |
| Embroidered patches | Raised thread texture with a traditional appearance | Bold crests, uniforms, jackets and strong simple lettering | Fine detail must remain crisp at a small size |
| Printed patches | Flat ink surface with gradients and image-like detail | Artwork with shading, photographs or a very flat finish | You want tactile thread texture |
| PVC patches | Moulded, rubber-like and weather-resistant appearance | Outdoor equipment, tactical kit and strong graphic marks | The design depends on fine woven detail or a softer textile look |
| Chenille patches | High, fuzzy pile with a varsity feel | College lettering, sportswear and large bold initials | Small text or intricate linework is central to the design |
| Leather patches | Natural or synthetic leather face with a premium label feel | Caps, bags, outdoor brands and heritage clothing | Many colours or fine woven detail are required |
The choice often comes down to the mark you want the customer to touch and see. Woven is smooth and controlled. Embroidery is textured. Printed is flatter; that is the point. PVC is more graphic and structured. Our embroidered patches hub shows the wider range if your first quote is not yet settled.
Artwork, lettering and readability at small sizes
A patch does not gain detail simply because the artwork file is large. The physical size, thread structure and contrast still control what can be read. Small white lettering on a pale background is a common problem. So are thin outlines, tightly packed dates and logos built from several very similar colours.
Start with the words that must remain legible. A football club may need the club name more than a tiny founding date. A hospitality polo may need the business name and emblem, not every line from the original crest. If the artwork needs editing, our guide to designing artwork for woven patches explains how to prepare a production-ready file.
- Use strong contrast between the background and the main lettering.
- Avoid very thin rules that may close up or disappear at a small finished size.
- Check abbreviations carefully; a shortened name can be clearer than a long sentence.
- Keep important details away from the outer edge and any merrowed border.
- Supply vector artwork where possible, but still judge the design at its proposed physical size.
- Ask for a proof if you are unsure about a date, motto, phone number or small symbol.
We can show the proposed dimensions on the mockup so the buyer sees more than a flat logo file. This is particularly useful for teams ordering several sizes, such as a large back badge and a smaller left-chest badge using the same identity.
Quantity, pricing and the 5-piece minimum
The Customized Patches has a 5-piece minimum per design. That means five identical patches are the minimum for one approved design; changing the size, wording, shape or backing may make it a separate specification. If a school wants three house colours or a club wants player names, list those versions clearly so the quote reflects the actual number of designs.
Price is influenced by size, quantity, backing, edge, artwork complexity and the number of separate designs. A larger patch uses more material and may take more production time. A small run with several individual names is not priced in exactly the same way as one design repeated across a larger batch.
- State the finished width and height in inches, or the diameter for a round patch.
- Confirm the quantity for each design, remembering the 5-piece minimum per design.
- Name the backing rather than writing only ‘custom patch’.
- Mention the garment type, especially nylon shells, wool, waterproof fabric or Velcro panels.
- Attach the clearest artwork available and explain any parts that must not change.
- Give the date the patches are needed in the United Kingdom, allowing time for approval and fitting.
Ordering and lead-time details for UK customers
A straightforward quote normally starts with the artwork, finished size, quantity, shape, edge, backing and delivery postcode. If you do not know the correct size, send a picture of the garment with a ruler or a paper outline placed where the patch will go. That lets us spot issues before the specification is fixed.
The free digital mockup is usually supplied within 12 hours. It is a visual check, not permission to start production. We produce only after the customer approves the mockup, so review the spelling, dimensions, thread or print colours, edge, backing and placement before confirming.
Name the size, garment, quantity and preferred backing on the quote. We show the correct back on a free digital mockup usually within 12 hours, and production starts only after you approve it.
GET A FREE MOCKUPLead time depends on the approved specification, quantity and current production schedule. UK-wide shipping is available, but delivery time is separate from production time. Build in extra time if the patches must be sewn onto garments, if a school or club committee needs to approve the artwork, or if the order includes several variations.
For regional ordering information, see our UK city pages. Buyers comparing total project cost can also read How Much Do woven patches Cost in the UK? before sending the final brief.
Common sizing and backing mistakes
Most avoidable problems happen before production. A customer measures the full jacket panel instead of the usable area, approves a small logo without checking the lettering, or selects iron-on for a fabric that cannot take heat. These are specification problems, not faults that can be repaired after the patches arrive.
- Ordering by eye without writing the finished width and height.
- Using the same dimensions for a chest badge and a back badge.
- Leaving no space around a merrowed edge or the main lettering.
- Choosing iron-on for nylon, coated fabric, wool or a garment that goes through a hot dryer.
- Choosing Velcro without confirming that the garment has a compatible loop panel.
- Assuming the patch will cover an old badge without measuring the old badge first.
- Approving a screen image without checking the physical dimensions shown on the mockup.
- Treating every colourway as one design when the wording, outline or backing has changed.
- Requesting production before spelling, size and backing have been approved.
- Washing a newly fitted iron-on patch according to normal garment habits without checking the care instructions.
The safest habit is simple: photograph the garment, mark the intended patch area, write the finished dimensions and name the backing. Our guide to common mistakes when ordering woven patches gives a longer pre-order check for teams and businesses.
Which woven patches specification should you choose?
For a permanent school blazer, wool coach jacket or biker vest, start with sew-on. For a suitable cotton or denim garment used for occasional merchandise, iron-on may be convenient, but confirm the care label and accept that adhesive is more dependent on heat and washing conditions. For a kit bag or tactical-style garment with an existing loop panel, Velcro is the practical choice.
For size, begin by measuring the actual panel and checking the smallest artwork detail. A 2.5 inch chest badge may suit a simple business mark, while a club crest with several words may need 3 or 3.5 inches. If the design is too detailed for woven construction at the requested size, compare a larger patch, simplified artwork or a different product such as PVC patches.
The final decision should leave you with a written specification: finished dimensions in inches, shape, edge, backing, colour notes, quantity per design, garment type and delivery requirement. That gives our team something definite to quote and gives you something definite to approve.
Further woven patches guidance
If you are still deciding if this construction suits the project, read Are woven patches Right for Your Project? A Decision Guide. It covers the balance between detail, texture, garment use and budget without treating one patch type as right for every buyer.
For a more complete overview, Woven patches: Everything UK Buyers Need to Know brings together artwork, ordering, backing and application advice. The woven patches product hub is also useful if you want to compare the product specification before requesting a mockup.
Frequently asked questions
What is the best size for woven patches?
There is no single best size. Many chest and sleeve woven patches fall between 2 and 3.5 inches, while larger club, biker and back badges may be 4 inches or more. Measure the usable garment area and check that the smallest lettering remains readable at the finished size.
Are woven patches better with sew-on or iron-on backing?
Sew-on is usually better for permanent use, repeated washing, wool, school blazers, uniforms and biker vests. Iron-on is quicker on suitable heat-tolerant fabrics but can peel after washing or a dryer cycle. The garment care label should be checked before choosing iron-on.
Can woven patches go on nylon jackets?
They can be used on nylon jackets, but the backing and fitting method need care. Heat may mark or damage a nylon shell, while sewing can affect waterproof panels. Send a garment photograph and state the fabric before approving the specification.
Can I order only five woven patches?
Yes. The Customized Patches has a 5-piece minimum per design. If you order different names, sizes, colourways or backing types, confirm whether each version counts as a separate design before requesting the quote.
How quickly can I see a woven patches mockup?
The Customized Patches usually sends a free digital mockup within 12 hours. Production starts only after approval, so use the proof to check spelling, size, shape, edge, colours and backing before confirming the order.
What information should I include when ordering woven patches?
Include the artwork, finished width and height in inches, quantity per design, shape, edge, backing, garment type, delivery postcode and required date. A photograph or paper template on the garment is useful when the correct size is uncertain. You can also review the 10 Questions to Ask Before Ordering woven patches guide.
Ready to produce custom patches for your UK team or brand?
GET A FREE MOCKUP