The Complete Guide to 3D embroidered patches in 2026
3D embroidered patches use raised foam beneath selected stitched areas to create a three-dimensional logo or emblem. They suit bold lettering, sports badges, club marks and branded workwear, but fine detail can be lost. The Customized Patches supplies UK orders from five pieces per design and provides a free digital mockup, usually within 12 hours, before production.
Key takeaways
- 3D embroidered patches create height by stitching over a foam layer, normally on selected parts of the design rather than across the whole badge.
- Bold lettering and simple logos work best; tiny text, narrow gaps and very fine outlines may merge after the foam is trimmed.
- The Customized Patches has a five-piece minimum per design, offers UK-wide shipping and usually sends a free digital mockup within 12 hours.
- Production starts only after the artwork, size, backing and mockup have been approved.
3D embroidered patches give a badge or logo a raised, tactile finish by placing foam beneath selected stitched areas. They are a strong choice for bold team lettering, club crests, brand marks and workwear where a flat embroidered surface does not have enough presence. The Customized Patches supplies 3D embroidered patches across the United Kingdom, with a five-piece minimum per design and a free digital mockup usually sent within 12 hours.
The raised effect is not magic and it is not suitable for every drawing. Foam needs room to be covered and trimmed cleanly, so tiny lettering and narrow gaps can disappear. This guide covers the decisions that matter on a real order: artwork, dimensions in inches, thread and foam, backing, garment type, care, quantity, price and approval.
What are 3D embroidered patches?
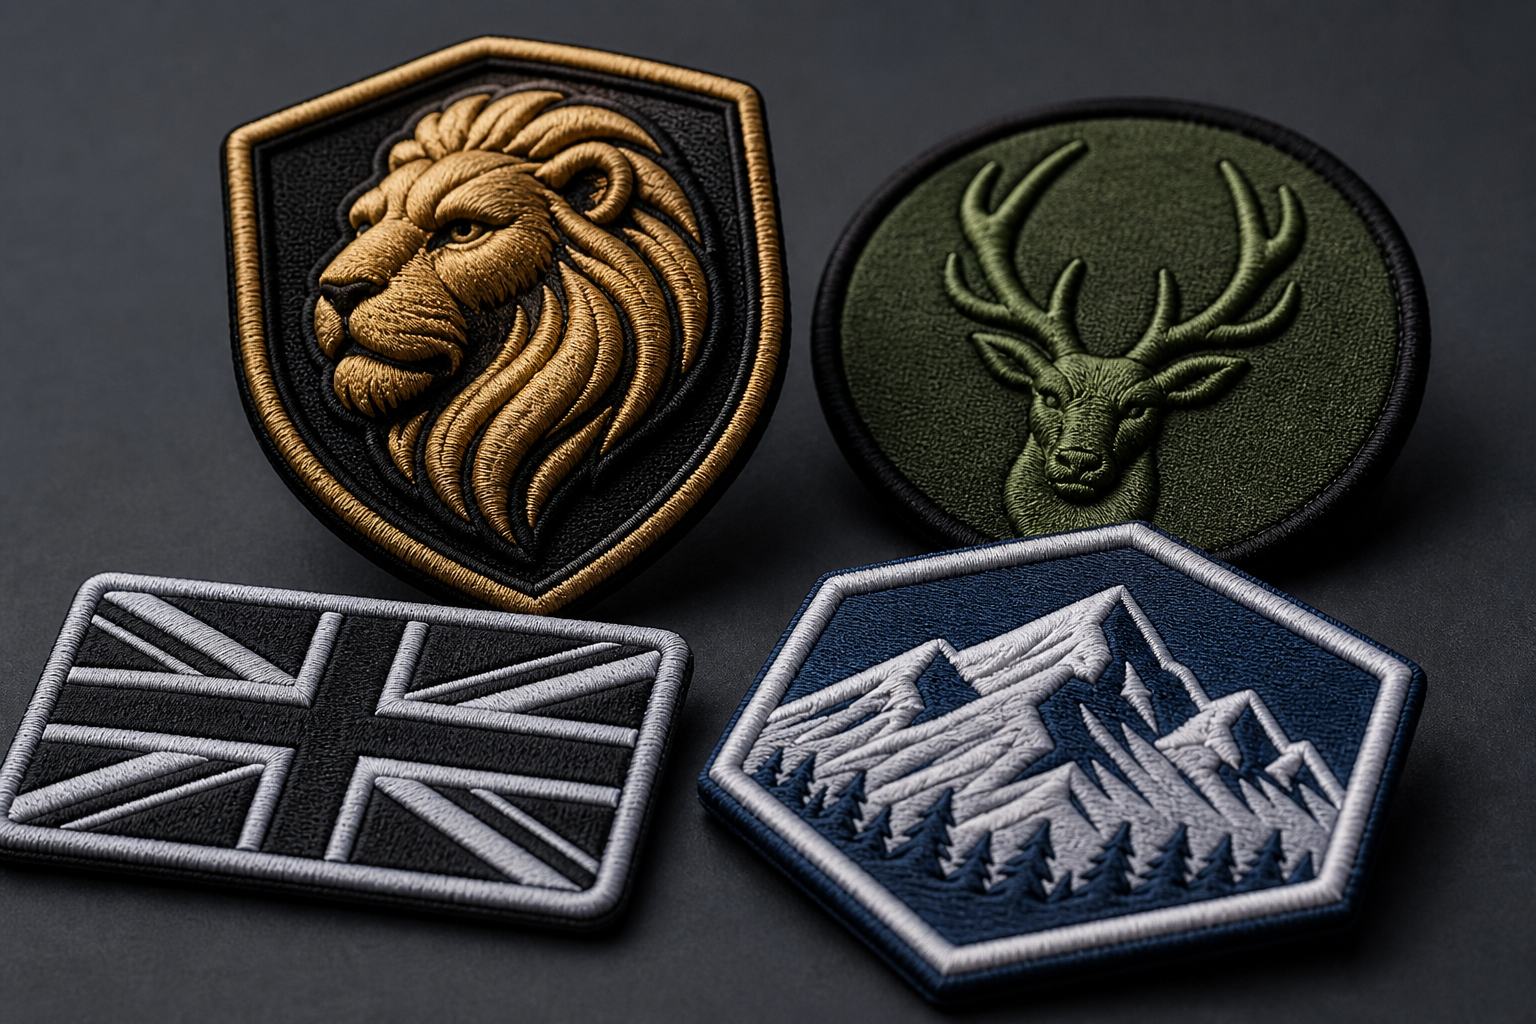
A standard embroidered patch is stitched into a relatively flat surface. A 3D embroidered patch adds a layer of foam beneath selected parts of the design, then stitches over that area. Once the stitching is complete, the exposed foam around the raised section is trimmed away. The result is a raised letter, number, stripe, symbol or shape that can be felt with a finger and seen from an angle.
The foam normally sits under the main raised feature, not underneath every thread on the patch. A merrowed border, background fill and small supporting text may remain flat while the club initials or central icon stand up. That contrast is often what makes the design work.
How the raised effect is produced
- The artwork is converted into an embroidery file with separate instructions for the flat areas, foam placement and raised stitching.
- The foam is positioned over the area intended to stand proud.
- A dense stitch pattern covers the foam and holds the edge in place.
- The excess foam is removed from around the stitched shape.
- Loose fibres and visible gaps are checked before the patch is finished with its chosen border and backing.
This process means the finished patch follows the practical limits of thread, needle spacing and foam thickness. A clean, simple mark usually looks better than a crowded illustration forced into a raised finish. For a broader overview of ordinary embroidery, see our embroidered patches hub.
When should you choose 3D embroidered patches?
Choose 3D embroidery when the main purpose of the patch is impact at a short viewing distance. Football clubs often use it for a large initial or sponsor mark on a training jacket. Biker and motorcycle clubs may use a raised central emblem on a vest, provided the artwork has enough open space. Hospitality businesses can use a raised monogram on a structured jacket or cap where a little height makes the branding easier to notice.
It also suits school blazers, cadet units, gym clothing, event crews and branded bags. A simple shield with three raised initials can be very effective. A long sentence in small raised lettering usually is not. If the badge must carry detailed artwork, gradients or a photographic image, a different patch method may be more reliable.
Good applications for a raised finish
- Team initials or squad numbers on football and rugby outerwear.
- Large brand lettering on work jackets, caps and structured bags.
- Club crests with one bold central symbol.
- Biker vest emblems with a clear border and open background.
- School, cadet and society badges where the main mark needs a tactile finish.
- Limited-run merchandise where the raised surface is part of the product feel.
There is no requirement to make the entire patch raised. In fact, a mixed design often gives better definition. The raised element catches light while the flat stitching carries the supporting detail. That is one reason a digital mockup matters: it lets you see which parts should have height before any patches are produced.
Artwork rules for a clean 3D result
The best 3D embroidered patches start with artwork that has a clear hierarchy. Decide what someone should read first, then make that element the raised feature. A bold word, number or central mark normally works better than several competing details all trying to sit on foam.
Solid vector artwork is helpful, but it does not remove the need for production judgement. A logo that looks crisp on a monitor at 10 inches wide may need changes at 3 inches wide. Lines can close up, counters inside letters can fill, and narrow gaps can disappear under dense stitching.
Lettering, outlines and spacing
- Use short, bold words for the raised section wherever possible.
- Leave visible space between raised letters and the outer border.
- Avoid very thin outlines around foam-covered shapes.
- Check that enclosed areas in letters such as A, B, P and R remain open at the finished size.
- Do not assume a fine script font will read clearly once converted to stitches.
- Keep small supporting text flat or consider replacing it with a simpler wordmark.
A useful test is to print the logo at its proposed size and view it from a normal standing distance. If the small text is difficult to read on paper, it is unlikely to become clearer when stitched. Our guide to artwork for production-ready embroidered patches covers file preparation and the decisions that reduce avoidable revisions.
Colour and thread choices
Thread colour affects how much definition the raised section has. A strong contrast between raised lettering and the background makes the height easier to see. Similar shades can still work, but the effect becomes more subtle and depends more on lighting.
Give colour references if the shade is part of your brand identity. Pantone references, existing garments or a clear brand guide are more useful than saying “the usual blue”. Thread is not ink, so a digital screen cannot display every finished colour exactly. The mockup is a production discussion, not a colour guarantee for every monitor.
Choosing size, border and backing
Size should follow the garment and the viewing distance. A chest badge on a football jacket may need a wider format than a small sleeve mark. A patch for a blazer pocket has less space than one for the back of a wool coaches jacket. Measure the actual panel, then allow room for the border and for stitching around the patch.
Many customers begin with a target such as 3 inches wide or 4 inches wide, then adjust the height to preserve the logo proportions. Do not squash a circular crest into a wide rectangle simply to fill a panel. It is better to revise the size while keeping the artwork natural.
| Patch feature | Practical choice | What to check |
|---|---|---|
| Raised area | Bold initials, numbers or a central icon | Does the feature have enough width for foam and dense stitching? |
| Flat embroidery | Small supporting words, background fills and fine accents | Will the detail remain readable at the finished size? |
| Border | Merrowed or stitched edge depending on the shape and finish | Does the border give the patch a clean outline without swallowing detail? |
| Sew-on backing | Best for permanent attachment to many jackets, blazers and bags | Can the garment take a needle, and will the wearer accept visible stitching? |
| Iron-on backing | Useful for suitable cotton and polyester garments with a firm pressing area | Will the item be tumble-dried, stretched or washed at high heat? |
| Hook-and-loop backing | Practical for removable badges and Velcro panels | Is the loop panel already fitted, or does it need to be added separately? |
Backing is a functional choice, not an afterthought. Iron-on can be convenient, but an iron-on patch that looks secure on day one may peel after a dryer cycle or repeated flexing. Sew-on is often the safer answer for hard-used nylon shells, wool coaches jackets and school blazers. Hook-and-loop is appropriate for removable identification, but the garment needs a compatible loop panel.
For a fuller explanation of dimensions and attachment methods, read Custom embroidered patches UK Sizing and Backing Options Explained. The right backing can matter more to the life of the garment than the raised thread itself.
Not sure whether the raised area, size or backing suits your garment? Send the artwork and tell us what the patch will be attached to. We provide a free digital mockup, usually within 12 hours, so you can review the design before production.
GET A FREE MOCKUP3D embroidery compared with other patch types
There is no universal winner between patch methods. The correct choice depends on the artwork, surface, wash routine and the visual result you actually want. 3D embroidery is raised and tactile, but printed is flatter; that is the point when a design contains gradients, fine shading or a large amount of small text.
| Patch type | Surface and appearance | Best suited to | Main trade-off |
|---|---|---|---|
| 3D embroidered patches | Selected areas stand above the patch on foam, with stitched coverage | Bold initials, sports marks, club emblems and tactile branding | Fine detail and small lettering may not work well in the raised area |
| Standard embroidered patches | Textured stitched surface with a mostly flat profile | Traditional crests, uniforms, teams and workwear | Less suitable for photographic detail or smooth colour blends |
| Woven patches | Flatter, finer woven face with sharper small text | Detailed labels, compact logos and fine lines | Does not provide the same raised foam effect |
| Printed patches | Flat printed image with broad colour and tonal detail | Illustrations, gradients, photos and complex artwork | Can look less tactile and may show wear differently from thread |
| PVC patches | Moulded rubber-like surface with a strong solid profile | Outdoor, tactical, cycling and bold simplified logos | Less traditional than thread and limited by moulded detail |
| Chenille patches | Soft, looped yarn with a visibly fluffy surface | Varsity lettering, school teams and large simple initials | Not ideal for fine detail or very small badges |
If your design is mostly crisp small lettering, compare woven patches with embroidery. If it contains tonal artwork, look at printed patches. For a moulded outdoor feel, PVC patches may be more suitable. Large varsity initials may be better served by chenille patches, while a leather-look brand label may point towards leather patches.
Why 3D is not simply a better version of flat embroidery
Raised embroidery changes the visual priority of the design. That is useful when the main mark needs to stand out, but it can be the wrong choice for a detailed badge that must be read from close up. A standard embroidered patch often handles a traditional crest more naturally because the whole face remains at a consistent level.
Printed patches are also worth considering for artwork with smooth shading. The print can reproduce a continuous image without asking thread to imitate every colour change. Choosing flat print does not mean accepting poor quality; it means using a surface that matches the artwork.
Garment and use-case advice from UK orders
A patch that works on a cotton hoodie may not behave the same way on a lightweight nylon shell. Nylon can move, crease and resist heat, so sew-on attachment is often worth considering. A structured wool coaches jacket gives a patch a stable surface, but the needlework and placement need to be planned so the garment is not puckered.
Football clubs usually need repeatable sizing across tracksuits, jackets and kit bags. Cadet units may need a removable badge on a Velcro panel. Hospitality teams often want branding on polos or overshirts, where a very tall raised feature can catch during laundering. School blazers need a neat border and a backing that suits regular wear without damaging the fabric.
Biker vests and heavy outerwear
Biker and motorcycle club patches are often viewed from several feet away, which favours strong shapes and high contrast. A raised club name can work on a large back panel, while a small chest patch may need standard embroidery so the details remain readable. Check the available panel and the curve of the garment before fixing the dimensions.
For ideas specific to that use, see biker and motorcycle club patches. Heavy leather and thick denim can accept sew-on patches well, but the final attachment should be checked against the construction of the vest. A backing choice cannot compensate for a patch placed across a seam or pocket opening.
Workwear, uniforms and school clothing
Workwear needs practical thinking. A raised logo on a warehouse jacket may look good but can catch against equipment if placed near a pocket or cuff. On polos, the patch should not be so heavy that it pulls the fabric. On a blazer, a balanced size and clean border generally look more appropriate than an oversized foam emblem.
Ask how the garment will be washed, dried and repaired. If staff will put jackets through frequent industrial laundering, confirm the attachment method and care instructions before choosing an iron-on backing. The patch and the garment should be treated as one system.
Ordering 3D embroidered patches from the UK
Start with four pieces of information: the artwork, finished size, quantity and intended garment. Add your preferred thread colours, border style, backing and delivery postcode if you already know them. If you are unsure, say so. It is easier to recommend a practical option before the file is prepared than to correct a backing choice after production.
The Customized Patches accepts orders from five pieces per design. That suits a small club trial, a new business launch or a replacement batch as well as larger team orders. If you need several different logos, each design is assessed separately for the minimum, artwork and production requirements.
What happens after you send the artwork?
- The artwork and brief are reviewed for size, detail, raised sections, colours and attachment method.
- A free digital mockup is prepared, usually within 12 hours.
- You check spelling, proportions, border, backing and the position of the raised foam.
- Any requested amendments are made before the design is confirmed.
- Production begins only after you approve the mockup and the order details.
- The finished patches are checked and shipped across the UK.
A mockup is especially useful for 3D work because it shows the intended hierarchy. Check that the raised section is actually the part you want to emphasise. Also check the proposed size against the real garment, since a patch can look larger or smaller depending on the panel around it.
For a wider ordering checklist, read 10 Questions to Ask Before Ordering custom embroidered patches UK or follow the step-by-step ordering guide. Both are useful if several people in a club or business need to approve the same design.
Price, quantity and lead-time considerations
The price of 3D embroidered patches depends on more than the number of pieces. Finished size, stitch coverage, number of thread colours, raised area, border, backing and artwork complexity all affect the quotation. A small batch with a detailed file can require more preparation per piece than a larger repeat run with a simple mark.
The minimum order is five pieces per design. If you are testing a new logo, that gives a club or business a manageable first run. Larger quantities can make more sense for a full squad, a uniform programme or a merchandise drop, but only order the quantity you can use. Extra patches still need suitable storage and can be difficult to match if a thread or garment colour changes later.
Lead time should be discussed before promising a launch date. Artwork revisions, approval delays, unusual backings, seasonal demand and delivery requirements can all affect the timetable. The free mockup is usually supplied within 12 hours, but that is not the same as a promise that finished patches will arrive within 12 hours. The production schedule is confirmed with the quotation and approved artwork.
Name sew-on, iron-on or Velcro on the quote and tell us which garment will receive the patch. We show the proposed backing and raised areas on a free digital mockup, usually within 12 hours; production starts only after your approval.
GET A FREE MOCKUPCare, washing and common failure points
The patch should be cared for according to both its construction and the garment beneath it. Avoid assuming that a raised foam finish should be scrubbed, ironed directly or tumble-dried at high heat. If the item can be washed at a lower temperature and air-dried, that is usually kinder to the attachment and the fabric.
The most common failures we hear about are not always caused by the thread. An iron-on patch may peel after a dryer cycle because the adhesive has been stressed. A sew-on patch may lift at a corner if the stitching does not reach a stable part of the garment. A Velcro badge may curl if the backing panel is too small or poorly positioned.
Practical checks before fixing the patch
- Test the chosen backing on the actual garment or an equivalent fabric.
- Keep the patch away from seams, zips and pocket openings unless the placement has been planned around them.
- Do not place a hot iron directly on raised foam or exposed embroidery.
- Follow the garment care label and any attachment instructions supplied with the order.
- Check corners and edges after the first wash, especially on flexible nylon or stretch fabric.
- Store unused patches flat and dry, away from direct heat.
For removable identification, hook-and-loop is often easier to maintain than repeatedly sewing and unpicking a patch. For a permanent school or team badge, sew-on can give better long-term security. There is no backing that removes every maintenance requirement, so choose based on how the garment is actually used.
Mistakes to avoid before approving the design
The first mistake is approving a screen image without checking the physical size. The second is asking for every detail to be raised. A third is treating backing as a last-minute add-on. These decisions affect the finished appearance and the way the patch behaves on the garment.
- Do not use tiny text as the main raised feature without checking it at the finished size.
- Do not approve a badge that has the wrong proportions simply because it fills the available panel.
- Do not choose iron-on for a garment that will regularly go through a hot dryer without discussing the risk.
- Do not ignore the thickness and movement of a nylon shell or stretch polo.
- Do not compare quotations without checking whether the backing, border and mockup service are included.
- Do not send production approval until spelling, colours, dimensions and attachment method are correct.
A short written brief prevents most confusion: “3.5 inches wide, sew-on, raised white initials, navy flat background, merrowed border, for a wool jacket.” Add the quantity and garment photo if possible. The clearer the brief, the less time is spent guessing what the finished patch should do.
A sensible 3D patch specification for 2026
For many UK teams and small businesses, a sensible specification is a simple raised word or emblem, a contrasting flat background, a clean border and sew-on backing. That combination gives the patch a visible feature without asking foam to carry every detail. It also remains flexible across jackets, bags and uniform items.
If the artwork is detailed, compare it honestly with other methods before committing. A printed patch may preserve the illustration more faithfully. A woven patch may handle compact text better. A standard embroidered design may suit a traditional crest. The strongest result comes from matching the process to the mark, not from selecting the most elaborate option.
Customers across the United Kingdom can request a free digital mockup from The Customized Patches. The usual mockup turnaround is within 12 hours, the minimum is five pieces per design, and production only begins after approval. That gives you a clear point to check the raised areas, size, backing and garment fit before committing the order.
Final checklist before you place the order
- The raised feature is clearly identified.
- The artwork has been checked at the intended size in inches.
- Small text and narrow gaps have been reviewed for readability.
- The border and overall shape suit the garment panel.
- The backing matches the washing routine and whether the patch is permanent.
- The quantity is at least five pieces per design.
- The delivery address is in the United Kingdom or the required shipping destination has been confirmed.
- The free digital mockup has been reviewed.
- Spelling, colours, dimensions and backing have been approved.
- No production work is expected before approval.
If you have the artwork but are still weighing up the details, send the file with a photograph or description of the garment. A short production conversation can usually settle the raised area, size and backing before the order is confirmed. That is the practical purpose of the mockup: to make the finished patch easier to agree before it is made.
Frequently asked questions
What are 3D embroidered patches?
3D embroidered patches have raised foam beneath selected stitched parts of the design. The foam creates height under bold lettering, initials, numbers or symbols, while other parts of the patch can remain flat. They are suited to simple, high-impact artwork rather than very fine text or detailed photographic images.
Are 3D embroidered patches suitable for football clubs and sports teams?
Yes. They work well for bold club initials, squad numbers, sponsor marks and simple crests on jackets, kit bags and teamwear. Check the size against the garment and keep small supporting text flat if possible. Sports teams should also choose a backing that suits frequent washing and movement.
What is the minimum order for 3D embroidered patches in the UK?
The Customized Patches has a five-piece minimum per design. This can suit a small club trial, a new business identity or a replacement batch. Different artwork designs are treated separately, so confirm the quantity for each design when requesting a quotation.
How quickly can I receive a mockup for 3D embroidered patches?
The Customized Patches usually provides a free digital mockup within 12 hours. The mockup shows the proposed artwork and helps you review the raised sections, proportions, colours and backing. It is not the finished production schedule, and production starts only after you approve the design and order details.
Are 3D embroidered patches better than printed patches?
Neither is always better. 3D embroidery is raised and tactile, which suits bold logos and lettering. Printed patches are flatter and can handle gradients, fine shading and detailed illustrations more directly. If your logo is detailed or contains small text, compare both options before choosing.
Which backing is best for 3D embroidered patches?
Sew-on backing is often a practical choice for permanent use on jackets, blazers, bags and heavy outerwear. Iron-on backing can suit compatible garments but may peel after repeated heat or dryer cycles. Hook-and-loop backing is useful for removable badges on Velcro panels. The correct choice depends on the garment and care routine.
Ready to produce custom patches for your UK team or brand?
GET A FREE MOCKUP