How to Choose the Right 3D embroidered patches for Your Brand
Choose 3D embroidered patches by checking the raised detail, finished size, border, backing and garment first. Use foam-backed 3D embroidery for bold logos and lettering, but choose flat embroidery, woven or printed patches for fine detail. The Customized Patches has a 5-piece minimum, provides a free digital mockup usually within 12 hours, and produces only after approval.
Key takeaways
- 3D embroidery suits bold lettering, simple marks and logos that need a raised centre.
- Finished size matters: a small patch cannot carry the same detail as a larger chest or back patch.
- Choose sew-on, iron-on or Velcro backing according to the garment and how often it will be washed or moved.
- The Customized Patches accepts a 5-piece minimum per design and produces only after artwork and mockup approval.
The best 3D embroidered patches use raised foam embroidery only where it improves the logo. Choose them for bold initials, large sports lettering, simple icons and brand marks that need texture and height. If your artwork contains tiny wording, fine outlines or photographic shading, flat embroidery, woven or printed patches may reproduce it more clearly.
The Customized Patches supplies customers across the United Kingdom with a 5-piece minimum per design. You receive a free digital mockup usually within 12 hours, and we produce only after you approve the artwork, size, colours and backing.
Start with the job the patch has to do
A patch on a football club tracksuit has a different job from one on a café apron or a biker vest. The tracksuit badge needs to read from the touchline. A hospitality logo may need a neat, compact finish on a polo chest. A club patch on a thick back panel can carry more visual weight and more than one line of lettering.
Before discussing thread colours, write down where the patch will go, how far away it will be viewed and how often the garment will be washed. Also note whether it must be removed. A removable Velcro panel for a cadet unit needs a different specification from a permanent crest sewn to a school blazer.
- Football and rugby teams: use strong block lettering and a size that reads from the sideline or changing room.
- Cadet units and outdoor teams: check the shell fabric, panel location and whether a sew-on or Velcro back is required.
- Hospitality businesses: keep the mark compact enough for a polo or apron without crowding seams and pockets.
- Biker and motorcycle clubs: allow room for a clear border, large lettering and the shape of the vest or jacket panel.
- Schools and clubs: consider repeated washing, children’s garment sizes and whether the same design must fit blazers, bags and jackets.
Our biker and motorcycle club patches guide covers larger back designs and club layouts, while the embroidered patches hub is useful if you are comparing standard flat embroidery with raised work.
Understand what makes 3D embroidery different
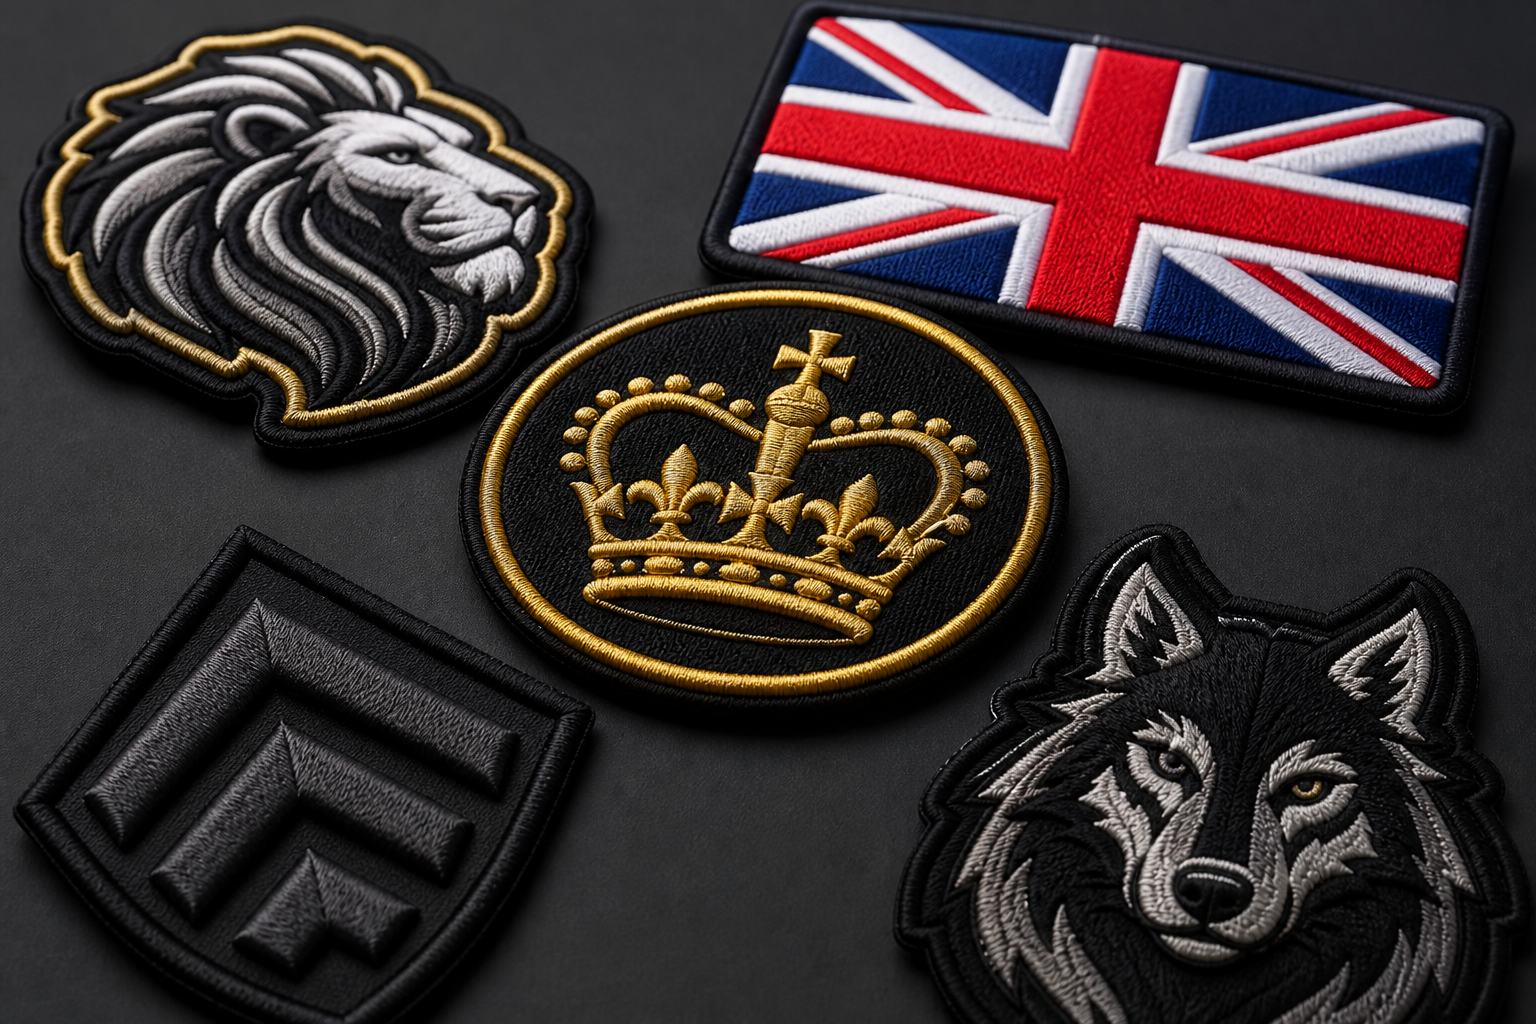
3D embroidered patches use foam beneath selected stitches. The embroidery covers the foam, then the excess is trimmed away so the chosen lettering or shape stands above the base fabric. The result is tactile and easy to spot, but it is not a way to turn every part of a complex illustration into a miniature sculpture.
The strongest result normally comes from contrast: raised white initials on a dark base, a lifted central icon inside a flat border, or thick lettering that is separate from fine supporting detail. A design made entirely from narrow raised strokes can lose its shape when reduced. Foam also needs enough surrounding space for the stitches and border to read cleanly.
What usually works well
- Three-letter initials on a chest patch.
- A large, simple animal or mascot mark.
- Bold team names with a flat outline around the raised letters.
- A central brand symbol with a solid background.
- Short words on caps, overshirts, jackets and kit bags.
What needs a different treatment
Small paragraphs, thin script, gradients and detailed faces are warning signs. They may still be possible at a larger finished size, but the right answer may be mixed construction: a raised headline with flat embroidery underneath, or a printed base with a small embroidered feature. Printed is flatter; that is the point when the artwork depends on continuous shading or very fine detail.
You can compare the construction with our 3D embroidered patches product page and the guide 3D embroidered patches: Everything UK Buyers Need to Know. A mockup is especially useful here because a screen preview cannot fully show how much height a small word will have.
Choose the finished size before refining the artwork
Size is measured across the finished patch, including the border, rather than just the central logo. Measure the available area in inches and leave space from zips, seams, pockets and curved edges. A patch that looks generous on a flat artwork file can become crowded on a sleeve or narrow chest panel.
Think about viewing distance as well. A one-inch patch can carry a simple initial, but it is a poor home for a full club name and motto. A three- to four-inch chest or sleeve patch has more room for a readable border and larger raised forms. Large back patches can support more information, although the garment shape still affects the result.
| Typical finished size | Good use | Design guidance | Common risk |
|---|---|---|---|
| 1 to 1.5 inches | Small chest mark, cap side, accessory | Use one initial, a simple symbol or very short word | Fine lettering becomes a solid line |
| 2 to 3 inches | Sleeve, polo chest, school blazer, kit bag | Use a clear central mark with a strong border | Too many colours make the patch busy |
| 3 to 4.5 inches | Jacket chest, club vest, teamwear | Suitable for bold names, mascots and raised lettering | Placement may conflict with seams or pockets |
| 5 inches and above | Back panel, large outerwear badge | Allows more visual hierarchy and supporting detail | Heavy designs can feel out of scale on light garments |
These are working ranges rather than fixed rules. A wide horizontal logo may need more width but less height, while a shield may need a taller shape. If several garments are involved, check the smallest garment first. A design that fits a men’s large jacket may overwhelm a child’s blazer or a women’s fitted polo.
Our guide to Custom embroidered patches UK Sizing and Backing Options Explained covers placement and attachment choices in more detail. It is worth measuring a real garment rather than relying on a product photograph.
Select the right border, base and thread colours
The border is not just decoration. A merrowed crest gives a traditional, rounded edge and works well for many club and uniform designs. A stitched border can suit irregular shapes or artwork that needs a less pronounced edge. The base fabric, border and raised thread should have enough contrast to remain separate at a glance.
Do not send only a colour name such as royal blue if the brand has a defined colour system. Send the logo file, a colour reference where available and a photograph of the garment. Thread is not ink on a flat screen, so a digital mockup helps you judge the relationship between thread, base fabric and border.
Not sure whether the raised section will hold your logo at the chosen size? Send the artwork and garment details. We provide a free digital mockup usually within 12 hours, then produce only after your approval.
GET A FREE MOCKUP- Use a dark base with a light raised element when the lettering must be read quickly.
- Avoid putting a dark raised word on a dark base unless the texture itself is the main feature.
- Keep the border visually heavier than fine internal lines so the patch retains its shape.
- Limit crowded small patches to the colours that do real work in the mark.
- Check reversed or mirrored artwork before approving a left-chest or sleeve placement.
For a softer, high-pile finish, chenille patches may be more suitable than foam-backed embroidery. For narrow lettering and detailed badges, woven patches can provide a flatter, sharper surface. The choice is not about one method being best for every brand; it is about matching the construction to the artwork and garment.
Match the backing to the garment
Backing affects how the patch behaves after it leaves the production desk. Sew-on backing is the dependable choice for jackets, heavy cotton, wool coaches, school blazers and items that will be washed regularly. It takes longer to attach than an adhesive option, but the patch is not relying on glue alone.
Iron-on backing is useful for suitable cotton and cotton-blend garments when the application temperature and pressure can be controlled. It is less forgiving on nylon shells, waterproof outerwear, coated fabrics and some technical materials. We have seen iron-on patches peel after a dryer cycle because the garment and application conditions were not suitable.
| Backing | Best suited to | Advantages | Points to check |
|---|---|---|---|
| Sew-on | Jackets, blazers, wool coaches, heavy cotton | Secure and suitable for repeated wear | Requires stitching and a little more attachment time |
| Iron-on | Suitable cotton or cotton-blend garments | Quick application without visible sewing | Heat, pressure and fabric compatibility matter |
| Velcro | Removable panels, tactical or team equipment | Allows patches to be changed or removed | Needs a matching loop panel and correct placement |
| Adhesive or temporary use | Short-term display or sampling | Useful for testing placement | Not a substitute for a permanent attachment on working garments |
Velcro is often the practical answer for units that change identifiers, event teams that swap roles, or bags that need different labels. Check whether the garment already has a loop panel. If not, adding one may be part of the job. Do not specify iron-on simply because it is familiar; a nylon shell or coated rain jacket may need sewing or a suitable panel instead.
Compare 3D embroidery with other patch methods
A brand can have a strong identity without putting every logo into raised embroidery. A raised finish adds physical depth and can make short lettering stand out, but it may not be the clearest solution for a long slogan or a detailed illustration. Looking at alternatives before ordering is good specification, not second-guessing.
| Patch type | Best for | Main strength | Trade-off |
|---|---|---|---|
| 3D embroidered patches | Bold logos, initials, mascots and short lettering | Raised texture and strong visual presence | Needs simplified artwork and enough finished size |
| Flat embroidered patches | Traditional crests, uniforms and general branding | Familiar stitched appearance with broad use | Very fine detail can still become crowded |
| Woven patches | Small lettering and detailed flat graphics | Smooth surface and cleaner fine lines | Does not have the raised foam effect |
| Printed patches | Photographic detail, gradients and complex colour | Continuous artwork and fine visual detail | Flatter appearance and less tactile texture |
| PVC patches | Outdoor, utility and hard-wearing applications | Rubbery surface with clear solid shapes | Different appearance from thread-based branding |
| Leather patches | Premium casualwear, bags and heritage branding | Natural material character | Not the right surface for every colour or detailed mark |
The Difference Between custom embroidered patches UK and printed patches, Explained gives a fuller comparison. You can also review printed patches, PVC patches and leather patches if the garment, wash routine or artwork points away from foam-backed thread.
For example, a hospitality group with a shaded illustrated emblem may be happier with a printed patch on a work jacket. A football club with three bold initials may get more value from raised embroidery. A utility team working outdoors may prefer PVC. The sensible choice is the one that remains legible and attached in the conditions it will face.
Prepare artwork that can be produced cleanly
Start with a vector file if you have one, but do not assume that a perfect screen logo is automatically ready for embroidery. Thread has a minimum practical line width, and stitches need room to turn around corners. Tiny gaps can close, thin outlines can disappear and close-set letters can merge.
Keep the master logo unchanged, then create a patch version with simplified detail. That might mean removing a fine inner ring, shortening a slogan, thickening a line or raising only the main word. This preserves the brand while accepting the limits of the material.
- Supply the clearest logo file available, preferably vector artwork or a high-resolution image.
- State the exact wording and check spelling before the mockup is made.
- Identify the part of the design that should be raised rather than asking for every stitch to have height.
- Mark any non-negotiable colours and explain where a close thread match is acceptable.
- Show the intended garment, placement and approximate finished size.
The How to Design Artwork for custom embroidered patches UK That Production-Ready guide explains why simplifying artwork can improve the finished badge. This is also where a production conversation saves time: it is better to adjust a two-inch design before ordering than to discover after production that a small line has vanished.
Order the right quantity and allow time for approval
The Customized Patches has a 5-piece minimum per design. That suits a small business testing a new uniform mark, a club ordering a first run, or a team needing replacements without committing to hundreds of pieces. If you have several colourways or sizes, treat each distinct design as a separate specification and ask how the minimum applies.
Send the artwork, quantity, finished size, garment type, placement and backing preference in one message. Include a photograph if the fabric is unusual. Nylon shells, fleece, wool coaches and Velcro panels can all change the sensible attachment method, and identifying that at quote stage avoids a late correction.
- Send the logo or artwork with the intended use.
- Confirm the finished size in inches and the patch shape.
- Choose raised, flat or mixed embroidery and identify the colours.
- Specify sew-on, iron-on or Velcro backing.
- Review the free digital mockup, usually supplied within 12 hours.
- Approve the final mockup before production begins.
Lead time depends on the artwork, quantity, construction and current production schedule. A straightforward repeat design is different from a first-time badge with several revisions. Do not book a launch or kit handout around an assumed dispatch date until the specification and timing have been confirmed.
If you are organising several suppliers or a team deadline, the A Step-by-Step Guide to Ordering custom embroidered patches UK is a useful checklist. Keep the approved mockup with your purchase records so future replacement orders use the same size, colours and backing.
Name sew-on, iron-on or Velcro on the quote and tell us the garment material. We show the proposed construction on a free digital mockup usually within 12 hours, with production starting only after approval.
GET A FREE MOCKUPCheck the mockup like a production proof
A mockup is not just a nice preview. Check the wording, proportions, finished dimensions, border, raised areas, thread colours and backing. Look at it both close up and at the distance from which people will normally see the garment.
Put the mockup over a photograph of the real item if placement is uncertain. A chest patch can sit too close to a zip, a sleeve badge can rotate on a curved arm and a large back patch can compete with seams or existing branding. Fixing these decisions before production is much easier than altering finished garments.
- Is every word spelled correctly?
- Does the raised section have enough thickness to remain distinct?
- Is the border clear against the garment?
- Will the patch fit the smallest garment in the order?
- Is the backing suitable for the fabric and wash routine?
- Does the mockup show the same design, size and colourway you intend to order?
Approval should be clear and specific. If you want a wording change, colour adjustment or different backing, make it before confirming. The Customized Patches produces only after approval, which gives the customer a defined point to check the details rather than relying on an unconfirmed email description.
Avoid the mistakes we see on real garments
The most common problem is not embroidery quality. It is a mismatch between the patch and the garment. An iron-on badge is ordered for a nylon shell, a tiny logo is expected to carry a full slogan, or a Velcro patch arrives without a loop panel. These are specification issues and can usually be avoided with a photograph and a few direct questions.
Another mistake is copying a digital logo without making a patch version. Brand guidelines may call for a one-pixel outline or a fine gradient that works on a website but not in thread. A production-ready interpretation can keep the brand recognisable while removing detail that would close up or disappear.
- Ordering by screen size rather than measuring the garment in inches.
- Using raised embroidery for thin script that needs a smooth continuous line.
- Choosing iron-on for waterproof, coated or heat-sensitive fabric.
- Ignoring the merrowed edge when calculating the final patch size.
- Approving a colour from a monitor without checking the garment and thread relationship.
- Assuming one sample size will suit adult jackets, children’s blazers and bags.
- Forgetting to request a replacement specification for future orders.
The Common Mistakes to Avoid When Ordering custom embroidered patches UK guide covers these issues in a wider ordering context. A short production discussion at the start is usually more useful than trying to repair a poor fit afterwards.
A sensible decision for UK brands
Choose 3D embroidered patches when the value lies in bold raised lettering, a tactile central mark or a badge that needs to stand apart from a plain garment. Choose flat embroidery when you want a traditional crest, woven when fine flat detail matters, printed when the artwork relies on shading, and PVC or leather when the material itself supports the brand.
For customers in England, Scotland, Wales and Northern Ireland, the ordering process is the same: provide the artwork and garment information, confirm the 5-piece minimum per design, review the free digital mockup usually within 12 hours, and approve before production. UK-wide delivery planning is easier when the final quantity and application date are agreed at quote stage.
If you are still comparing methods, start with Are custom embroidered patches UK Right for Your Project? A Decision Guide or browse the UK city pages for local ordering information. The right patch is not necessarily the most complex one. It is the one that keeps the logo clear, suits the garment and continues to make sense after washing and regular wear.
Frequently asked questions
What are 3D embroidered patches best used for?
3D embroidered patches are best for bold initials, short words, simple logos, mascots and central symbols that benefit from a raised foam-backed finish. They are less suitable for tiny lettering, gradients and photographic artwork. A mixed design can use raised embroidery for the main mark and flat or printed detail elsewhere.
What is the minimum order for 3D embroidered patches?
The Customized Patches has a 5-piece minimum per design. If you need different sizes, colourways or artwork versions, confirm how each version is counted when requesting a quote. A small first order can be suitable for a club, small business or team testing a new badge.
How quickly can I see a mockup?
The Customized Patches usually provides a free digital mockup within 12 hours. Send the artwork, intended size, garment, placement and backing preference together so the mockup can show a useful production proposal. Production starts only after you approve the mockup and specification.
Are 3D embroidered patches suitable for nylon jackets?
The raised embroidery itself can suit a nylon jacket, but the backing needs care. Iron-on backing may not be suitable for nylon shells or coated outerwear because heat and adhesion can cause problems. Sew-on or a correctly fitted Velcro panel is often the safer option, subject to the garment details.
Should I choose 3D embroidered patches or printed patches?
Choose 3D embroidered patches for raised texture, bold lettering and simple marks. Choose printed patches for gradients, photographs, fine shading and complex illustrations where a flat continuous image is clearer. The printed patches hub and The Difference Between custom embroidered patches UK and printed patches, Explained provide further comparison.
Can I use 3D embroidery on a school blazer or football kit?
Yes, provided the size, placement and backing suit the garment. A school blazer commonly uses a sewn badge, while a football kit may need a lightweight attachment that does not interfere with the fabric. Measure the smallest garment, check washing requirements and approve the mockup before production.
Ready to produce custom patches for your UK team or brand?
GET A FREE MOCKUP