Why brands Are Choosing 3D embroidered patches
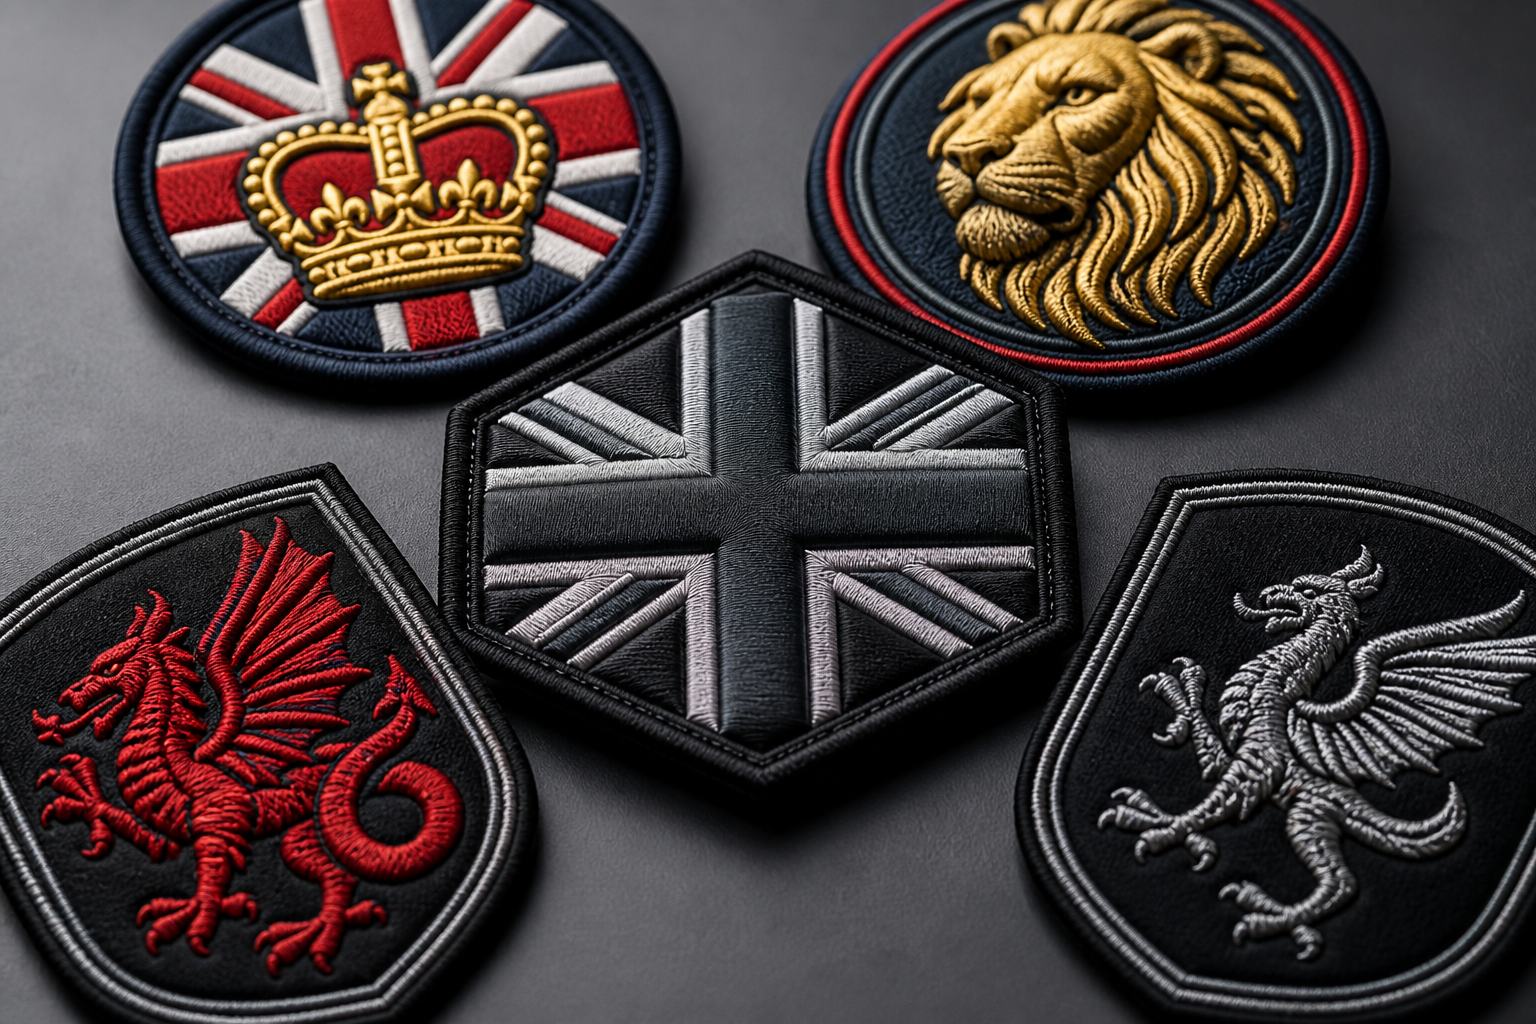
3D embroidered patches give selected parts of a logo a raised, tactile finish by stitching over a foam layer. Brands choose them for caps, workwear, jackets, bags and Velcro panels where a bold mark needs to be noticed. They suit simple lettering and strong shapes best, but fine detail and long text may need flat embroidery or printing.
Key takeaways
- 3D embroidered patches use a foam layer beneath selected stitching to create a raised logo or letter.
- They work best for bold shapes, short lettering and high-impact branding on caps, jackets, uniforms and bags.
- A 5-piece minimum applies per design, and The Customized Patches usually sends a free digital mockup within 12 hours.
- The Customized Patches produces only after the customer approves the mockup, backing, size and final specification.
Brands are choosing 3D embroidered patches because a raised logo is easier to notice on a cap, jacket, bag or uniform than a completely flat mark. The foam-backed embroidery adds height to selected parts of the design while keeping the patch stitched and wearable. It suits bold initials, short names, symbols and strong brand shapes.
At The Customized Patches, we quote for UK teams, brands, clubs and businesses that need a patch to look right on the actual garment, not just on a screen. A 5-piece minimum applies per design. You can request a free digital mockup, usually within 12 hours, and we produce only after you approve the final artwork and specification.
What makes 3D embroidered patches different?
Standard embroidery builds a design with thread laid across the surface of the patch. With 3D embroidery, a layer of foam is placed beneath selected areas before the thread covers it. Once the excess foam is removed, the chosen lettering or shape stands above the surrounding stitching.
That does not mean the whole patch has to be raised. A common layout is a flat embroidered border with raised initials in the centre. Another is a flat background with a raised animal, vehicle, club emblem or short word. This contrast gives the eye somewhere to land and avoids making every part of the patch equally thick.
The raised effect has a practical limit
The foam needs enough room to be covered cleanly by thread. Very fine lettering can collapse, expose the foam or lose its shape during trimming. Long brand names often need to be shortened, enlarged or split across two lines. A production-ready mockup is useful here because it shows what the design can do at the requested size.
Raised embroidery is also affected by the item it will sit on. A flat cap front gives the patch support, while a very curved crown can make a large design look uneven. On a soft nylon shell, a heavy patch may need careful sewing and a suitable backing so the fabric does not pucker.
Why are brands choosing a raised logo?
A brand mark has to work at a glance. On a busy football sideline, a hospitality team moving between tables or a trade crew working outdoors, a raised emblem can be easier to recognise than a small flat print. It catches light differently and gives the customer a physical detail to notice when handling the garment.
There is also a difference in perceived construction. A stitched patch with a raised crest tends to feel more like part of a uniform or club identity than a basic label. That is not a promise that 3D is right for every brand. Printed is flatter; that is the point when a logo contains a photograph, a colour fade or several lines of small information.
- Caps and five-panel hats where the front panel needs a compact, high-impact mark.
- Football, rugby and other sportswear where club initials or a short sponsor mark must be visible from the touchline.
- Biker vests and motorcycle club garments where a bold emblem benefits from texture and weight.
- Hospitality polos, overshirts and work jackets where the logo needs to look distinct from a standard printed chest mark.
- School blazers, cadet clothing and uniform bags where a raised badge can add a formal, traditional finish.
- Velcro panels on kit bags, tactical-style clothing and removable team equipment.
We have quoted 3D designs for football clubs, cadet units, hospitality polos, biker vests and school blazers. The best results usually come from a clear central feature rather than an attempt to raise every stitch. If you are comparing construction methods, see our guide to 3D embroidered patches and the wider range of embroidered patches.
Which artwork works best for 3D embroidered patches?
Start with the part of the logo that matters most at a distance. That might be three initials, a simple animal silhouette, a crown, a mountain, a wheel or a bold word. The raised section should have a clear outer edge so the foam can be covered and trimmed without blurring the shape.
Good candidates for raised embroidery
- Short words with broad letter strokes.
- Block capitals and uncomplicated sans-serif lettering.
- Simple mascots, crests, tools, vehicles and geometric symbols.
- Two-colour designs with a strong contrast between the raised section and the background.
- Logos that need a tactile feature on a cap, jacket or bag.
Artwork that may need another method
Thin script, tiny dates, narrow outlines and detailed illustrations are often better handled with flat embroidery, woven construction or print. Woven patches can hold small text more neatly because the surface is flatter and more consistent. A printed patch can reproduce gradients, photographs and fine artwork without forcing the design into thread-width limits.
This is where a direct comparison saves time. Our guide to 3D embroidered patches Best Practices for brands covers artwork preparation, while 3D embroidered patches vs flat embroidered patches: Which Is Right for Your Project? explains when the simpler construction is the better choice.
3D embroidered patches compared with other patch types
The right patch is determined by the logo, garment, handling and budget rather than by the most noticeable finish. A raised patch is a strong option for a short bold mark, but it is not automatically the best option for detailed artwork or very small text.
| Patch type | Surface and appearance | Best suited to | Main trade-off |
|---|---|---|---|
| 3D embroidered patches | Selected lettering or shapes stand above the stitched surface | Bold logos, initials, caps, jackets, bags and statement club marks | Fine detail and long text can be difficult at small sizes |
| Flat embroidered patches | Thread fills the design without a raised foam section | Traditional crests, uniforms, sports badges and general-purpose branding | Less tactile impact than a raised feature |
| Woven patches | Smooth, tightly woven surface with fine lines | Small text, detailed symbols and compact labels | Flatter appearance and less thread texture |
| Printed patches | Ink reproduces gradients, photographs and detailed artwork | Complex illustrations, colour fades and high-detail graphics | Can look less textured than stitched construction |
| PVC patches | Moulded rubber-like surface with defined levels | Outdoor kit, utility clothing, bold modern badges and weather-facing uses | Different feel and appearance from traditional textile patches |
| Chenille patches | Soft, fuzzy yarn with a thick varsity-style surface | College, school, sports and heritage lettering | Less suitable for fine detail and compact intricate artwork |
| Leather patches | Natural or synthetic leather surface, often debossed or stitched | Premium casualwear, denim, bags and heritage-style branding | Limited colour and detail compared with print |
Not sure whether raised embroidery, flat stitching or print will hold your logo best? Send the artwork and garment details for a free digital mockup, usually within 12 hours, so you can compare the proposed finish before production.
GET A FREE MOCKUPFor a raised textile finish, 3D embroidery sits between the traditional look of a stitched crest and the stronger relief of a moulded badge. If a workwear supplier wants a clean technical surface, PVC patches may be more suitable. For a varsity jacket or school sports garment, chenille patches may communicate the right character.
The garment matters as much as the artwork. A nylon shell can be light and slippery, a wool coaches jacket can be thick and soft, and a biker vest may need a strong sewn attachment. For heritage clothing, leather patches can look more natural than foam-backed embroidery. There is no useful answer without knowing where the patch will go.
Backing, attachment and garment compatibility
Backing is not a minor afterthought. It decides how the patch is fitted and how easily it can be removed later. A sew-on patch is often the sensible choice for biker vests, heavy jackets, school blazers and kit that will be washed regularly. Stitching holds the patch to the garment rather than relying on adhesive alone.
Iron-on backing can be convenient for suitable cotton or polyester surfaces, but heat and pressure still need to be applied correctly. An iron-on patch that looks secure on day one can peel after a dryer cycle if the fabric, temperature or application is wrong. Nylon shells and coated fabrics are particularly important to discuss before choosing heat application.
- Sew-on: a dependable choice for heavy-use garments, wool coaches, denim, leather and items washed frequently.
- Iron-on: useful for suitable smooth fabrics where the customer can follow application instructions carefully.
- Velcro: practical for removable badges, team kit, equipment bags and panels that need to be changed.
- Combination backing: worth discussing where a patch needs initial positioning help followed by stitching for long-term use.
A Velcro panel also needs two matching decisions: the hook or loop side on the patch and the mating side on the garment or bag. A raised design can work well on Velcro, but the backing may add thickness to an already substantial patch. Tell us the panel dimensions in inches and how the badge will be handled.
For a wider explanation of attachment choices, read Custom embroidered patches UK Sizing and Backing Options Explained. If the patch is for a motorcycle group, our page on biker and motorcycle club patches covers the sort of large, durable back and chest placements commonly requested.
Size, quantity and cost in the United Kingdom
Size should be measured against the garment, not chosen from the logo file alone. A chest patch may need to stay compact so it does not interfere with a zip or pocket. A back patch can carry a larger emblem, while a cap front usually needs a design that follows the curve without becoming too tall.
Give the requested width and height in inches, or send a photograph with a ruler beside the intended position. We can then check whether the lettering has enough room for a clean raised finish. A design that looks generous on a desktop monitor may be too small when reduced to a 2-inch badge.
The 5-piece minimum
The minimum order is 5 pieces per design. If a club needs 20 identical chest patches, that is one design at 20 pieces. If it needs five player names plus five staff names, those may be treated as separate designs because the artwork changes. Confirm the design count before asking for a final quote.
Pricing depends on the finished size, number of pieces, artwork complexity, backing and the number of thread colours. Raised areas can involve extra preparation compared with a basic flat design. For a UK-focused cost discussion, see How Much Do 3D embroidered patches Cost in the UK?. A quote is more useful when it includes the garment type, dimensions, quantity and delivery postcode.
The Customized Patches supplies UK-wide shipping. We can quote in pounds sterling and discuss the practical difference between sending one approved design in a small run and producing several versions for a larger organisation.
How the ordering process works
The quickest orders usually start with four details: the artwork, the finished size, the number of pieces and the garment or attachment method. A photograph of the placement helps, especially for curved caps, nylon shells, wool jackets and existing Velcro panels.
- Send the logo or a clear description of the design, including any text that must remain unchanged.
- State the approximate size in inches and explain where the patch will be fitted.
- Confirm the quantity per design, remembering that the minimum is 5 pieces for each separate design.
- Choose a preferred backing, or ask for advice if the patch is going on nylon, leather, wool, a blazer or a removable panel.
- Review the free digital mockup, usually sent within 12 hours.
- Check spelling, colours, raised areas, border shape, backing, quantity and delivery information.
- Approve the final specification. We produce only after approval.
The mockup is not just a sales image. It is the point at which a long word can be enlarged, a narrow border removed, a colour adjusted or a raised feature limited to the strongest part of the logo. It also gives the customer a record of what has been agreed before manufacture begins.
Lead time can vary with the design, quantity and current production schedule, so it is best to raise a dated event at the first enquiry. A school presentation, fixture list, launch date or trade show may affect the sensible delivery plan. UK-wide delivery is available, but the production timetable starts after artwork approval rather than at the first message.
Common problems that a mockup can prevent
The most common issue is not a poor stitch. It is an artwork decision made too late. A brand supplies a long name, asks for a small cap patch and expects every letter to remain raised and legible. The production answer may be a wider patch, shorter wording, flat text around a raised symbol or a different patch method.
- Tiny lettering that becomes a solid line when reduced.
- Raised sections packed too closely together for the foam to separate cleanly.
- A border that leaves too little room around the central emblem.
- A colour combination with insufficient contrast between thread and background.
- A patch that is too large for a curved cap front or too heavy for a light nylon shell.
- Iron-on backing selected for a coated or heat-sensitive fabric.
- A Velcro badge ordered without checking the size and orientation of the existing panel.
- A spelling or sponsor change noticed after production has started.
Name sew-on, iron-on or Velcro on the quote and include the garment type. We show the proposed backing and raised areas on a free digital mockup, usually within 12 hours, then start production only after you approve it.
GET A FREE MOCKUPThese points are why we ask for approval before making the patches. The customer can see the proposed proportions and attachment method first. Our guide to Common Mistakes to Avoid When Ordering 3D embroidered patches gives more examples of problems that can be identified at quotation stage.
Are 3D embroidered patches right for your brand?
Choose them when the brand has a strong central mark and the garment benefits from texture. They are particularly effective for caps, club jackets, workwear, bags, uniforms and short sponsor or event marks. A raised feature can make a familiar logo feel more physical without changing the actual brand colours.
Choose a flatter method when the artwork contains gradients, detailed illustrations, very small copy or a large amount of information. A patch does not have to be raised to be well made. The best production choice is the one that keeps the logo recognisable after it has been reduced to the size the garment allows.
For a broader brand decision, compare woven patches and printed patches with embroidered construction. If your organisation operates across England, Scotland, Wales or Northern Ireland, you can also use our UK city pages when planning a UK-wide team or branch order.
A sensible specification to send with your enquiry
A clear enquiry reduces the number of messages needed before a quote can be prepared. It does not need to be technical. A sentence such as “30 raised black-and-white initials for navy cotton caps, approximately 2.5 inches wide, sew-on backing, delivery to Manchester” gives the production desk something useful to work from.
- Artwork file or a clear photograph of the logo.
- Finished width and height in inches, if known.
- Quantity for each separate design.
- Thread colours or a reference to the supplied brand artwork.
- Which parts should be raised and which should remain flat.
- Garment or item: cap, polo, blazer, jacket, vest, bag, uniform or Velcro panel.
- Preferred backing: sew-on, iron-on or Velcro.
- Required delivery date and UK delivery address.
- Any washing, removal or repeated-use requirements.
If you are unsure about any of these points, send what you have rather than waiting for perfect artwork. We can explain the trade-offs, prepare a free digital mockup usually within 12 hours and identify questions before production. The minimum remains 5 pieces per design, and the final order is made only after approval.
The practical answer for UK brands
3D embroidered patches are a good fit for brands that want a raised, tactile mark and have artwork built around clear shapes or short lettering. They give caps, jackets, bags, uniforms and club garments a stronger visual feature than a plain flat label, while still using the familiar stitched patch format.
They are not a replacement for every patch type. Printed, woven, PVC, leather, chenille and flat embroidered patches all solve different problems. The reliable route is to compare the artwork with the garment, backing, size, quantity and expected use before choosing the finish.
The Customized Patches serves customers across the United Kingdom with a 5-piece minimum per design, free digital mockups usually within 12 hours and production after approval. For a starting point, visit the free mockup quote or browse the embroidered patches hub.
Frequently asked questions
What are 3D embroidered patches?
3D embroidered patches use foam beneath selected stitched areas to create a raised logo, letter or shape. The rest of the patch can remain flat, which gives the design contrast. They are commonly used on caps, jackets, bags, uniforms, club clothing and Velcro panels.
What is the minimum order for 3D embroidered patches?
The minimum order is 5 pieces per design. Different names, wording or artwork may count as separate designs, so confirm the design quantity when requesting a quote from The Customized Patches.
How quickly can I see a mockup?
The Customized Patches usually sends a free digital mockup within 12 hours. This allows you to check the raised section, size, colours, border and backing before approving the order. Production starts only after approval.
Can 3D embroidered patches go on nylon jackets?
They can be used on nylon jackets, but the fabric and backing need to be considered first. Nylon shells can be light, slippery or coated, so sew-on attachment may be more suitable than relying on iron-on adhesive. Send a garment photograph when asking for a mockup.
Are 3D embroidered patches better than printed patches?
Neither is automatically better. 3D embroidery suits bold shapes, short lettering and tactile branding. Printed patches are usually better for gradients, photographs, detailed illustrations and small information. Compare the artwork and garment before choosing; our guide to The Difference Between custom embroidered patches UK and printed patches, Explained covers the main differences.
Which backing should I choose for a 3D patch?
Sew-on backing is often suitable for heavy-use jackets, biker vests, wool garments and school blazers. Iron-on can work on compatible fabrics when applied correctly, but it may peel after a dryer cycle if the heat or fabric is unsuitable. Velcro is useful for removable team, equipment or operational panels. The correct choice depends on the garment and how the patch will be used.
Ready to produce custom patches for your UK team or brand?
GET A FREE MOCKUP