Top 10 Uses for 3D embroidered patches in 2026
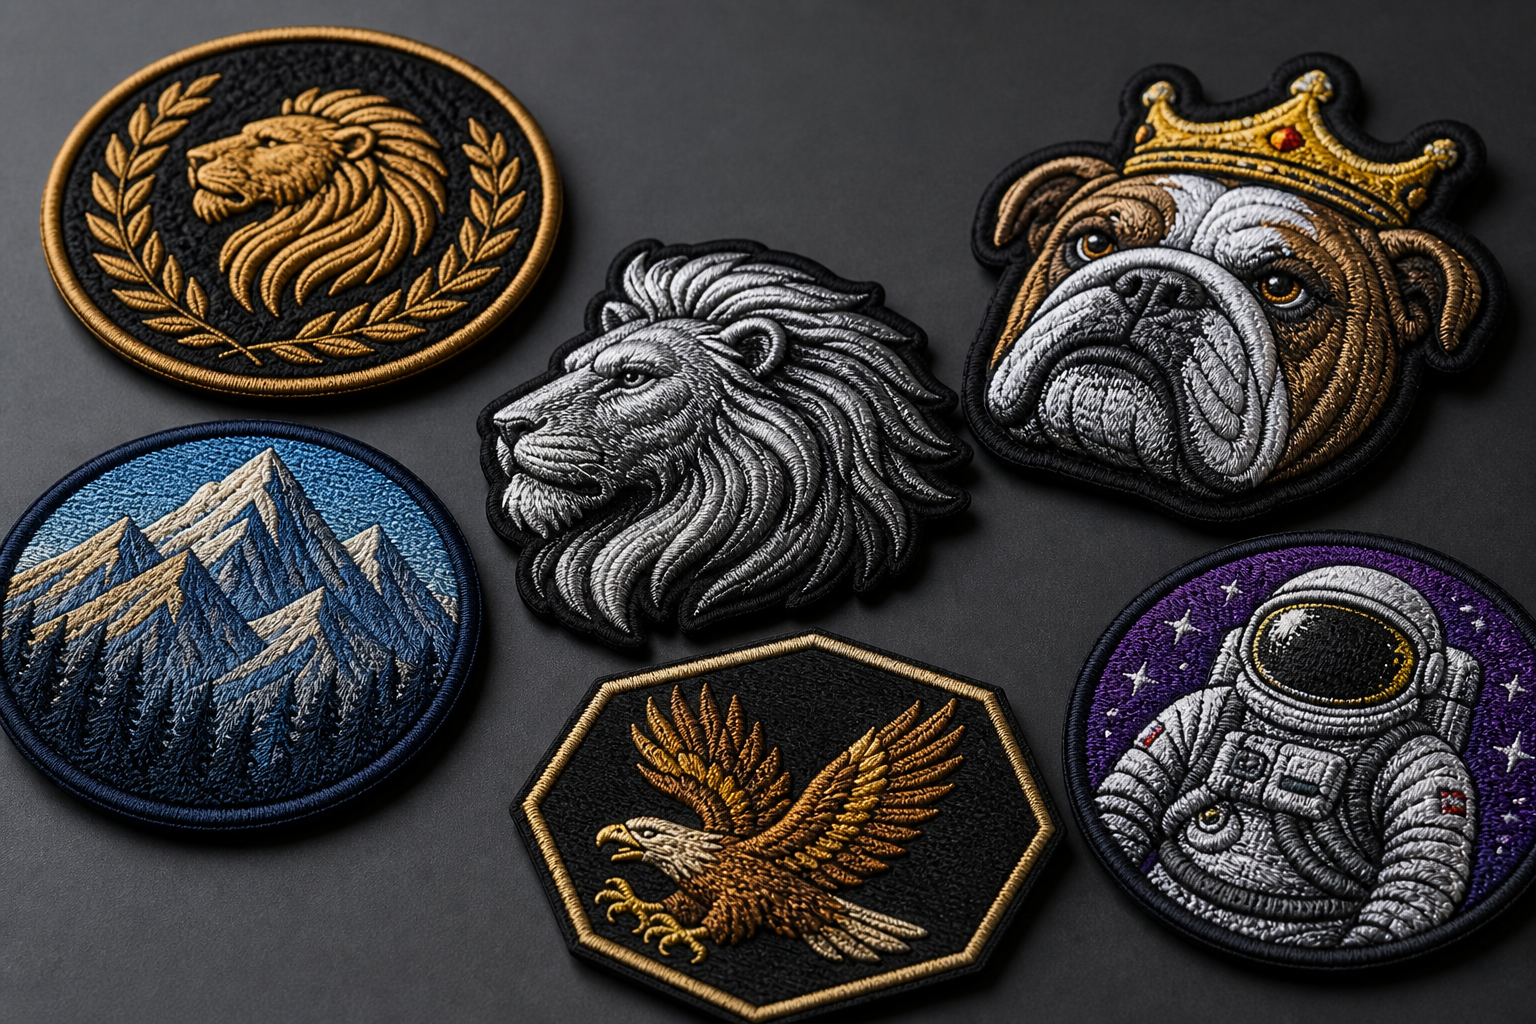
3D embroidered patches are raised embroidered badges made with foam beneath selected stitched areas, giving logos, lettering and symbols a visible three-dimensional finish. In the UK, teams, clubs, brands and businesses use them on caps, jackets, workwear, bags and uniforms where texture and strong shelf or garment presence matter.
Key takeaways
- 3D embroidered patches suit bold logos, initials, mascots and short lettering that benefit from raised texture.
- They work particularly well on caps, outerwear, uniforms, team kit, bags and Velcro panels.
- A 5-piece minimum applies per design, and production begins only after the artwork and mockup have been approved.
- The Customized Patches usually provides a free digital mockup within 12 hours so you can check size, thread and backing before ordering.
3D embroidered patches are most useful where a logo, word or emblem needs to stand proud of the garment rather than sit completely flat. In 2026, UK football teams, brands, clubs, hospitality businesses, cadet units and workwear suppliers are using them on caps, jackets, uniforms, bags and removable Velcro panels.
The best result comes from choosing a simple design with enough space for the raised foam and stitching to read clearly. The Customized Patches has a 5-piece minimum per design, provides a free digital mockup usually within 12 hours, and produces only after approval.
What makes 3D embroidered patches different?
A standard embroidered patch is stitched directly across its surface. A 3D version adds foam under selected areas, then stitches over the foam to create height. The border and background can remain flat while a letter, stripe, mascot feature or central mark is raised. That contrast is what makes the design catch the light and feel different in the hand.
This method is not a way to rescue an over-detailed logo. Tiny wording, narrow gaps and intricate illustrations can disappear once foam, thread and an outer border are added. A good production file separates the raised areas from the flat areas and keeps text large enough to sew cleanly.
| Option | Surface | Good for | Main trade-off |
|---|---|---|---|
| 3D embroidered patches | Raised foam-backed stitching on selected areas | Bold logos, initials, caps, club marks and premium merchandise | Small detail and long text may need simplifying |
| Flat embroidered patches | Thread stitched level across the patch | Crests, detailed badges, uniforms and traditional club designs | Less height and texture |
| Woven patches | Fine woven surface with a flatter finish | Small lettering, gradients and detailed artwork | Less tactile than embroidery |
| Printed patches | Ink printed onto the patch surface | Photographic detail, fine shading and complex artwork | Flatter appearance and less stitched texture |
| PVC patches | Moulded rubber-like raised surface | Outdoor kit, workwear, tactical designs and waterproof-style applications | Different look and feel from thread |
Printed is flatter; that is the point. It can preserve a fine illustration that would be difficult to stitch. Woven can also be the better choice for small lettering. For a useful side-by-side decision, see 3D embroidered patches vs flat embroidered patches: Which Is Right for Your Project? and compare the wider printed patches range before settling on a production method.
Choosing the right size, border and backing
Size should follow the garment, not just the artwork on your screen. A 2-inch badge may work on a chest pocket but look lost on the back of a wool coaches jacket. A 3D logo on a cap usually needs enough width for the raised section to show without forcing the crown to distort around it.
Most customers choose a merrowed or stitched border around the edge. A merrowed crest gives a traditional sports and uniform appearance, while a clean cut edge can suit a modern brand mark. The border colour should contrast with the garment and should not be so narrow that it vanishes beside the raised foam.
- Use sew-on backing for permanent attachment to cotton, denim, wool and many workwear fabrics.
- Use iron-on backing for suitable garments that will not face repeated high-heat washing or rough abrasion.
- Use Velcro when a unit, team or business needs to move the patch between jackets, bags or kit panels.
- Ask about the garment before choosing adhesive. Nylon shells, coated rainwear and textured fleece can make iron-on attachment unreliable.
- Keep important wording away from the outer edge so it is not crowded by the border.
We have seen iron-on patches peel after a dryer cycle, especially where the garment was washed hot or the adhesive did not bond properly to a nylon shell. For clubs and businesses that need a repeatable result, the Custom embroidered patches UK Sizing and Backing Options Explained guide covers the practical choices in more detail.
1. Football, rugby and sports team kit
Sports clubs are one of the clearest uses for 3D embroidered patches. A raised club initial, animal mascot, ball symbol or short team name gives training jackets, caps and supporter merchandise a strong identity without needing a large full-colour print.
For a football club, the patch might sit on a presentation jacket, coach's cap or kit bag rather than the match shirt itself. Rugby clubs often use a bold raised initial on waterproof outerwear, while rowing, hockey and cricket teams can use a smaller badge on a blazer or club fleece. The artwork should be tested at the actual finished size, because a crest that looks clear at 6 inches may become cramped at 2.5 inches.
2. Caps, beanies and headwear
Raised embroidery is particularly effective on five-panel caps, snapbacks, trucker caps and structured baseball hats. The peak and crown are viewed at close range, so a short wordmark or simple icon can make a clear impression without covering the entire garment.
Headwear has limits. A very wide patch can wrinkle around the curve, and a tall raised design may feel bulky on a soft beanie. Start with the cap panel dimensions, then choose a patch that leaves a sensible margin around the seam. If the design needs a photograph, fine gradient or lengthy slogan, woven patches or printed patches may preserve more of the artwork.
3. Biker jackets and motorcycle club clothing
Biker vests and motorcycle jackets often use a combination of large back panels, chest marks and smaller rocker-style details. A raised centre emblem can add depth to a club design, particularly when the artwork uses a strong outline, limited colours and a short name.
Placement needs care. Leather, denim and heavy canvas can take sew-on patches well, but a thick raised badge may need more hand stitching around the border. A Velcro panel is useful for riders who change identifiers between garments or use the same patch on a jacket and a kit bag. See the biker and motorcycle club patches hub for related formats and layout ideas.
4. Clothing brands and streetwear drops
Independent clothing labels use 3D embroidered patches as a physical brand detail on overshirts, hoodies, caps, coach jackets and bags. Raised initials can make a small run feel considered without requiring a large front print. They also give customers a removable item that can be collected, swapped or attached to another garment.
The production decision should match the label's visual language. A thick raised monogram suits a workwear-inspired collection; a flat embroidered badge may be better for a heritage crest; and a leather patches option can suit a denim or motorcycle range. Keep the first design simple and use the mockup to check how thread colours sit against the actual fabric.
Not sure whether a raised area, flat embroidery or printed detail will suit your garment? Send the artwork and tell us what it will be attached to. You will receive a free digital mockup usually within 12 hours, and production starts only after you approve it.
GET A FREE MOCKUP5. Hospitality, cafés and food businesses
Restaurants, cafés, bars, breweries and mobile food businesses can use small raised patches on aprons, caps, overshirts and staff jackets. A short venue name, monogram or simple cup, bottle or fork icon often works better than a detailed full logo at this scale.
Hospitality clothing is washed frequently, so attachment matters as much as appearance. Sew-on is usually the sensible route for heavier aprons and jackets. Iron-on can be considered for suitable garments, but the care label, fabric composition and washing routine should be checked first. A patch that looks excellent on a display sample is not useful if it lifts after regular commercial laundering.
6. Trades, workwear and company uniforms
Builders, electricians, landscapers, mechanics and facilities teams need branding that can be recognised on jackets, gilets, polo shirts and tool bags. A raised company initial or compact symbol can add distinction to a standard uniform, particularly where a flat printed logo would blend into a busy garment.
Think about movement and contact. A patch on a sleeve may rub against walls or machinery, while one on a chest pocket can catch on harnesses. Heavy workwear usually favours sewn attachment. For high-contact clothing, the design should avoid fragile narrow projections and should have a border that protects the edge.
7. Cadet units, outdoor groups and associations
Cadet units, scouting groups, hiking clubs and other associations often need consistent badges for leaders, event teams or activity groups. A raised symbol can distinguish a commemorative badge or a special unit mark from the standard embroidered crest worn across the organisation.
Uniform rules should be checked before ordering. Some groups specify the location, size, thread colour and backing. Velcro works well for badges that must be removed before washing or reassigned between jackets, while sew-on backing is better for a permanent uniform position. A simple mockup can show whether the raised section remains legible beside existing badges.
8. School blazers, colleges and alumni merchandise
Schools and colleges can use raised patches for house teams, student societies, leavers' merchandise, sports squads and alumni clothing. A large initial, house animal or short year mark is more suitable than a detailed shield packed with tiny wording.
School blazers are often wool or a wool blend, which can take sewn patches neatly when the position is agreed in advance. A removable Velcro version may suit an activity jacket, but it can look less formal on a blazer. For a traditional crest with small text, compare 3D embroidery with chenille patches and flat embroidery before choosing.
9. Events, launches and promotional merchandise
A raised patch can turn an event logo into a useful keepsake rather than a disposable handout. Music events, product launches, conferences, charity challenges and community festivals can place the badge on caps, tote bags, bomber jackets or event crew clothing.
The design should be readable in photographs and at arm's length. Use the event name, year or a recognisable symbol, but avoid putting every sponsor on one small patch. If several logos must appear, separate them into a main patch and smaller supporting pieces. The 5-piece minimum per design makes small test runs possible, although larger quantities may be more suitable for a public event.
10. Retail packaging, bags and brand extras
Brands can add a patch to a rucksack, laptop bag, gym bag, wash bag or reusable packaging insert. A detachable Velcro badge can become part of the product, while a sew-on patch can be supplied as a separate brand extra for customers to attach themselves.
This use rewards a simple shape. A raised letter, icon or compact badge is easier to apply consistently than a large design with many colours. Bags made from coated nylon may not suit iron-on backing, and some synthetic fabrics can mark under heat. If water resistance and a moulded look are priorities, compare PVC patches with 3D embroidery rather than assuming thread is the only answer.
Artwork rules that prevent common 3D problems
The most reliable artwork has a clear hierarchy: one raised feature, a supporting flat background and a defined border. Use bold shapes and avoid relying on tiny gaps to separate colours. If a wordmark has thin lettering, increase the letter height or shorten the wording before the digitising stage.
- Send vector artwork where possible, or provide the highest-resolution logo available.
- Identify which parts should be raised rather than assuming every area will use foam.
- State the finished width and height in inches, not only the pixel dimensions of a screen image.
- List preferred thread colours, while allowing for a production recommendation if close shades are difficult to distinguish.
- Show the garment type, fabric and intended placement so the backing can be matched properly.
- Request a mockup before approving production, especially for curved caps, small lettering and multi-part crests.
A raised patch cannot reproduce every effect from a digital logo. Soft shadows, photographic shading and very fine outlines may need to be removed or converted into stronger shapes. The How to Design Artwork for custom embroidered patches UK That Production-Ready guide is useful if your file has not been prepared for stitching.
Name sew-on, iron-on or Velcro on the quote and include the garment material. We will show the proposed backing on a free digital mockup usually within 12 hours, so you can approve the correct version before production.
GET A FREE MOCKUPOrdering, approval and UK lead-time details
Start a quote with four details: the design, finished size, quantity and intended garment. Add the preferred backing and say whether the patch will be sewn on permanently or moved between items. A photograph of the garment is helpful for unusual materials such as waterproof nylon, coated canvas or thick fleece.
The Customized Patches accepts a 5-piece minimum per design. A free digital mockup is usually supplied within 12 hours, showing the proposed shape, colours, raised sections and general proportions. You can request changes before approval. Production begins only after the mockup and details have been approved, which prevents an unconfirmed interpretation of the logo being made.
- Send the artwork, quantity, size and garment information.
- Review the digital mockup, including the raised areas, border and backing.
- Confirm any changes and approve the final design.
- Production begins after approval, followed by dispatch for UK delivery.
- Check the patches against the agreed design before applying them to the garments.
Lead time depends on the design, quantity, backing and current production schedule, so it is sensible to allow room before a match day, product launch, school term or event. If you need several designs, list each one separately because the 5-piece minimum applies per design rather than to a mixed basket.
When another patch type is the better choice
3D embroidery is not automatically the right answer for every logo. Choose flat embroidery if the design is a formal crest with several stitched details. Choose woven if small wording and fine lines matter more than height. Choose printed if the artwork includes photographic detail, subtle shading or a long colour gradient.
PVC can be practical for outdoor and hard-wearing applications where a moulded surface is preferred. Chenille gives sportswear a soft, textured varsity appearance. The right choice depends on the garment, washing routine, artwork and the impression you want the badge to make. Our 3D embroidered patches: Everything UK Buyers Need to Know guide covers the material and ordering questions in greater depth.
Why UK customers use a mockup before ordering
A screen logo does not show how a raised patch will sit on a cap seam, blazer pocket or curved jacket panel. The mockup gives you a chance to check the visual weight, wording, border, colours and placement before any production work starts.
It also gives a team, manager, buyer or client something specific to approve. That matters when one person supplies the artwork and another person is responsible for the uniforms. A clear approval record reduces avoidable changes later and helps keep repeat orders consistent.
Final decision: is 3D embroidery suitable for your project?
Choose 3D embroidered patches if your design has a bold central mark, short lettering or a simple mascot that will benefit from height and texture. They are particularly effective on caps, jackets, teamwear, workwear, bags and clothing brands where the badge needs to be noticed at close range.
Before ordering, confirm the finished size, garment fabric, backing, quantity and washing conditions. Keep the design clear, use the free mockup to check the raised sections, and remember that The Customized Patches produces only after approval. For a broader starting point, visit the embroidered patches hub or request a free mockup quote.
Frequently asked questions
What are 3D embroidered patches used for?
3D embroidered patches are used for bold logos, initials, mascots and short wording on caps, football and rugby kit, biker jackets, school blazers, hospitality uniforms, workwear, bags and branded merchandise. The raised foam section gives selected parts of the design visible height.
What is the minimum order for 3D embroidered patches?
The minimum order is 5 pieces per design. If you need three different logos, each design is assessed separately, so the minimum would normally be 5 of each design rather than 5 mixed patches.
How quickly can I see a 3D patch mockup in the UK?
The Customized Patches usually provides a free digital mockup within 12 hours. The mockup should be reviewed for size, colours, raised areas and backing. Production starts only after the design and details have been approved.
Can 3D embroidered patches go on nylon jackets?
They can be suitable for nylon jackets, but backing and attachment need checking first. Iron-on adhesive may not bond reliably to coated or waterproof nylon, particularly after washing. Sew-on or Velcro is often more suitable, depending on the jacket and intended use.
Are 3D embroidered patches washable?
They can be washed when properly attached, but the garment care label and backing type matter. Sew-on patches are generally dependable for regular use. Iron-on patches can lift after high heat or dryer cycles, so avoid assuming that every patch and garment combination will behave the same way.
Should I choose 3D embroidery or printed patches for a detailed logo?
Choose 3D embroidery for a simple, bold logo where raised texture is part of the design. Choose printed patches when photographic detail, fine shading, small text or gradients are essential. A free mockup can help compare the two approaches before production, and the The Difference Between custom embroidered patches UK and printed patches, Explained guide gives further comparison advice.
Ready to produce custom patches for your UK team or brand?
GET A FREE MOCKUP