
A Step-by-Step Guide to Ordering puff embroidery patches UK
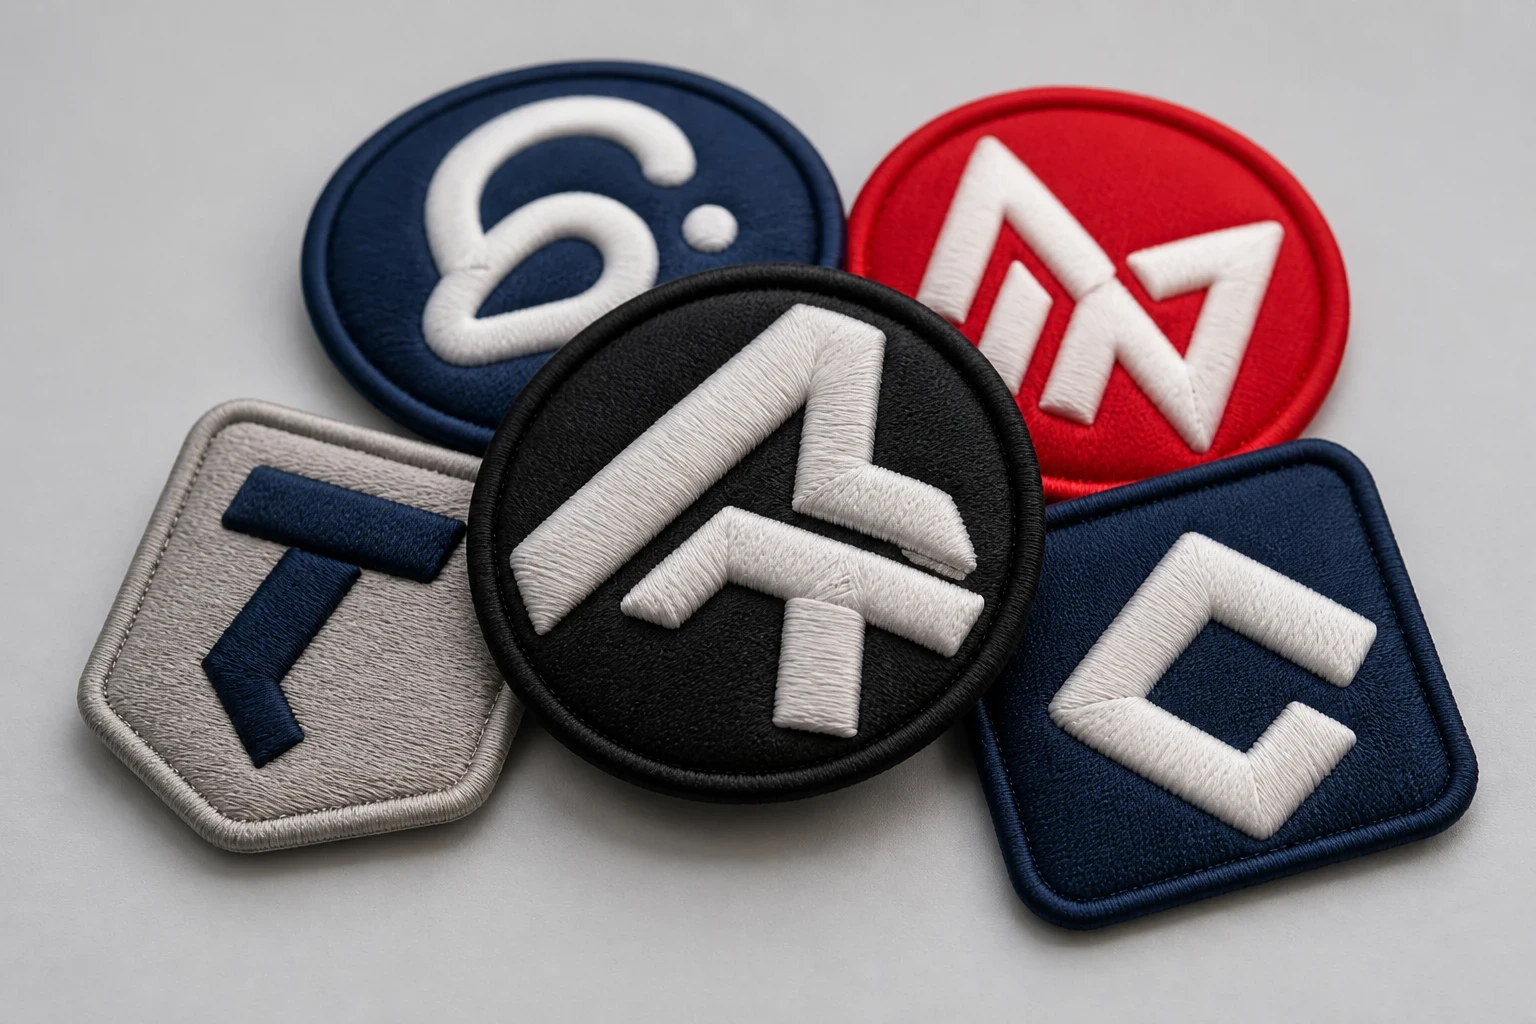
Puff embroidery patches UK are raised embroidered badges made with foam beneath selected stitched areas, giving logos, lettering and crests a 3D finish. To order, prepare clear artwork, confirm size, thread colours, backing and quantity, review a digital mockup, then approve production. The Customized Patches has a 5-piece minimum per design.
Key takeaways
- Puff embroidery patches use foam under selected stitching to create a raised 3D surface.
- The Customized Patches has a 5-piece minimum per design, with quantity counted separately for each design.
- A free digital mockup is usually supplied within 12 hours, and production starts only after approval.
- Backing, garment fabric, lettering size and wash conditions should be agreed before the order is produced.
Ordering puff embroidery patches UK normally involves six decisions: artwork, raised areas, size, quantity, backing and garment use. Send your design, explain where the patch will go, review the free digital mockup and approve it before production. The Customized Patches has a 5-piece minimum per design, so a small club order can still be practical.
Puff embroidery is not simply flat embroidery made thicker. Foam is placed beneath selected stitched sections, then the excess is trimmed away so the chosen letters or shapes stand above the base. That gives a cap badge, football crest or clothing logo a raised surface, but it also means very fine detail and very small lettering need careful editing.
1. Decide if puff embroidery suits the garment and design
Start with the garment, not just the logo. A raised patch can work well on a football training jacket, heavyweight hoodie, workwear overshirt, varsity-style jacket, wool coaches jacket or structured cap. It can also give a hospitality polo a strong chest mark, although the polo fabric and laundering routine should be checked before choosing the backing.
Puff embroidery is strongest where the design has bold shapes and breathing room. Large initials, block lettering, a simple animal mark, a club abbreviation or a clean badge border can look clear. Tiny sponsor text, narrow script and detailed illustrations may lose definition when foam and thread are combined. The finished patch is tactile, but tactile does not mean every detail will remain readable.
Flat embroidery may be the better choice for a detailed merrowed crest, small text or a badge that will be viewed from a distance. Printed is flatter; that is the point. It can reproduce gradients, photographic detail and very fine lines without trying to build height. You can compare the main options through Puff embroidery patches UK vs flat embroidered patches: Which Is Right for Your Project? before sending the quote.
| Patch type | Surface and appearance | Good choice for | Main trade-off |
|---|---|---|---|
| Puff embroidery | Raised stitched sections with foam underneath | Bold lettering, initials, caps, streetwear, team badges | Small detail and narrow lettering need simplification |
| Flat embroidered | Stitched surface without a raised foam layer | Traditional crests, uniforms, names and detailed line work | Less height and texture |
| Printed | Ink or printed artwork on a flatter patch surface | Gradients, photographs, fine illustrations and colour variation | Less tactile depth than embroidery |
| Woven | Tightly woven flat face with clean small lettering | Fine text, labels and compact designs | Does not give the same raised puff effect |
| PVC | Moulded rubber-like raised surface | Outdoor-style branding, bags, tactical kit and wet-use applications | Different look and feel from thread |
There is no universally best patch method. A football club may use puff embroidery for a bold initials badge on a jacket, flat embroidery for the playing shirt crest and printed patches for a sponsor panel with a photographic mark. If you want to compare a wider range of surfaces, see the embroidered patches hub and the guides to woven patches and printed patches.
2. Prepare artwork that can be embroidered cleanly
Send the clearest version of the design you have. An SVG, PDF, AI or other vector file is helpful because the artwork can be inspected at different sizes. A sharp PNG or JPEG can also be used to prepare a quote and mockup. A phone photograph of a paper sketch is useful for explaining the idea, but it may need redraw work before production.
Mark the parts that should stand proud
Puff does not have to cover the whole patch. Many effective designs use a flat embroidered base with raised initials, a central icon or a word across the middle. Tell us which parts you want raised, or ask for a recommendation if you are unsure. A raised border can work, but a very narrow border may not have enough room for a clean foam edge.
- Use bold letter shapes rather than thin hairline fonts.
- Keep gaps between letters and shapes wide enough for thread and foam.
- Avoid placing tiny wording inside a raised section.
- Tell our team which colours are essential and which can be matched closely.
- Supply the exact spelling of names, club titles and sponsor wording.
- Separate versions of the design if the order contains different names or colourways.
The most common artwork problem is asking for a very small patch while keeping a large, complicated logo. A 2-inch-wide patch cannot retain the same detail as a 4-inch chest patch. The answer may be a simplified version, a wider patch, flat embroidery for the detail or a different construction altogether. The 3D embroidered patches Sizing and Backing Options Explained guide covers the same size decisions in more detail.
3. Choose the patch size in inches
Measure the area where the patch will sit and state the intended finished width and height in inches. For a chest logo on a polo or jacket, measure across the usable panel rather than guessing from the full garment. For a sleeve, check the seam, cuff and arm movement. For a cap, remember that the curved front can distort a wide design.
A team badge may need to sit beside a manufacturer logo, while a biker vest may have a large back panel with separate top and bottom rockers. A school blazer has less room and usually needs a modest chest or sleeve badge. A cadet unit may require consistent positioning across several sizes of uniform. These details affect both the dimensions and the most practical backing.
| Common placement | Typical starting point | What to check |
|---|---|---|
| Cap front | About 2 to 4 inches wide | Curve, crown height and whether the design is too tall |
| Polo or work shirt chest | About 3 to 4 inches wide | Seams, buttons, pocket position and wash routine |
| Football or club jacket | About 3 to 5 inches wide | Existing crest, zip, fabric stretch and player sizes |
| Sleeve | About 2 to 3 inches wide | Arm movement, cuff and seam placement |
| Biker vest back | Based on the full available panel | Top and bottom rockers, curved edges and surrounding patches |
These are starting points, not fixed rules. A narrow wordmark may need more width, while a compact emblem may work at a smaller size. The mockup should show the proposed dimensions so you can judge the balance before approval. Do not approve a design based only on a screen preview; place a ruler beside the garment if the exact scale matters.
4. Choose thread colours and the patch edge
Give the production team the brand colours, a Pantone reference if you have one, or a clear visual sample. Thread has its own surface and sheen, so an exact on-screen colour match is not always possible. Strong contrast normally gives better readability, especially on a dark jacket or navy school blazer.
The edge also changes the appearance. A merrowed edge gives a traditional overlocked border and suits many club, school and uniform badges. A laser-cut or clean-cut edge can suit a sharper modern outline, depending on the shape and material. If your badge has points, cut-outs or an unusual silhouette, mention that at quote stage rather than assuming every edge will be treated in the same way.
Build contrast into the design
- Use light thread on dark fabric or a dark outline around light lettering.
- Give raised lettering a contrasting border where the design allows it.
- Avoid putting mid-blue thread on a similar mid-blue garment.
- Check the patch against the actual garment colour, not only a white artboard.
- Keep sponsor and club colours separate if they must remain visually distinct.
For a hospitality company, a discreet tone-on-tone patch may be deliberate. For a youth football club, stronger contrast may be needed so the badge reads from the touchline. Both can be correct. The useful question is how the patch will be seen, washed and worn, rather than which colour combination looks most dramatic on a computer screen.
5. Select the backing for the garment
Backing is a functional decision. Sew-on is often the dependable option for nylon shells, thick jackets, wool coaches jackets and garments that will be washed regularly. It is also a sensible choice for biker vests and workwear where the patch may receive movement, friction or repeated cleaning.
Not sure whether your lettering needs more room or a flatter treatment? Send the artwork and the intended garment for a free digital mockup, usually within 12 hours, so you can compare the proposed size and raised areas before production.
GET A FREE MOCKUPIron-on is convenient for suitable cotton or blended garments, but it is not a universal answer. Heat, fabric coatings, seams and tumble-drying can affect the bond. It is common to see iron-on patches peel after a dryer cycle, particularly where the garment was not pressed at the correct temperature or the fabric was unsuitable. Sew-on or Velcro may be more appropriate for a frequently washed team kit.
Backing choices at a glance
| Backing | Best suited to | Points to confirm |
|---|---|---|
| Sew-on | Jackets, uniforms, nylon shells, wool coaches jackets and durable workwear | Stitching position, edge access and whether the garment can be sewn |
| Iron-on | Suitable cotton or blended garments where fixed placement is wanted | Fabric heat tolerance, pressing instructions and drying routine |
| Velcro | Removable badges, operational kit, panels and teams changing identifiers | Hook or loop side, panel dimensions and matching placement |
| Adhesive | Short-term display or lighter-use applications | Surface cleanliness, wear period and whether extra stitching is needed |
A Velcro panel deserves a separate check. A patch can be perfectly made but still sit badly if its hook or loop side does not match the panel on the garment. State whether the patch should carry hook or loop, and send a photo of the existing panel if possible. For alternatives, the embroidered patches hub includes common backing routes, while PVC patches may suit some outdoor or equipment applications better.
6. Confirm quantity and the 5-piece minimum
The Customized Patches produces orders from 5 pieces per design. That means five identical patches meet the minimum; five different names or five unrelated logos are normally treated as separate designs. Tell us how many of each version you need so the quote reflects the actual job.
Quantity can affect the unit price because the artwork setup and production work are spread across the run. A club ordering 25 identical badges is quoting a different job from a business ordering five versions with individual names. If you need a first small batch, start with the most useful quantity rather than ordering a large number that may not fit a revised uniform.
- List each separate design and its quantity.
- State if colour, wording, shape or backing changes between versions.
- Confirm whether spare patches are wanted for replacements.
- Tell us if several garments need different sizes of the same logo.
- Keep one approved artwork version for the whole order.
For teams, it helps to count the people who need a badge and add a small sensible allowance for new members or replacements. For a brand launch, count the garments, packaging inserts and retail stock separately. If the same badge will appear on caps and jackets at different sizes, treat those as separate specifications even if the artwork is similar.
7. Request the quote and free digital mockup
A useful quote request includes the artwork, finished size, quantity per design, thread colours, edge preference, backing, garment type and delivery postcode. Add a deadline if the patches are needed for a match, launch, event or uniform handover. This avoids a long email chain where important production details appear one at a time.
The Customized Patches usually provides a free digital mockup within 12 hours. It shows the proposed patch arrangement, colours, size and raised areas so you can check the idea before manufacture. A mockup is not a photograph of a finished patch and cannot show every physical thread effect, but it is the right stage for correcting spelling, proportions, backing and placement.
What to inspect on the mockup
- Read every letter, number and word at the proposed size.
- Check the width and height against the garment space.
- Confirm which areas are raised and which remain flat.
- Check the thread colours and outline contrast.
- Confirm the edge shape and corner treatment.
- Check whether the displayed backing matches your fitting method.
- Make sure the quantity and separate versions are correct.
If the mockup makes the design look crowded, ask for a revised version before approval. It is usually better to remove a small line of text, widen the patch or reduce the raised area than to receive a technically correct patch that is difficult to read. You can also compare the How to Choose the Right puff embroidery patches UK for Your Brand guide when the design needs to work across different garments.
8. Approve the specification before production
Production starts only after approval. Your approval should cover the final artwork, dimensions, quantity, colours, raised sections, edge, backing and delivery details. If several people are involved, nominate one person to give the final sign-off so our team is not working from conflicting replies.
Check the wording carefully. A missing apostrophe, incorrect club year or swapped colour can be obvious on the finished patch but easy to miss in a busy email thread. For a school blazer or cadet unit, also confirm whether the badge needs a specific position or whether the organisation has a uniform rule about sewn and iron-on applications.
- Final artwork version attached or clearly identified.
- Finished width and height stated in inches.
- Quantity confirmed for each design.
- Raised areas identified.
- Backing and edge confirmed.
- Garment type and fitting method supplied.
- Delivery address and required date supplied.
- Approval given in writing.
9. Allow time for production and UK delivery
Lead time depends on the design, quantity, backing, artwork changes and current production schedule. The free mockup is usually supplied within 12 hours, but mockup speed is not the same as finished-patch delivery time. Ask for the expected production and UK shipping timetable when you request the quote, especially before a tournament, trade show, wedding, launch or school term.
Build in time for approval and garment fitting. A batch of simple identical patches is usually easier to prepare than a set of many personalised versions. A large biker back patch with curved rockers, a detailed merrowed crest or a Velcro order with several identifiers may need more checking than a small one-colour chest badge.
If you are ordering from Scotland, Wales, Northern Ireland or an English region outside a major city, provide the full postcode and event date at the start. The UK city pages can help you find location-specific information, but the production requirements remain the same across the United Kingdom: clear artwork, confirmed specifications and approval before manufacture.
Name sew-on, iron-on or Velcro on the quote and include the garment fabric. We will show the proposed backing on a free digital mockup, usually within 12 hours, so production follows the approved specification.
GET A FREE MOCKUPCommon mistakes with puff embroidery patches UK orders
Most avoidable problems happen before the embroidery machine runs. Customers sometimes approve a patch without checking the actual garment size, ask for tiny lettering in a raised section or assume iron-on will work on a coated nylon shell. These are specification problems, not simply production problems.
- Ordering one broad size for caps, sleeves and jacket chests without checking each placement.
- Using a thin script font because it looks good on a large digital logo.
- Putting too many colours and details into a small patch.
- Forgetting that each variation counts as its own design for the 5-piece minimum.
- Choosing iron-on for a garment that will be tumble-dried or heavily washed.
- Failing to confirm the hook or loop side for a Velcro panel.
- Approving the mockup without checking spelling and numbers.
- Leaving the delivery date until after production has started.
- Expecting puff embroidery to reproduce photographic shading like a printed patch.
The practical fix is simple: state the use, measure the placement, review the mockup and ask questions before approval. The guide Common Mistakes to Avoid When Ordering puff embroidery patches UK is useful if you are collecting specifications from several people.
Puff embroidery compared with other UK patch options
Puff embroidery is chosen for height and texture, but a different patch method can be more suitable for the same brand. A pub group may want a raised beer mug on a cap, while the care label or product information on the same range may need a flat woven patch. A motorcycle club may prefer a traditional embroidered back patch, whereas a rainwear brand may favour PVC.
The 3D embroidered patches range is the closest comparison because both methods create depth. Chenille patches have a soft, looped surface that suits varsity lettering and large simple motifs. Leather patches give a different natural material impression, while biker and motorcycle club patches cover formats often used on vests and jackets.
| Your priority | Option to consider | Why |
|---|---|---|
| Raised block letters or initials | Puff embroidery | Foam creates height under selected stitched areas |
| Detailed traditional crest | Flat embroidered patch | More suitable for fine stitched detail without foam |
| Small lettering and clean compact labels | Woven patch | Tightly woven surface can keep small details flatter and clearer |
| Gradients or image-like artwork | Printed patch | Ink can reproduce tonal changes without stitching every area |
| Weather-facing equipment branding | PVC patch | Moulded construction may suit some wet or hard-wearing uses |
Choosing another method is not a failure of the puff design. Sometimes printed is flatter; that is the point. The right choice depends on the artwork, the garment, how the patch will be washed and the surface you want customers or members to feel.
A practical approval checklist for teams and businesses
Before approving an order, ask someone who has not worked on the artwork to read the mockup. Fresh eyes often spot a missing letter, uneven abbreviation or crowded border. If the patch will be fitted by someone else, include the backing and care information with the batch.
- The design is the correct version and has no unapproved changes.
- The raised areas are intentional and readable at the finished size.
- The patch dimensions are in inches and fit the planned garment.
- The edge is suitable for the silhouette.
- The backing matches the fabric and washing conditions.
- The quantity meets the 5-piece minimum for every design.
- The mockup colours have been checked against the garment.
- The delivery date allows time for approval and fitting.
- The person approving the order has authority to sign it off.
Keep the approved mockup with the purchase order. It gives the team a shared reference if the patches are handed to a kit manager, uniform supplier, embroidery shop or event organiser. It also makes repeat orders easier because the intended size, colour and backing are recorded.
Frequently asked questions about puff embroidery patches UK
The questions below cover the points raised most often by UK clubs, brands, schools and businesses before they place an order. If your garment or artwork is unusual, include a photograph with the quote request so the specification can be checked properly.
Frequently asked questions
What are puff embroidery patches UK?
Puff embroidery patches UK are embroidered badges with foam beneath selected stitched areas. The foam raises bold letters, initials, borders or symbols above the base, creating a 3D surface. They are often used on caps, jackets, hoodies, club clothing, workwear and branded garments where a tactile raised mark is wanted.
What is the minimum order for puff embroidery patches?
The Customized Patches has a minimum order of 5 pieces per design. If the wording, colour, dimensions, shape or backing changes, the versions may need to be treated as separate designs. Confirm the quantity for each version when requesting a quote.
How quickly can I receive a free mockup?
The Customized Patches usually provides a free digital mockup within 12 hours. The mockup is supplied for checking artwork, size, colours, raised sections and backing. Production starts only after you approve the final mockup and specification, so finished-patch delivery time is separate from mockup time.
Can puff embroidery be used on a nylon jacket or wool coaches jacket?
Yes, the patch can be made for those garments, but sew-on backing is often worth considering for nylon shells and wool coaches jackets. The fabric, lining, seams, washing routine and available stitching area should be checked. Iron-on is not automatically suitable for coated nylon or garments exposed to high heat.
Can small lettering be made as a puff embroidery patch?
Small lettering can be possible, but very thin or tightly spaced text may lose clarity because the foam and stitching need room. A wider patch, heavier font, fewer words or flat embroidery may produce a clearer result. The digital mockup is the right stage to check this before production.
Is puff embroidery better than printed or flat embroidered patches?
It depends on the design and use. Puff embroidery is suited to raised bold shapes and tactile branding. Flat embroidery is often better for detailed crests, while printed patches suit gradients, images and very fine artwork. Printed is flatter; that is the point. Garment fabric, washing, placement and the desired appearance should guide the choice.
Ready to produce custom patches for your UK team or brand?
GET A FREE MOCKUP