
3D embroidered patches Sizing and Backing Options Explained
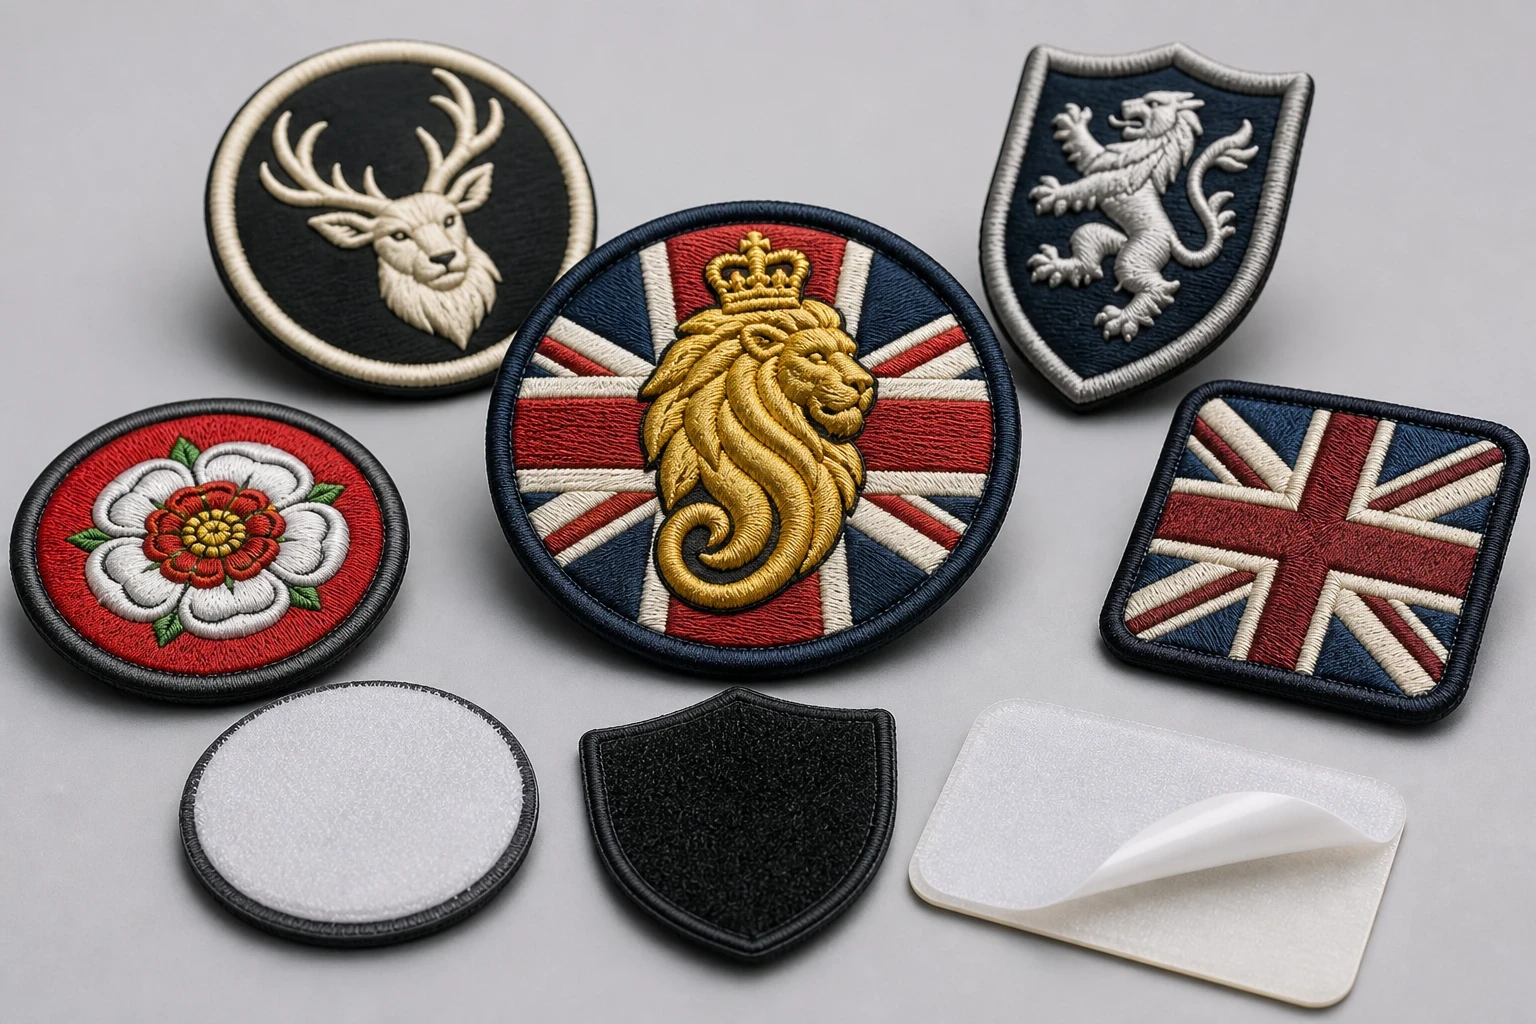
3D embroidered patches use raised foam beneath selected stitched areas to create a tactile, high-impact finish. Most logos work well between 2.5 and 4 inches wide, but the correct size depends on the garment and detail level. Choose sew-on for maximum security, iron-on for straightforward clothing application, or Velcro for removable team and tactical garments.
Key takeaways
- Most 3D embroidered patches sit comfortably between 2.5 and 4 inches wide, although the garment and artwork should decide the final measurement.
- Raised foam works best on bold lettering, simple logos and clear shapes; very fine detail can become crowded at small sizes.
- Sew-on backing gives the most dependable long-term hold, while iron-on is convenient and Velcro is useful where patches need to be removed.
- The Customized Patches has a 5-piece minimum per design and normally sends a free digital mockup within 12 hours before production begins.
3D embroidered patches usually work best when they are sized for the garment first and the artwork second. For many UK jackets, polos and team tops, a width of about 2.5 to 4 inches gives the raised foam and stitched border enough room to read clearly without making the garment look crowded. The right backing then depends on whether the patch is staying on permanently, being washed often, or moved between garments.
The Customized Patches supplies these patches across the United Kingdom with a 5-piece minimum per design. You receive a free digital mockup usually within 12 hours, and production starts only after you approve the size, colours, raised areas and backing. That approval stage matters: a patch that looks balanced on a large jacket may be too dominant on a polo sleeve or too detailed for a small cap.
What makes 3D embroidered patches different?
The raised effect comes from foam placed beneath selected embroidered sections. The needlework covers the foam, leaving areas such as bold initials, a large brand mark or a simple number standing above the base fabric. It is not a fully sculpted badge; the height is used selectively so the patch remains readable and practical to wear.
This makes 3D embroidery particularly useful for sportswear, caps, streetwear, biker clothing, hospitality polos and strong logo marks. A football club might raise its initials while keeping the crest outline flat. A brewery could raise one large letter on a work jacket. A small business may use a raised icon on staff polos while keeping its phone number flat or leaving it off entirely.
The trade-off is detail. A printed patch can reproduce a small photograph, gradient or fine illustration because ink sits flat across the surface. That flatness is not a fault; printed is flatter, and that is the point. If the artwork contains tiny writing, several close colours or hairline strokes, a printed patch or woven patch may communicate it more reliably.
Raised areas should have a clear job
Ask which part of the logo needs attention from a short distance. That might be the club initials, a mascot, a crown, a large number or one word in a business name. Raising every part of a complicated crest can make the surface busy and can leave narrow foam sections vulnerable to catching.
- Good candidates include bold block letters, simple icons, wide stripes, large numbers and uncomplicated symbols.
- Less suitable candidates include tiny slogans, thin script, intricate line drawings and very small internal gaps.
- A flat embroidered border normally gives the raised section a cleaner edge and helps the patch keep its shape.
- If the logo has several small elements, consider making the patch larger or simplifying the artwork before production.
How to choose the correct patch size
Patch size is quoted by the finished outside measurement, including the border. A 3-inch wide badge is not a 3-inch logo with extra fabric added afterwards. This is worth checking if you are replacing an existing badge, matching a supplier sample or fitting a patch beside a pocket.
For a first estimate, measure the available area on the actual garment. Lay a ruler over the chest, sleeve or back panel and photograph it from the usual viewing distance. Screens make artwork look deceptively large, particularly if the design file is displayed at 100 per cent on a laptop.
| Typical finished width | Common UK application | Advantages | Points to check |
|---|---|---|---|
| 1.5–2 inches | Small cap mark, pocket detail or sleeve tab | Discreet and easy to place on compact garments | Fine lettering may not read; raised areas need to stay simple |
| 2.5–3 inches | Polo chest, shirt pocket or junior teamwear | Balanced size for many logos and initials | Check that the full border clears seams and pockets |
| 3–4 inches | Adult football tops, work jackets and club sleeves | Good visibility without taking over the garment | Confirm the design will not cover a zip, sponsor mark or pocket |
| 4–6 inches | Back panel, large jacket badge or statement brand mark | Allows stronger lettering and larger raised shapes | Heavier appearance and more fabric movement; check curved surfaces |
| Over 6 inches | Large back design or display garment | Suitable for bold graphics viewed from a distance | May need a revised layout, extra border planning and careful placement |
There is no universal best size. A 3-inch round merrowed crest may suit a blazer, while a long horizontal name patch could need 4.5 inches of width but only 1.5 inches of height. We look at both measurements, the border, the foam areas and the garment rather than applying one size to every order.
Size examples from real garment types
Football clubs often choose a chest or sleeve patch around 3 to 4 inches wide. The crest has to sit beside a sponsor or manufacturer mark, so a few millimetres can affect the whole shirt layout. For youth kits, reducing the badge slightly may prevent it looking oversized, but the lettering still needs to be tested at the final size.
Cadet units and uniformed groups tend to need clear, disciplined shapes that hold up on a sleeve or outer layer. A bold insignia can work well in 3D, while a detailed rank system may be better as flat embroidery or a separate embroidered patch. School blazers need particular care because the wool can show needle marks if a patch is repeatedly moved.
Hospitality polos usually benefit from a compact chest badge that does not pull the fabric. A raised logo can be effective, but a large foam area may feel stiff on a thin polo. Nylon shells, lightweight gilets and waterproof-style jackets can also need a sewn application rather than relying on adhesive alone.
Backing options: sew-on, iron-on and Velcro
Backing is not a minor finishing choice. It affects application, washing, comfort, replacement and how confidently the patch stays attached. A football shirt washed every week has different needs from a display jacket, a removable security garment or a school blazer worn through the winter.
| Backing | Best suited to | Main benefit | Trade-off or warning |
|---|---|---|---|
| Sew-on | Jackets, wool coaches, uniforms, heavy workwear and long-term club clothing | Most dependable attachment when stitched around the border | Takes longer to apply and needs access to the reverse of the garment |
| Iron-on | Suitable cotton, polyester and smooth garments where quick application matters | Fast and tidy application without visible hand stitching | Heat, washing and fabric choice affect the bond; an iron-on that peels after a dryer cycle is a common failure |
| Velcro hook backing | Tactical clothing, removable team identifiers, bags and panels | Allows patches to be removed, swapped or stored | Needs a matching loop panel and can catch on other fabrics |
| Plain adhesive or temporary adhesive | Short-term display, packaging or controlled indoor use | Simple positioning for temporary purposes | Not the first choice for repeated washing, outdoor wear or heavy movement |
Sew-on backing for permanent use
Sew-on is usually the safest option for a garment expected to last. It suits nylon shells, wool coaches, denim, leather-style jackets and thick uniforms where heat application is risky or ineffective. A neat stitch around the border gives the patch mechanical support rather than asking adhesive to carry the whole load.
For biker and motorcycle club garments, the patch is often placed on a substantial vest or jacket and subjected to wind, flexing and repeated handling. A firm sew-on application is normally more sensible than iron-on. You can see related garment considerations in our guide to biker and motorcycle club patches.
Iron-on backing for convenient application
Iron-on backing can be useful for a clean, quick application on a suitable garment. It is often considered for cotton sweatshirts, polyester teamwear and selected polos. The surface must be clean and smooth, and the application needs enough heat and pressure for the adhesive to bond properly without scorching the fabric.
The label on the garment matters. Some nylon shells cannot tolerate the required heat, and waterproof coatings may prevent a reliable bond. Tumble drying is another risk. An iron-on patch that looks secure on day one can lift at the corners after a hot dryer cycle, so frequent-wash garments may benefit from extra stitching around the edge.
Not sure whether your logo needs more width or less detail for a raised finish? Send the artwork and the garment placement to The Customized Patches for a free digital mockup usually within 12 hours, then compare the size before production.
GET A FREE MOCKUPVelcro for removable patches
Velcro is practical for organisations that issue one garment with several identifiers. A team can change a player number, a unit can change a role tab, or a business can remove a campaign mark from a reusable jacket. The garment needs a suitable loop panel, and the patch dimensions should match that panel rather than being chosen independently.
Velcro also adds thickness behind the patch. That may be perfectly acceptable on a tactical vest or bag, but it can feel bulky on a fitted polo or blazer. If the patch will never be removed, sew-on may look flatter and be more comfortable.
Matching the backing to UK garments
The garment fabric is the production detail people most often leave out of a first quote. Saying “jacket” is not enough. A nylon shell, a wool coach jacket, a cotton hoodie and a polyester football top all behave differently under heat, stitching and washing.
- Nylon shells: favour sew-on unless the fabric and coating are confirmed as heat suitable. Avoid assuming an iron-on adhesive will bond to a waterproof surface.
- Wool coaches and school blazers: sew-on is generally the controlled choice. Position carefully because moving a stitched patch can leave visible needle holes.
- Cotton hoodies and sweatshirts: iron-on may be suitable, although a sewn edge can improve long-term security after frequent washing.
- Polyester football tops: the fabric can accept several options, but heat must be controlled to avoid shine, distortion or damage to printed sponsor marks.
- Velcro panels: specify the exact panel size and whether the patch should include hook backing or a matching loop section on the garment.
- Leather or imitation leather: check the material before choosing a backing. Heavy stitching and adhesive can behave differently from fabric applications.
A merrowed crest has a rounded, raised edge that frames the embroidery neatly, but it also takes up part of the overall measurement. On a small patch, a wide merrowed border can reduce the room available for the raised logo. If the design already contains a bold foam letter, a simpler stitched edge may give the artwork more breathing space.
If your garment is unusual, send a photograph of the placement area with a ruler beside it. That helps us spot seams, lining, pockets, curved panels and existing marks before recommending a finish. It is more useful than guessing from a logo file alone.
Design rules for raised foam embroidery
A production-ready file does not need to be complicated, but it must show what should be raised. Mark the foam areas clearly, supply the preferred colours and tell us if a section must remain flat. A clean vector file is helpful, although we can discuss suitable formats if the original artwork is a high-resolution raster image.
Keep small lettering realistic. If a business name has six words, squeezing it into a 2-inch badge rarely produces a useful result. Shorten the wording, remove secondary text or increase the patch size. The aim is a patch that can be identified on a moving person, not just a design that looks correct when enlarged on a monitor.
- Use bold sans-serif lettering for small raised words and initials.
- Leave enough space between letters so thread and foam do not close the gaps.
- Avoid very narrow strokes, tiny counters and delicate script in the raised section.
- Keep gradients and photographic shading out of the foam area; use flat colour blocks or consider a printed patch.
- Confirm the border shape, corner treatment and merrowed edge before production.
- State the finished width and height, not only the artwork canvas size.
- Show the intended garment and placement in the mockup so scale can be judged properly.
Raised embroidery is often strongest with contrast. A dark foam-backed letter on a lighter ground is easier to read than two near-identical shades. Metallic thread, neon colours and unusual brand colours can be discussed, but the final appearance depends on the thread range and the base fabric, so the mockup is the sensible point for checking the direction.
If the design needs a photograph, fine illustration or many colour changes, compare it with printed patches. If you want a thick, rubber-like badge for outdoor equipment, PVC patches may be a better match. For a soft, high-pile club emblem, chenille patches offer a different texture altogether.
3D embroidered patches compared with other patch types
Choosing 3D embroidery is mainly a question of visual effect, detail and garment use. A raised finish gives selected areas height and texture, while flat embroidery gives a more traditional stitched appearance. Neither is automatically better for every logo.
| Patch type | Surface and appearance | Best for | Choose another option if |
|---|---|---|---|
| 3D embroidered | Raised foam under selected stitched areas | Bold logos, caps, sportswear, strong initials and statement branding | The artwork relies on tiny text, gradients or fine illustration |
| Flat embroidered | Thread stitched level with the patch surface | Traditional crests, uniforms, school badges and detailed stitched marks | You specifically need a raised logo effect |
| Woven | Fine, flat woven detail with a smooth face | Small lettering, clean lines and detailed compact artwork | You want visible foam height or a tactile raised surface |
| Printed | Flat ink or printed colour across the surface | Photographs, gradients, highly detailed illustrations and large colour areas | You need a dimensional thread-led finish |
| PVC | Moulded rubber-like surface | Outdoor gear, bags, technical clothing and bold weather-resistant marks | You want the softer textile appearance of embroidery |
A hybrid approach can also work. Keep the fine information flat or printed and raise only the key icon. This avoids asking foam to reproduce details it cannot show cleanly. Our guide to The Difference Between 3D embroidered patches and flat embroidered patches, Explained covers the visual and practical distinction in more depth.
Quantities, pricing and ordering details
The Customized Patches has a 5-piece minimum per design. That means one approved artwork can be produced from five patches upwards; changing the size, wording, shape or backing may create a separate design specification. If a club needs three badge versions, ask for each version to be listed clearly rather than assuming they count as one design.
Pricing depends on the finished size, quantity, number of colours, stitch coverage, border, backing and any setup involved. A large raised patch uses more material and production time than a small badge. Velcro can add to the specification, and a complex shape may need more finishing than a simple rectangle.
Send the artwork, quantity, garment type, finished dimensions, backing preference and delivery postcode with the quote request. If you do not know the final size, give us the available space and a photograph. We can then recommend a workable starting point rather than quoting an impressive-looking size that does not fit.
The approval and lead-time process
- Share the artwork and explain the garment, placement, quantity and preferred backing.
- Review the quotation and confirm any alternative options, such as sew-on versus iron-on.
- Receive the free digital mockup, usually within 12 hours.
- Check the finished dimensions, raised areas, border, colours and application method.
- Approve the mockup or request changes. We produce only after approval.
- Production and UK-wide shipping are arranged against the approved specification.
The 12-hour mockup is a design approval stage, not a promise that finished patches will be delivered in 12 hours. Production time depends on the order details, quantity and current schedule. If you have a kit launch, club presentation, trade event or uniform deadline, mention the date at quotation stage so the practical options can be checked.
Name the backing on the quote. “Patch for jacket” leaves too much open to interpretation. “3.5-inch sew-on patch for a nylon shell” or “2.75-inch Velcro patch for an existing loop panel” gives our team something measurable to work with.
Name sew-on, iron-on or Velcro on the quote and tell us what garment will carry the patch. We will show the correct size and backing on a free digital mockup usually within 12 hours, with production starting only after your approval.
GET A FREE MOCKUPCommon sizing and backing mistakes
Most avoidable problems happen before the patch reaches production. A customer sends a logo without its intended garment, chooses a size from a screen preview or assumes iron-on will work on every jacket. A short check at the start can prevent a batch that looks right digitally but fails in use.
- Ordering by artwork canvas size instead of finished outside dimensions.
- Using a small patch for a long business name and expecting every word to remain readable.
- Putting a large patch across a zip, pocket opening or curved sleeve seam.
- Choosing iron-on for a coated nylon shell without checking heat and adhesion suitability.
- Using Velcro without measuring the loop panel already attached to the garment.
- Raising fine lines that are too narrow to hold a clean foam edge.
- Assuming a school blazer, football shirt and work jacket can all use the same backing.
- Approving a mockup without checking the patch beside existing sponsor marks or embroidery.
- Changing the artwork after approval and expecting it to remain the same specification.
- Washing an iron-on patch at high heat or putting it through a dryer without following the application guidance.
The best correction is often simplification rather than adding more thread. Remove tiny text, enlarge the main mark, reduce the number of raised sections or switch the detailed part to printing. A patch does not need to show every part of a brand guideline to do its job well.
A practical recommendation by use case
For a football club crest, start around 3 to 4 inches wide, keep the raised effect on the central initials or mascot and use sew-on if the kit will be worn and washed heavily. If the badge is being applied to modern performance fabric, confirm the heat tolerance before choosing iron-on.
For a cadet or youth organisation, prioritise clear lettering and a controlled sleeve size. A compact flat embroidered badge may carry small ranks more clearly, while 3D embroidery can highlight a simple unit emblem. For school blazers, measure the chest or sleeve and choose sew-on with a careful permanent position.
For a hospitality or trades business, a 2.5 to 3.5-inch chest patch often gives a tidy result on a polo or overshirt. Raise the logo icon rather than the full contact details. If staff garments go through commercial laundering, discuss whether stitching around an iron-on base would provide useful extra security.
For a biker vest or club jacket, a larger back patch may carry the main identity while smaller front or sleeve patches handle role details. The fabric, lining and existing badges need to be considered together. On a removable tactical or event garment, Velcro can make more sense than a permanent stitch.
For a growing UK brand, choose a size that can be repeated across jackets, caps and bags without redesigning the identity each time. You may need two specifications: a larger back or chest badge and a smaller cap mark. Our guide to 3D embroidered patches for Small Businesses: A Practical Guide covers that sort of rollout.
Final checklist before approving your patch
Before approval, place the mockup beside the real garment or a photograph of it. Check the badge at the distance people will normally see it, not only at full screen size. Look for conflicts with seams, pockets, zips, sponsor marks and existing embroidery.
- Is the finished width and height stated clearly?
- Are the raised foam areas marked correctly?
- Does the smallest lettering remain readable?
- Is the border too wide for the available artwork?
- Will the chosen backing suit the garment fabric and washing routine?
- If using Velcro, does the patch match the existing loop panel?
- If using iron-on, can the garment accept the required heat?
- Has the quantity met the 5-piece minimum per design?
- Have you checked the delivery timing against the event or garment issue date?
- Has the final mockup been approved before production?
If you are still comparing materials, you can browse the wider range of embroidered patches or look at leather patches for a different garment feel. Customers in England, Scotland, Wales and Northern Ireland can send the same artwork and placement details for a UK-wide quote.
The sensible choice is the one that fits the garment, survives its use and keeps the important part of the design readable. 3D embroidered patches can give a logo genuine depth, but the effect works best when the size is controlled, the raised areas are selective and the backing matches the fabric.
Frequently asked questions
What size should 3D embroidered patches be?
Many 3D embroidered patches work well between 2.5 and 4 inches wide for polos, football shirts, jackets and sleeves. Small caps may need around 1.5 to 2 inches, while back patches can be larger. The final size should be checked against the garment, border and smallest lettering.
What is the best backing for 3D embroidered patches?
Sew-on is usually the most secure option for long-term use, heavy jackets, wool coaches, uniforms and nylon shells. Iron-on is convenient for suitable fabrics, but heat and washing affect the bond. Velcro suits removable patches and garments with existing loop panels.
Can 3D embroidered patches go on nylon jackets?
They can, but nylon requires care because heat may damage the fabric or coating and adhesive may not bond reliably. Sew-on backing is often the safer route for nylon shells. Send a garment photograph or describe the fabric so the application method can be checked before production.
Do you have a minimum order for 3D embroidered patches?
Yes. The Customized Patches has a 5-piece minimum per design. A change to the artwork, wording, size or specification may count as a separate design, so list each required version when requesting a quote.
How quickly can I see a mockup for 3D embroidered patches?
The Customized Patches normally provides a free digital mockup within 12 hours. This is for checking the artwork, size, raised areas, colours and backing. Production starts only after the mockup has been approved.
Are 3D embroidered patches washable?
They can be washed when correctly applied, but care depends on the garment and backing. Sew-on patches generally cope well with regular use. Iron-on patches can lift after unsuitable heat, harsh washing or a dryer cycle, so follow the application and garment-care guidance and consider extra stitching for heavily washed clothing.
Ready to produce custom patches for your UK team or brand?
GET A FREE MOCKUP