
How to Design Artwork for custom embroidered patches That Production-Ready
Production-ready artwork for custom embroidered patches uses clear shapes, strong contrast, readable lettering and enough space for thread to form each detail. Supply vector artwork where possible, state the finished size in inches, choose the backing and approve a digital mockup. The Customized Patches offers a free mockup usually within 12 hours, with production starting after approval.
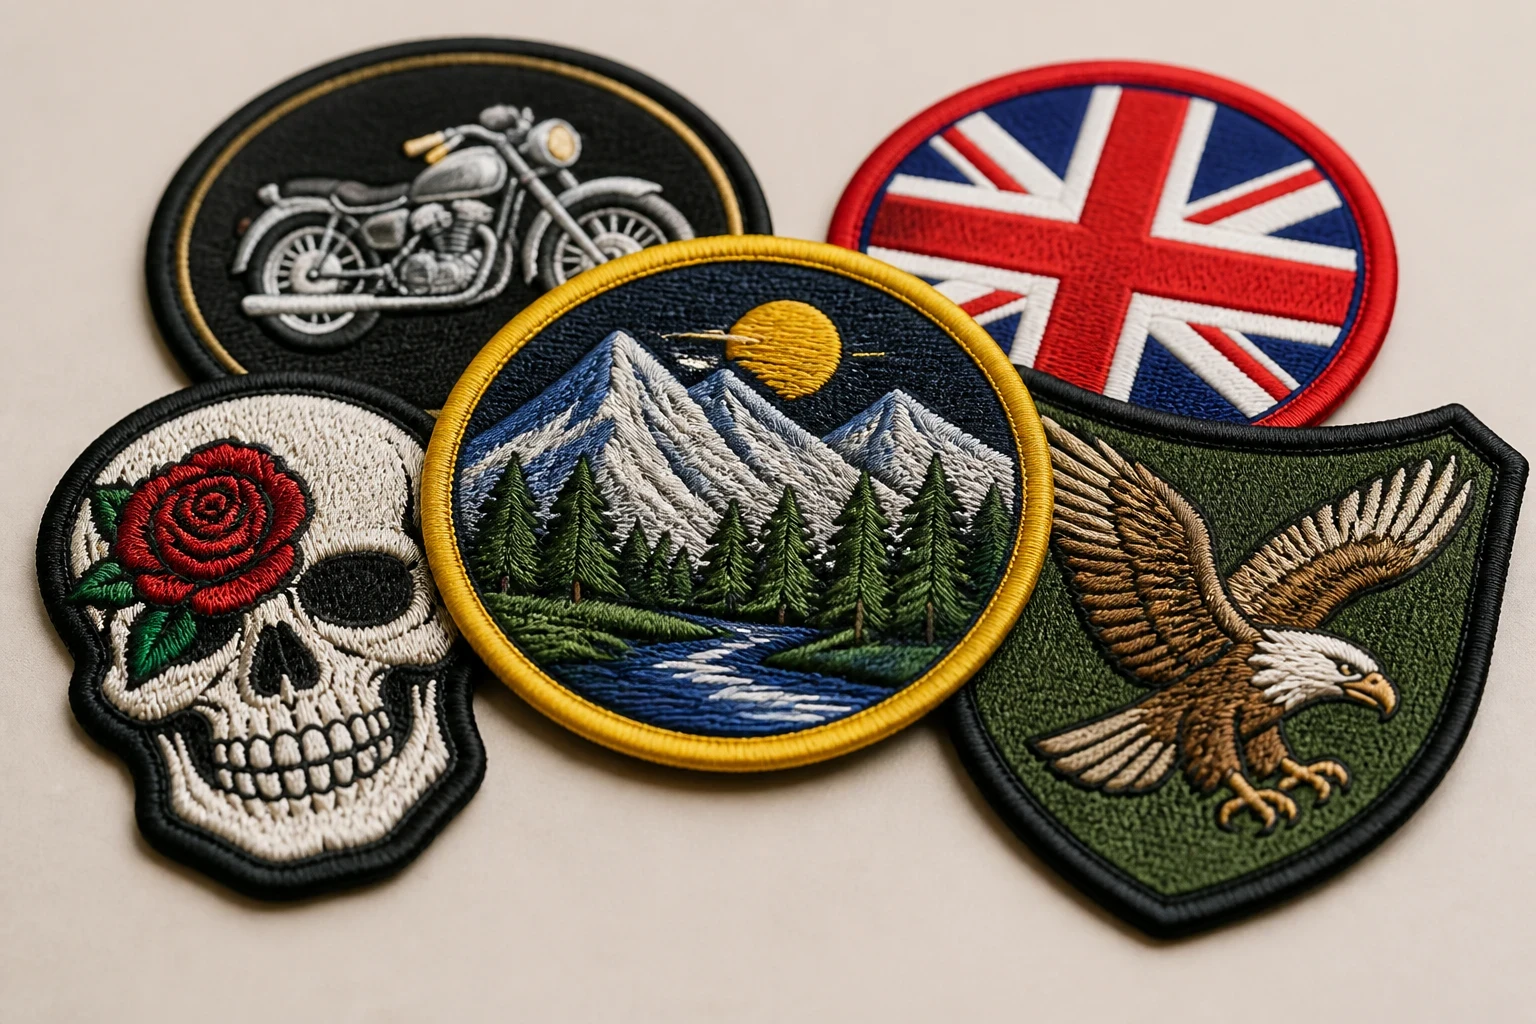
Key takeaways
- Design at the finished patch size, not only on a large computer screen.
- Keep small lettering, narrow gaps and tiny enclosed shapes out of an embroidered design unless they can be enlarged or simplified.
- Choose sew-on, iron-on or Velcro backing according to the garment and how it will be used.
- The Customized Patches has a 5-piece minimum per design and normally supplies a free digital mockup within 12 hours before production.
To design artwork for custom embroidered patches, start with the finished patch size and simplify the logo so its important shapes, lettering and colour blocks can be formed with thread. A clean vector file helps, but the real test is whether the design remains readable at its actual size on a jacket, blazer, cap or Velcro panel.
The Customized Patches works with UK football clubs, cadet units, hospitality polos, biker vests, school blazers and business uniforms. We check the artwork, prepare a digital mockup usually within 12 hours, and produce only after approval. The minimum is 5 pieces per design.
What makes artwork production-ready?
Production-ready does not mean the file looks impressive when enlarged to fill a monitor. It means the essential parts of the design can be translated into stitches at the size you intend to wear. A football crest at 3.5 inches wide can carry more detail than a sleeve badge at 2 inches, and a cap front often needs an even simpler version because of the curve.
The artwork should have a clear outer shape, readable wording and enough separation between colours. Avoid asking thread to reproduce every soft shadow, photographic texture or hairline outline from a full-size brand file. Those details may exist in the original logo but disappear when reduced and converted into stitches.
- State the finished width and height in inches, including whether the measurement includes the border.
- Use solid shapes and defined colour areas rather than relying on gradients.
- Make lettering large enough to recognise without zooming in.
- Keep important lines heavier than a single fine screen line.
- Separate adjacent shapes so the thread does not close the gap.
- Send the garment type or application area with the artwork.
- Mark any wording that must remain exact, including capital letters, punctuation and dates.
If you only have a JPG, PNG or screenshot, send it anyway. A high-resolution image is useful, and a low-resolution image can still show the intended design. We may need to redraw or simplify parts for digitising. That is a normal production step, not a reason to stretch a blurry file until its edges become jagged.
How to prepare a logo for custom embroidered patches
Begin by identifying the parts that people must recognise from a short distance. For a club crest, that may be the shield, initials and founding year. For a hospitality polo, it may be the company name and a simple mark. For a cadet unit, the badge outline and unit text may matter more than a tiny internal illustration.
Create a simplified patch version if the main brand logo contains fine gradients, very thin type or several overlapping colours. A patch is not a website header. The most successful designs often use fewer colours and stronger outlines than the original master artwork.
Vector files, raster files and what to send
AI, EPS, SVG and PDF files can preserve shapes and curves, which makes them useful for artwork review. A PNG with a transparent background can also be workable, particularly when it is large and clean. A small image copied from social media is less helpful because compression can hide the true edge of the logo.
Do not convert a low-resolution file into a large PDF and assume it has become production-ready. The container changes, but the missing detail does not return. Send the original file if you have it, plus a note explaining the desired patch size, border and application.
Text is the first detail to fail
Small text is a common problem on school badges, club mottos and business logos. At 2 inches wide, a long phrase around the edge may need to be shortened, enlarged or moved onto a larger patch. A letter can close up when satin stitches sit beside it, especially in bold fonts with small counters such as the inside of an A, R or O.
Use a font with open shapes and avoid thin script unless the wording is large. If the date is decorative rather than essential, removing it may make the badge clearer. We show these decisions on the mockup so you can judge the result before any patch is made.
Choosing patch size, border and stitch coverage
Patch size should follow the garment rather than a standard number. A chest logo on a polo may sit comfortably at 3 to 4 inches wide, while a cap badge may need a shorter height and a flatter composition. A back panel on a biker vest can be much larger, but its artwork still needs an orderly visual hierarchy.
Measure the usable area, not just the garment size. A nylon shell may have a seam, pocket or zip that limits the patch area. A wool coaches jacket may need a different attachment plan from a cotton hoodie. A Velcro panel sets its own maximum footprint, and the hook side must align with the loop panel already on the garment.
| Application | Typical artwork concern | Useful design approach | Backing question |
|---|---|---|---|
| Football club chest badge | Small wording and a detailed crest | Prioritise the shield, initials and strong colour blocks | Will it be washed often? Sew-on or suitable iron-on may be considered |
| Cadet or youth group sleeve badge | Long unit name around a narrow shape | Use open lettering and check the height at actual size | Is the uniform suitable for sewing, or is removable Velcro required? |
| Hospitality polo | Brand mark must stay neat after regular laundering | Keep the logo simple and avoid crowded fine lines | Confirm fabric and wash routine before selecting backing |
| Biker vest back patch | Large artwork with a border and possible top or bottom rocker | Plan the full layout, spacing and edge relationship together | Sew-on is commonly considered for a permanent vest application |
| Cap or hat front | Curved surface and limited height | Use compact lettering and avoid fragile narrow details | Check whether the cap can accept stitching without distortion |
| Removable Velcro panel | Patch must match the existing panel dimensions | Keep the finished footprint exact and avoid a border that overhangs | Specify hook backing and confirm the loop panel size |
The border gives the patch a finished edge and helps separate the design from the garment. A merrowed crest has a raised, wrapped edge that suits traditional badges and many club applications. A heat-cut edge can suit complex outlines or tighter shapes. The right choice depends on the outline, size and the look you want, not on a single universal rule.
Stitch coverage also affects the result. A heavily filled design has a dense embroidered surface and may hide more of the base fabric, but it can add weight and increase production time. A lighter design lets some background show and may suit a simple logo. The mockup and artwork review are the right place to discuss that balance.
Colour choices, contrast and thread limitations
A screen colour is not automatically a thread colour. Monitors vary, and embroidery thread has a defined range rather than every possible RGB value. Strong contrast usually matters more than an exact screen match, particularly on navy jackets, black workwear and dark biker vests.
List the key colour relationships in plain language as well as supplying the artwork. For example: white lettering on royal blue, gold border on black, or red mark on a white field. If your organisation has a brand guide or named colour reference, include it. The final thread selection can then be reviewed against the mockup.
If you are deciding between a detailed embroidered badge and a simpler version, send both files with the intended size. Get a free digital mockup usually within 12 hours and compare the readable result before production.
GET A FREE MOCKUP- Check light lettering on dark fabric and dark lettering on light fabric separately.
- Avoid placing two similar tones together if their boundary is important.
- Use a border or background field when the garment colour changes the contrast.
- Do not rely on a subtle gradient to separate two sections.
- Remember that a black thread outline can make small coloured areas appear more defined.
- Ask for a mockup on the intended background colour, especially for nylon shells or dark fleece.
If the artwork needs photographic detail, smooth shading or very fine colour transitions, compare other patch types. Printed patches reproduce flat artwork more closely because ink is the design surface; printed is flatter, and that is the point. Woven patches can hold small lettering and a fine, even face, while 3D embroidered patches add raised foam to selected areas rather than treating the entire design as a flat fill.
When embroidered is not the best artwork choice
Embroidery gives a tactile surface, visible thread direction and a traditional badge appearance. It works well for football clubs, schools, societies, workwear, jackets and many branded garments. It is not automatically the best answer for every logo, and saying that plainly helps avoid disappointment.
| Patch type | Best suited to | Main advantage | Trade-off |
|---|---|---|---|
| Embroidered | Crests, bold logos, uniforms and jackets | Visible thread texture and a familiar badge finish | Very fine detail and gradients need simplifying |
| Woven | Small type, linework and flatter detailed artwork | Fine detail can be represented more evenly | Less raised texture than embroidery |
| Printed | Illustrations, photographs and smooth colour transitions | Flat artwork and tonal detail remain clearer | Does not have the same stitched surface |
| Chenille | Varsity letters, collegiate designs and large simple shapes | Deep, soft texture with a bold profile | Not suitable for small wording or intricate artwork |
| PVC | Outdoor, tactical, airsoft and hard-wearing kit | Raised moulded surface and easy-clean character | Different visual language from thread embroidery |
| Leather | Heritage branding, hats and premium casual goods | Stamped or engraved appearance | Artwork depends on stamp size and material contrast |
Our embroidered patches hub is the right starting point for a thread-based badge, but it is sensible to compare chenille patches, PVC patches or leather patches if the garment, artwork or brand style points elsewhere. The choice should be made before final digitising because changing the production method can change which details survive.
Selecting the backing for the actual garment
Backing is part of the artwork brief because it changes how the patch is applied and sometimes how its edge sits. Sew-on backing is a dependable option for permanent use on many jackets, vests, uniforms and bags. It needs a suitable needle, thread and access to the garment, but it avoids relying on adhesive alone.
Iron-on backing can be convenient for suitable cotton or fabric surfaces when applied with the correct heat, pressure and timing. It is not a universal answer for nylon shells, coated fabrics, waterproof garments or heat-sensitive materials. It is common to see iron-on patches peel after a dryer cycle when the garment and care routine were not considered at the start.
Velcro is useful for emergency-style identification, airsoft kit, tactical equipment, removable club identifiers and garments with hook-and-loop panels. State whether you need hook backing and give the dimensions of the loop panel. A patch that is attractive but wider than the panel will not sit correctly.
Backing questions to answer before the quote
- What material will receive the patch: cotton, polyester, nylon, wool, canvas, leather or a coated fabric?
- Will the garment be washed weekly, occasionally or rarely?
- Does the patch need to be removed between uses?
- Is there an existing loop panel?
- Can the inside of the garment be reached for sewing?
- Will the item go through a tumble dryer or commercial laundry?
- Does the patch sit near a seam, zip, pocket or curved edge?
For a traditional crest on a wool coaches jacket, sew-on often deserves serious consideration. For a removable badge on a tactical panel, Velcro is usually the practical direction. For a school blazer, the school or uniform supplier may have rules about placement and attachment. The garment details should travel with the artwork rather than being added as an afterthought.
The digital mockup and approval stage
A mockup is a working approval document, not merely a decoration for the quote. It should let you check the spelling, proportions, patch dimensions, edge, colours and backing before production. Look at it both enlarged and at the intended physical size. An enlarged view helps find alignment issues; the smaller view shows whether the design remains readable.
The Customized Patches normally provides a free digital mockup within 12 hours. It may show the patch as a flat design rather than a photograph stitched onto a real garment, so use the stated measurements and notes alongside the image. If you need a particular placement, send a photograph of the chest, sleeve, cap or panel and explain the available space.
What to check line by line
- Read every letter, number, apostrophe and abbreviation.
- Check the patch width and height in inches.
- Confirm the border colour, edge style and background.
- Check that the supplied colours match the intended contrast.
- Confirm the backing: sew-on, iron-on or Velcro.
- Look for crowded gaps, closed letter counters or details that have been removed.
- Check the number of pieces and whether the design is counted separately from another colourway.
- Approve only when the mockup represents what you want produced.
If the club has a committee, get one consolidated list of changes where possible. Five people sending five different amendments can slow the artwork stage and create uncertainty about which version is final. A single named approver is particularly helpful for businesses, schools and teams ordering several colourways.
Ordering custom embroidered patches from the UK
A clear order includes the artwork, finished size, quantity, patch shape, edge, backing, garment or use case and delivery details. Tell us if the design is for a football kit, a cadet uniform, a hospitality polo, a school blazer, a nylon shell or a biker vest. The same logo may need different advice for each surface.
There is a 5-piece minimum per design. Different artwork, sizes or colourways may be treated as separate designs, so list them clearly when asking for a quote. Larger quantities can change the unit cost, but the right quantity is the number you can use without storing unwanted stock.
After the mockup is approved, the design moves into production. We do not produce from an unapproved draft. Allow time for artwork questions, approval, manufacture and UK-wide shipping, particularly before a tournament, school term, festival, launch or club event. For a fuller ordering sequence, see A Step-by-Step Guide to Ordering custom embroidered patches.
Do not compare quotes on piece price alone. Check what is included in the artwork preparation, whether the backing is specified, how changes are handled, the stated lead time and whether delivery is to a UK address. A lower initial figure can become less useful if the patch does not suit the garment or the artwork has not been checked at its finished size.
Name the design, size, quantity, garment and backing on the quote. The Customized Patches will prepare a free digital mockup usually within 12 hours, and production starts only after you approve it.
GET A FREE MOCKUPCommon artwork failures
The most avoidable failure is too much detail in too little space. A team sends a 10-inch crest and asks for the same design at 2 inches. The outline survives, but the motto, inner lines and small icons turn into a dark cluster. We usually recommend choosing the important elements and building the small version around them.
Another issue is a border that is not part of the intended dimensions. If the customer asks for a 3-inch patch and then adds a thick merrowed edge outside the artwork, the usable design area becomes smaller than expected. Confirm whether the quoted width includes the full finished edge.
- Tiny text copied from a website logo and expected to remain legible on a sleeve badge.
- Thin white lines placed between dark thread areas, leaving no practical stitch gap.
- A transparent PNG with a pale background that was not meant to appear on the patch.
- A cap design made too tall for the front panel, causing distortion around the curve.
- A Velcro patch ordered without checking the existing loop panel.
- Iron-on selected for a coated nylon shell without testing heat suitability.
- Multiple versions supplied with similar filenames and no stated final artwork.
- A club crest changed by a well-meaning designer without approval from the committee.
One specific failure is worth spelling out: iron-on that peels after a dryer cycle. The problem may be heat, pressure, the fabric finish, washing conditions or the adhesive itself, and it is not solved by making the logo more detailed. If the garment will be tumble dried or commercially laundered, tell us before choosing the backing and read the garment care instructions.
A practical artwork checklist before you send the file
Use this checklist before requesting a quote. It takes a few minutes and often removes the questions that hold up an artwork review. If you cannot answer every point, send what you have and describe the uncertainty rather than guessing.
- Final patch width and height in inches.
- The exact wording, including dates, abbreviations and punctuation.
- The intended garment, equipment or fabric.
- The number of pieces required for each design.
- The preferred edge: merrowed, heat-cut or another agreed finish.
- The backing: sew-on, iron-on or Velcro.
- The main thread colours and required contrast.
- The artwork file in vector format if available, plus a high-resolution raster version if useful.
- A note identifying essential details and details that can be removed.
- A contact who can approve the mockup.
If the design is for a biker or motorcycle club, review the layout as a complete back-patch system rather than treating each piece in isolation. Our guide to biker and motorcycle club patches covers the wider arrangement, while artwork review should still focus on spacing, readable lettering and the finished vest area.
For teams and schools, quantity planning can be just as important as the artwork. Count players, substitutes, staff, spare garments and future replacements, then check the 5-piece minimum per design. A small spare quantity can be useful when a jacket is replaced, but do not order a second colourway accidentally by leaving the version description unclear.
Final production decision: approve the version you can use
The best production artwork is not necessarily the most complex file. It is the version that reads clearly, fits the garment, uses an appropriate patch method and has a backing suited to the way the item will be worn and washed. A flatter printed patch may be the honest choice for a detailed illustration; a stitched crest may be the better choice for a club blazer or work jacket.
Send the artwork, state the finished size and application, and ask questions before approving. The Customized Patches supplies UK-wide orders, offers a free digital mockup usually within 12 hours, accepts designs from 5 pieces per design and begins production only after approval. That sequence gives you a clear opportunity to correct the wording, proportions, colours or backing before manufacture.
For related guidance, compare Custom embroidered patches vs printed patches: Which Is Right for Your Project? and Custom Patches for Jackets in the UK: Size, Backing, and Stitch. The practical answer usually comes from the combination of artwork, garment, washing routine and intended lifespan rather than from the logo alone.
Frequently asked questions
What artwork file is best for custom embroidered patches?
AI, EPS, SVG or a clean PDF can preserve the shapes needed for review and digitising. A high-resolution PNG can also work. Send the original file where possible, state the finished patch size in inches and explain the garment and backing. A small screenshot may still help, but it may need redrawing or simplification.
How small can lettering be on an embroidered patch?
There is no single safe size for every font, patch and stitch plan. Small lettering becomes difficult when the patch is narrow, the font is thin or adjacent letters have little space. At around 2 inches wide, long wording may need to be shortened or enlarged. The digital mockup should be checked at the intended physical size before approval.
Can I use my existing brand logo for custom embroidered patches?
Usually, but the logo may need a patch-specific version. Gradients, fine outlines, tiny text and photographic detail may not translate cleanly into thread. Keep the recognisable mark and essential wording, then simplify or enlarge details that are too small. The Customized Patches can review the supplied artwork and show the proposed result on a free digital mockup.
What backing should I choose for a patch on a nylon jacket?
Do not assume iron-on is suitable for nylon because heat can affect the fabric or its coating. Sew-on may be more appropriate for a permanent patch, while Velcro suits a jacket with a matching loop panel. Confirm the garment material, washing routine and whether the patch must be removable before choosing the backing.
What is the minimum order for custom embroidered patches in the UK?
The Customized Patches has a 5-piece minimum per design. Different artwork, sizes or colourways may count as separate designs, so list each version on the quote request. A free digital mockup is usually supplied within 12 hours, and production starts only after the mockup and artwork have been approved.
How long does artwork approval take before patches are made?
The free digital mockup is usually provided within 12 hours, although clear artwork and complete specifications help avoid questions. Review the wording, dimensions, colours, edge and backing together. Once you approve the version, production can begin. Allow additional time for manufacture and UK-wide shipping, especially for a fixed event date.
Ready to produce custom patches for your UK team or brand?
GET A FREE MOCKUP