
How to Design Artwork for 3D embroidered patches That Production-Ready
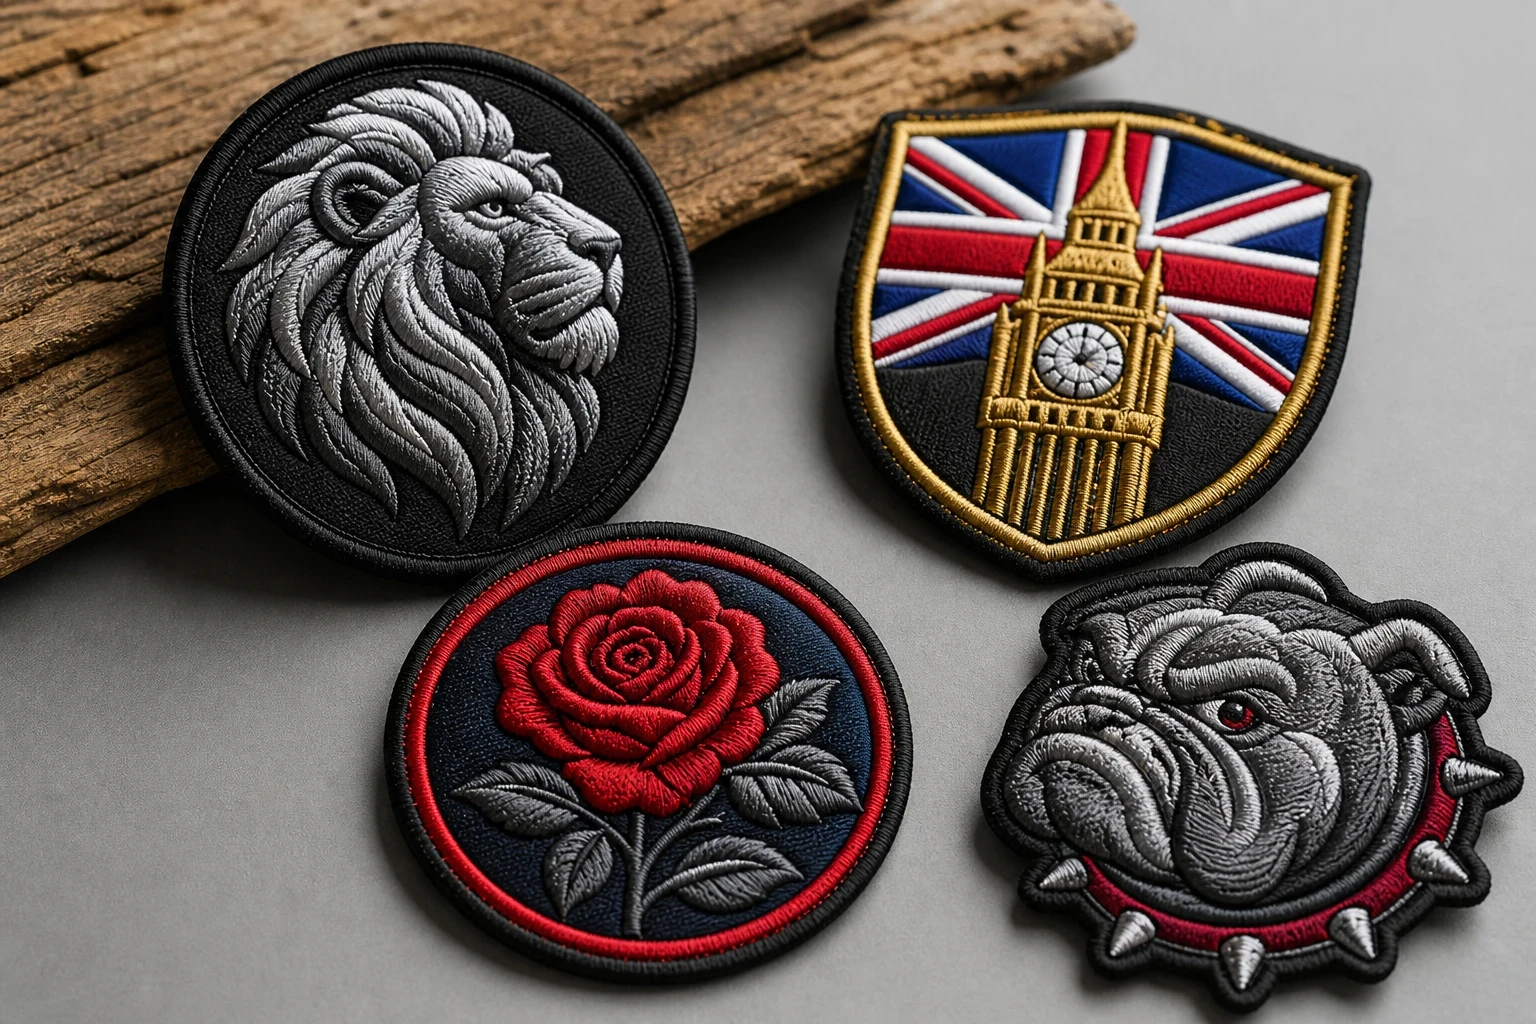
Production-ready artwork for 3D embroidered patches uses clear shapes, limited thread colours, bold lettering and enough space for raised foam. Supply a vector file where possible, state the finished size and backing, and approve a digital mockup before manufacture. The Customized Patches has a 5-piece minimum per design and normally sends a free mockup within 12 hours.
Key takeaways
- 3D embroidered patches need bold artwork with open areas for raised foam and thread coverage.
- Text below roughly 0.25 inches high can lose clarity, especially on small club or uniform patches.
- A 5-piece minimum applies to each design, and production starts only after the digital mockup is approved.
- The Customized Patches normally sends a free digital mockup within 12 hours for UK customers.
To make production-ready artwork for 3D embroidered patches, simplify the design, use bold shapes and allow room for raised foam beneath the key areas. Set the finished size in inches, check small lettering at that size and tell the manufacturer how the patch will attach to the garment.
The Customized Patches makes these patches for UK teams, brands, clubs and businesses, from football shirts and cadet uniforms to hospitality polos and biker vests. A 5-piece minimum applies per design. You send the artwork, we prepare a digital mockup usually within 12 hours, and production starts only after you approve it.
What makes artwork suitable for 3D embroidered patches?
A 3D patch is not simply a flat embroidered patch with more thread. Foam is placed beneath selected stitched areas, then covered with satin or other embroidery stitches. The raised section needs a clean edge and enough width for the stitches to hold it down. A complicated illustration can look excellent on a screen but become crowded once thread, border and foam are added.
Start with the part people must recognise from a few feet away. For a football club, that might be the crest and founding year. For a hospitality brand, it may be a single monogram on a polo. For a biker vest, the large back mark normally needs different treatment from a small chest identifier.
- Use strong silhouettes instead of hairline outlines.
- Keep raised sections broad enough to be covered cleanly.
- Separate neighbouring colours with a stitched boundary or clear gap.
- Reduce tiny decoration before the artwork reaches digitising.
- Choose a border that supports the shape rather than hiding it.
- Show the intended finished size, not just the original logo dimensions.
A useful test is to view the artwork at its final size on a phone or printout. If the small mark disappears before embroidery, it is unlikely to return once converted into stitches. That does not mean every detail must be removed. It means the detail needs a job.
Choose the raised areas before simplifying the logo
The strongest 3D embroidered patches usually have one clear raised feature rather than foam spread across every part of the design. A large letter, football number, wing, initial or simple icon can catch the light and give the patch its depth. If every line is raised, the surface can become uneven and the design loses its hierarchy.
Good candidates for foam
Large block letters, broad numbers and solid geometric marks are normally suitable. Their edges can be defined with satin stitching, and the foam has enough coverage to stay enclosed. A thick central stripe can also work, provided it does not create narrow channels around the raised section.
Poor candidates for foam
Tiny script, thin swirls, fine facial features and detailed landscapes are poor choices for raised treatment. Foam cannot follow every small turn neatly. Those details may be better left flat, redrawn as a bolder symbol or moved to a printed patch where tonal detail is the purpose.
This is a design decision, not a failure of the product. Printed is flatter; that is the point. If the artwork relies on a photograph, a soft shadow or a long colour fade, compare it with printed patches before forcing it into embroidery. For a tactile emblem with a strong silhouette, 3D embroidered patches are usually the more natural fit.
Set practical artwork specifications
The file format matters, but the finished dimensions matter more. A perfect vector logo supplied at an unsuitable size still needs a production conversation. Tell us the intended width and height in inches, where it will sit, how it will be attached and whether the design must match an existing merrowed crest.
| Artwork point | Practical starting guidance | Why it matters |
|---|---|---|
| Finished size | State the width and height in inches; many chest patches sit around 3 to 4 inches wide, but the garment decides the answer. | The same logo can be readable at 4 inches and crowded at 2 inches. |
| Small lettering | Use bold, uncomplicated type and avoid relying on very small text below roughly 0.25 inches high. | Thread has physical width, so tiny counters and gaps can close. |
| Raised feature | Reserve foam for broad letters, numbers and simple marks with a clean outer edge. | Narrow foam shapes are harder to cover and trim cleanly. |
| Colour count | List the important thread colours and identify close shades that may be combined. | A long colour list can affect price, stitching time and visual clarity. |
| Border | Allow a clear edge for the stitched border or merrowed finish. | Artwork too close to the edge can lose detail during trimming. |
| File type | AI, EPS, SVG, PDF or a large PNG can help; send the original file if available. | A clean source gives the digitiser more useful information than a small screenshot. |
These figures are working guidance rather than an automatic pass or fail. A large bold font may remain readable below that height, while a light font can fail above it. The mockup is the place to check the actual interpretation before any order is made.
Do not flatten every layer and remove all construction information before sending the file. A transparent background, named colour swatches and a note showing which area should be raised can save questions. If you only have a JPEG, send it anyway with the highest resolution available; the production team can discuss what needs redrawing.
Make lettering readable on a finished patch
Lettering causes more artwork problems than almost any other feature. A club may send a crest with a motto wrapped around the edge, or a business may want a full trading name beneath a raised monogram. At screen size it looks tidy. At 2.5 inches on a polo, it may turn into a stitched band.
Use a heavier typeface, increase spacing where possible and remove words that are not essential to recognition. For a school blazer, the school initials may work better than a long Latin motto. For a cadet unit, a short identifier with a strong border is often clearer than small text packed around a badge.
- Avoid delicate serif details and very thin script.
- Keep letters separated from the outer border.
- Use contrast between lettering and the base fabric.
- Do not put small white type on a light thread field.
- Check letters with enclosed spaces such as A, B, P, R and O.
- Ask for a separate flat treatment if the wording is too fine for foam.
Raised lettering can look particularly strong on caps and workwear, but the letter height still needs checking. A raised word is not automatically more readable. It gives texture and shadow; contrast and spacing still do the basic communication work.
Select colours with thread, foam and contrast in mind
Artwork colours are references, not a promise that a screen value will appear as an exact thread match. Bright digital gradients and metallic-looking effects need a practical thread interpretation. If the brand has an approved colour system, include the reference and identify which colours are essential.
Not sure which parts of the logo should be raised, flat or printed? Send the artwork and the intended size for a free digital mockup, usually within 12 hours, so you can compare the production interpretation before approving it.
GET A FREE MOCKUPContrast also changes with the base fabric. A navy patch on a black nylon shell can lose its outline, while a white merrowed edge on a dark wool coaches jacket may remain clear. Ask for the intended garment or a photograph. The same patch can need a different border treatment for a high-visibility work jacket than for a black biker vest.
Gradients, shadows and highlights
Embroidery can suggest shading through thread changes and stitch direction, but it does not reproduce a smooth digital gradient in the same way as ink. A soft shadow under a logo may need to become a darker outline or a separate flat area. If the shadow is not important to identification, remove it.
If the design needs a photographic face, fine map, detailed animal or many colour transitions, consider woven patches or printed patches. Woven construction suits small detailed line work but has a flatter surface. This is one of the useful trade-offs: the most textured option is not automatically the most accurate option.
Match the artwork to the garment and backing
A patch is part of a garment system. A design for a rigid football training top does not behave exactly like one for a soft nylon shell. Before finalising the artwork, check whether the patch will sit on a shirt, polo, jacket, bag, wool coaches jacket, school blazer or Velcro panel.
Sew-on is the dependable choice for many long-term uniforms and heavy outerwear. Iron-on is convenient, but heat and pressure vary between fabrics; an iron-on patch can peel after a dryer cycle if the garment care and application are not suitable. Hook-and-loop Velcro is useful for removable identifiers, though the hook panel adds bulk and needs enough garment area.
| Garment or use | Artwork and backing checks | Common issue to avoid |
|---|---|---|
| Football shirt or training top | Keep the design light enough for flexible fabric and check that the border will not cover a seam. | A patch placed over a stretchy panel can pucker. |
| Nylon shell | Confirm heat tolerance before choosing iron-on; sew-on may be safer for frequent washing. | Heat can mark or distort some nylon fabrics. |
| Wool coaches jacket | Allow for the nap and thickness of the wool; a clear outer border helps. | A very fine edge can disappear into the fabric texture. |
| Cadet uniform or school blazer | Use readable initials, a practical sew-on finish and a size that fits the supplied garment space. | Small mottos can become indistinct at uniform scale. |
| Biker vest | Check the back panel, curved placement and whether a wide merrowed crest is wanted. | A rigid border can sit awkwardly if the patch is too large for the curve. |
| Removable Velcro panel | State the loop or hook requirement and leave room for the attachment panel. | The patch can be made correctly but supplied with the wrong back. |
A merrowed crest has a rounded, raised stitched edge that suits traditional club and uniform designs. A laser-cut border can follow sharper shapes and internal corners more closely. Neither is universally better. The border should support the artwork and the garment rather than dictate the design after the file has been sent.
For a wider look at attachment choices, read Custom embroidered patches UK Sizing and Backing Options Explained. If the artwork is for a motorcycle club, the biker and motorcycle club patches hub covers the larger back-panel context as well as smaller identifiers.
Prepare files for digitising without overworking them
Digitising converts artwork into a stitch plan. It decides stitch direction, density, underlay, borders and the sequence in which colours are sewn. You do not need to draw every stitch yourself. You do need to give the production team a clear design hierarchy and honest information about size and use.
Name the layers if you can: base, raised letter, flat detail, border and background. Mark any area that must remain flat. If the raised part is simply highlighted by a pale colour but not labelled, it can be interpreted differently from your intention.
- Choose the finished width and height in inches.
- Mark the intended raised foam areas.
- Remove or enlarge details that disappear at finished size.
- List the required thread colours and any brand colour references.
- Show the border, backing and application method.
- Send the original vector file or the clearest available artwork.
- Review the mockup for size, text, colour, border and backing before approval.
Do not approve only because the logo looks familiar. Check the spelling, the direction of any wording, the number of stars or stripes, the border thickness and the position of the foam. A wrong year or missing accent is easy to overlook when the design is viewed at a glance.
Order 3D embroidered patches without surprises
Send five pieces as the minimum quantity for each design, then state the total quantity if you have several versions. Five of one crest and five of a different crest are treated as separate designs. Small runs are useful for a new club, event staff or a brand test, while larger quantities may make the unit cost more practical.
Include the patch size, backing, border, raised areas, garment type, delivery location and required date in the first message. UK-wide shipping can be arranged, but the useful lead-time conversation starts with an honest date and the condition that production follows approval.
What happens after artwork is sent?
Our team checks whether the design can be interpreted at the requested size and raises questions where needed. A free digital mockup is usually sent within 12 hours. The mockup is not decoration; it is the point where you check the wording, dimensions, border, colours, backing and raised treatment.
The Customized Patches produces only after approval. If the mockup shows that a school badge needs larger initials, a football number should be flat, or a Velcro back is required instead of sew-on, those decisions can be made before manufacture rather than after the patches arrive.
For the wider ordering sequence, see A Step-by-Step Guide to Ordering 3D embroidered patches. It is also worth checking How Much Do 3D embroidered patches Cost in the UK? when comparing quantity, size, backing and stitch complexity.
Common artwork failures
The most avoidable problem is supplying artwork without a finished size. A logo intended for a 4-inch chest patch may be reduced to 2 inches to fit a garment, and the small wording then becomes the issue. The second is assuming that an image file proves how the patch should be made.
Name sew-on, iron-on or Velcro on the quote and include the garment if possible. We show the correct backing and raised treatment on a free digital mockup, usually within 12 hours, before production begins.
GET A FREE MOCKUP- A tiny slogan is retained because it appears clearly in the original vector file.
- A raised area is too narrow to cover the foam neatly.
- The border is omitted, so the final shape is unclear.
- A black garment is supplied but the artwork assumes a white background.
- Iron-on is chosen for a nylon shell without checking heat suitability.
- A Velcro panel is mentioned after manufacture rather than on the quote.
- Several colour shades are listed without identifying which are essential.
- The customer approves a mockup without checking the spelling or year.
- A detailed illustration is forced into embroidery when printed construction would suit it better.
One real-world example is the dryer problem. A customer may choose iron-on for convenience, then wash and tumble-dry a work garment repeatedly. If the adhesive and fabric combination are unsuitable, the edge can lift. For hard-wearing workwear, sew-on often makes more sense even if the first application takes longer.
Another is the merrowed edge on a curved biker vest. A large crest can look balanced in a flat image but sit too stiffly across a narrow curve. Showing the garment and placement early helps us discuss size, border and backing before the order is fixed.
When another patch type is the better answer
3D embroidered patches are chosen for relief, tactile feel and strong graphic marks. They are not the right answer for every logo. If the design needs a soft chenille surface for a varsity jacket, compare chenille patches. If it needs a rubberised finish for outdoor kit, review PVC patches.
For a leather-look badge, see leather patches. For a conventional thread design without raised foam, standard embroidered patches may provide the cleaner and more economical result. The aim is not to make every design 3D. The aim is to match construction to the job.
| Patch type | Best suited to | Main trade-off |
|---|---|---|
| 3D embroidered | Bold letters, numbers, emblems and raised brand marks. | Fine detail and tiny text need simplifying. |
| Flat embroidered | Traditional crests, uniforms and thread-based logos with moderate detail. | Less relief and shadow than a raised design. |
| Woven | Small lettering, fine lines and a flatter detailed badge. | It has less texture than raised embroidery. |
| Printed | Gradients, photographs, complex illustrations and tonal artwork. | The surface is flatter and lacks raised thread relief. |
| PVC | Rubberised outdoor, workwear and utility designs. | The look and hand feel differ from textile embroidery. |
| Chenille | Varsity, collegiate and soft high-pile lettering. | It is less suited to very fine detail. |
Comparing options before digitising saves time. A brand may want a raised monogram on staff jackets but a printed version of the same detailed illustration for packaging. A club may use a 3D chest mark and a flat embroidered name patch. One organisation can sensibly use more than one construction.
Final production-ready artwork checklist
Before you approve, read the checklist as if you are receiving a box of finished patches rather than looking at a logo on a monitor. Ask whether the patch will be recognised, attached and cared for in the way your team or customer expects.
- The finished width and height are stated in inches.
- The key raised foam area is clearly marked.
- The lettering has been checked at its actual patch size.
- The border and final shape are shown.
- The thread colours have been discussed, including close shades.
- The intended garment or item is known.
- The backing is confirmed as sew-on, iron-on or Velcro.
- The quantity is clear, with at least 5 pieces for each design.
- The mockup spelling, year, symbols and layout have been checked.
- Approval has been given only after all changes are complete.
If you are ordering for several garments, test the largest and smallest placement. A patch that looks right on a jacket may overpower a polo. A size that fits a school blazer may be too small to read on a football kit. It is often better to make two approved sizes than to compromise one design for every garment.
For UK delivery and city-specific ordering information, you can also visit the UK city pages. If you are still comparing materials, the guide to 3D embroidered patches: Everything UK Buyers Need to Know covers the wider buying questions.
Frequently asked questions
What artwork file is best for 3D embroidered patches?
An AI, EPS, SVG or vector PDF is usually the most useful because it preserves clean shapes and allows the artwork to be reviewed at different sizes. A large PNG or JPEG can still be assessed. Include the finished size, intended backing, garment type and a note showing which areas should be raised.
How large should lettering be on 3D embroidered patches?
There is no single minimum that suits every typeface, but lettering below roughly 0.25 inches high needs careful checking. Bold, open letters can work smaller than thin script. The finished mockup should be reviewed at the actual patch size, not only on a large computer screen.
Can every part of my logo be made raised?
Not usually with the best result. Broad letters, numbers and simple marks are good foam candidates, while tiny script, narrow outlines and fine internal details are better left flat or simplified. Raising every line can make the patch crowded and harder to read.
What is the minimum order for 3D embroidered patches?
The minimum is 5 pieces per design. If you order two different logos or versions, each design needs to meet the 5-piece minimum. The quantity, finished size, backing and stitch complexity can all affect the quotation.
How quickly will I receive a mockup for my 3D embroidered patches?
The Customized Patches usually sends a free digital mockup within 12 hours. The timing can depend on the clarity of the artwork and the information supplied. Production starts only after you approve the mockup, so changes should be completed before approval.
Are 3D embroidered patches suitable for nylon jackets and Velcro panels?
They can be suitable, but the backing and garment must be discussed first. Nylon may not tolerate the heat needed for some iron-on applications, so sew-on can be the safer choice. Velcro panels need the correct hook-and-loop arrangement and enough space to support the patch.
Ready to produce custom patches for your UK team or brand?
GET A FREE MOCKUP