
A Step-by-Step Guide to Ordering 3D embroidered patches
To order 3D embroidered patches, send your artwork, required size, quantity, garment and backing preference to The Customized Patches. The team checks the design, prepares a free digital mockup usually within 12 hours, and makes changes before production. The minimum order is 5 pieces per design, and production starts only after approval.
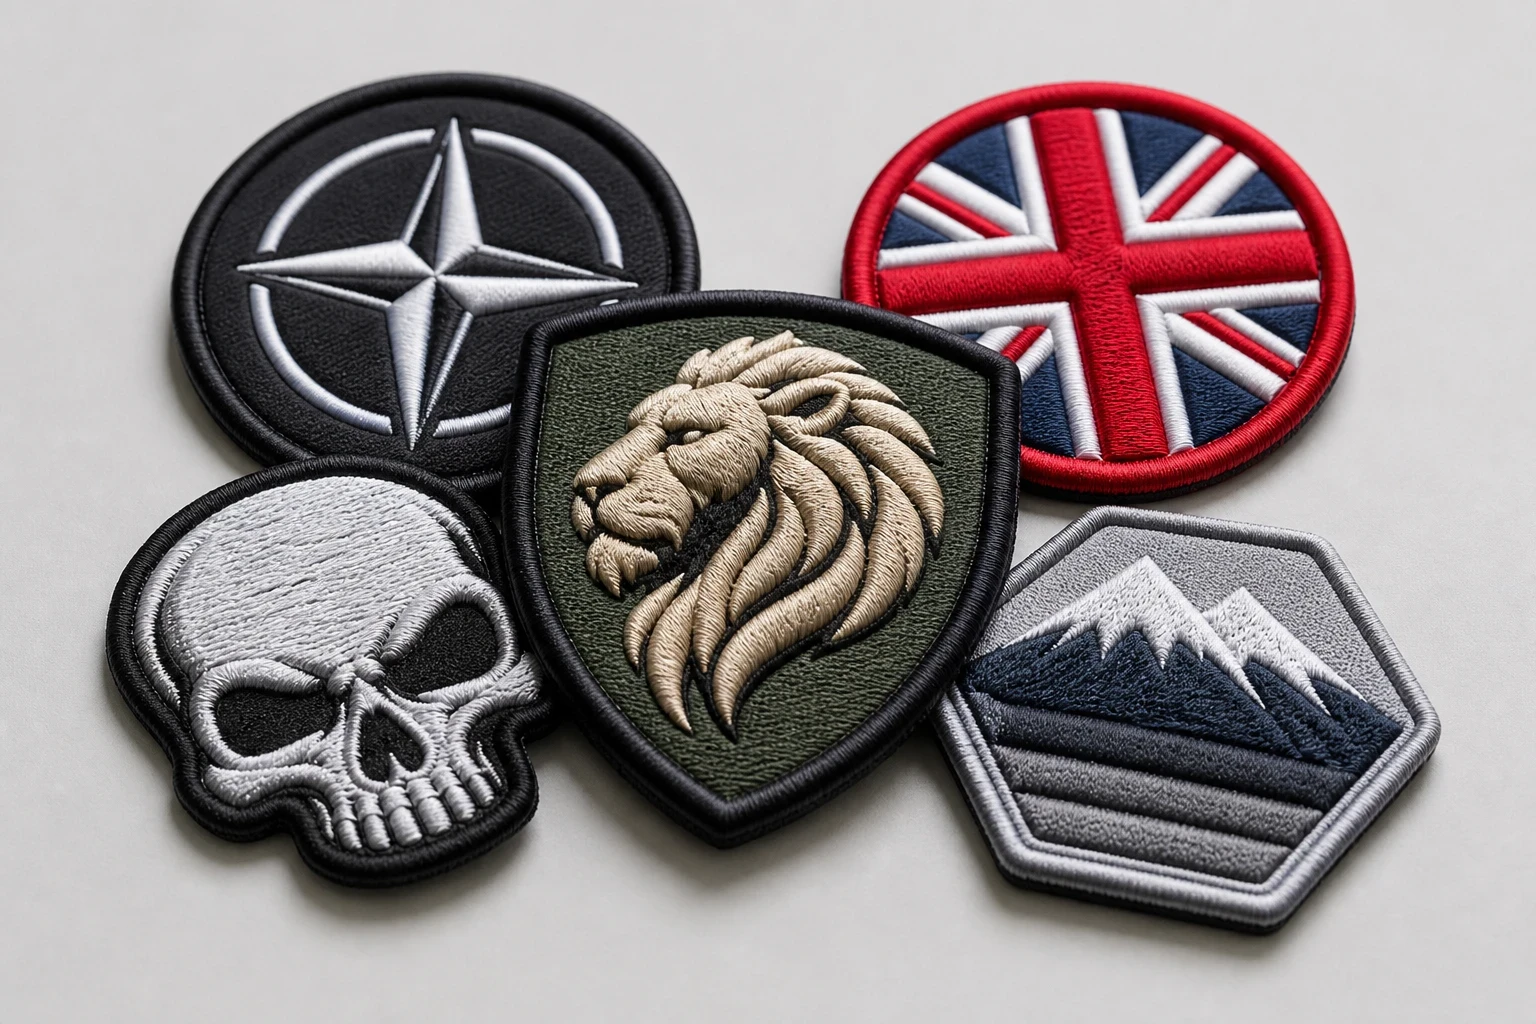
Key takeaways
- 3D embroidered patches use raised foam beneath selected stitched areas, so the artwork must be simplified enough to stitch cleanly.
- The minimum order is 5 pieces per design, making the format suitable for small UK clubs as well as larger business runs.
- The Customized Patches usually sends a free digital mockup within 12 hours and produces only after the customer approves it.
- Backing, garment fabric, finished size and washing conditions should be agreed before production, not after the patches arrive.
Ordering 3D embroidered patches is a straightforward process: send your artwork, choose the finished size and backing, review a digital mockup, then approve production. The raised foam effect works best on bold lettering, mascots and simple logos rather than tiny detailed artwork.
The Customized Patches supplies customers across the United Kingdom, from football clubs and cadet units to hospitality polos, biker vests, school blazers and company workwear. There is a 5-piece minimum per design. A free digital mockup is usually sent within 12 hours, and production starts only after you approve the design.
1. Decide if 3D embroidery suits the job
The first decision is not thread colour. It is whether the design benefits from a raised surface. In 3D embroidery, foam is placed beneath selected stitched sections and then covered with thread. The result gives letters, outlines or symbols a small amount of height that can be felt with a fingertip and seen from an angle.
That makes the format useful for a football club crest, a bold streetwear badge, a brewery mark on a jacket, or a motorcycle club emblem with a strong central word. It is less suitable for a logo made from hairline details, long small text or a photographic image. The foam needs room to be covered neatly.
Flat embroidery remains the better choice for fine stitched detail. Printed patches are flatter; that is the point when a design contains gradients, small illustrations or a large number of colours. Woven patches can reproduce small lettering with a smooth face, while chenille patches give a soft, varsity-style pile rather than a raised foam finish.
A useful test is to view the logo at the intended finished size, not on a large monitor. If a wordmark becomes difficult to read at 3 inches wide, increasing the foam will not solve the problem. Simplifying the artwork usually gives a cleaner result.
2. Mark the areas that should be raised
A 3D patch does not need every part of the artwork to stand up. Many successful designs use raised foam only for a central word, a football, a wing, a number or a thick border. The background and supporting details remain flat embroidery, which keeps the patch readable and avoids making the surface too busy.
Tell us which parts should have the 3D treatment when you submit the artwork. If the file does not make that clear, the production team can suggest a practical arrangement. For example, a club crest might have a raised team name and ball, with the fine laurel leaves stitched flat.
Lettering and small details
Bold block lettering generally works well. Narrow script, very small serifs and tightly packed words are more difficult because the thread must cover the foam without leaving gaps. A short word at 3 to 4 inches wide is normally easier to read than a long slogan squeezed into the same space.
Check names, dates and initials carefully. A single incorrect letter can make a batch unusable for a school blazer or team kit. The digital mockup is the point to check spelling, punctuation and the order of colours.
3. Choose the artwork format and colours
A vector PDF, AI or SVG file is useful because the shape can be checked without the edges becoming blurred. A high-resolution PNG or JPG is also workable for many logos. If all you have is a screenshot, photograph or hand-drawn badge, send it anyway and explain the intended result. The team can assess what needs cleaning before a production file is prepared.
Use named colours or clear visual references. Royal blue, navy and petrol blue can look close on a phone screen but behave differently beside a white border. For a company uniform, match the patch to the brand guide where possible. For a club order, a photograph of the current shirt can help show the relationship between the patch and the fabric.
Thread has a physical limit that a screen does not. Very close shades may merge once stitched, especially in a small design. Strong contrast between the base fabric, border and raised section usually gives the clearest finished badge.
Borders and edge finishes
A merrowed crest has a rounded overlocked edge and suits traditional club badges, circular logos and collegiate shapes. A clean-cut edge can suit sharper silhouettes or unusual outlines. The edge choice affects the appearance around the outside of the patch, so include it in the specification rather than treating it as a minor finishing detail.
If the artwork includes points, narrow corners or a shield shape, ask how the border will follow the outline. A digital mockup can show the general form, but the finished edge still needs enough width for tidy stitching.
| Patch type | Surface and appearance | Best suited to | Main trade-off |
|---|---|---|---|
| 3D embroidered | Raised foam beneath selected stitched areas | Bold names, mascots, numbers and strong logos | Fine detail and tiny text need simplifying |
| Flat embroidered | Thread stitched level across the face | Traditional crests, uniforms and detailed linework | Less height and no raised lettering effect |
| Woven | Smooth, closely woven face | Small text, fine outlines and compact artwork | Does not have the same tactile foam height |
| Printed | Ink printed on a flat patch surface | Gradients, photographs and complex illustrations | Less texture and a different visual character |
| PVC | Moulded rubber-like raised surface | Outdoor, utility and modern workwear designs | Different feel from thread and less traditional for formal crests |
The choice should follow the garment and the logo, not a general idea that one technique is always better. You can compare 3D embroidered patches vs flat embroidered patches before sending the quote. If you want a smooth design with photographic colour changes, review printed patches instead.
4. Set the finished size in inches
Give the finished width and height in inches, or provide one measurement and ask the production team to keep the proportions. A chest badge may be around 3 to 4 inches wide, while a large back or jacket patch may need a bigger format. The correct size depends on the garment, the viewing distance and the amount of text.
Measure the place where the patch will sit. A patch that fits a cotton polo may look too small on a heavy wool coach jacket. A badge designed for a sleeve must also clear seams, pockets, cuffs and existing Velcro panels. Lay a paper version of the proposed patch on the garment and look at it from normal standing distance.
Do not rely on a screen preview for scale. A design can look substantial on a laptop and arrive feeling surprisingly small on a blazer. The quote should state the intended finished dimensions, and any change to the size should be agreed before production.
Examples by garment
- Football shirts and training tops: check the chest area, sponsor position and seam placement before settling on a crest size.
- Cadet and school blazers: keep the badge readable at close range, but avoid a size that crowds the pocket or school trim.
- Hospitality polos: consider how the patch sits beside an embroidered name or printed company logo.
- Biker vests and denim jackets: confirm the space between existing back pieces, shoulder seams and side panels.
- Nylon shells: check the shell fabric, lining and heat sensitivity before selecting an iron-on backing.
- Wool coaches and heavy jackets: sew-on or Velcro may be more practical than relying on a hot application.
Not sure whether the raised sections should be stitched in 3D or kept flat? Send the logo and intended garment for a free digital mockup, usually within 12 hours, so you can compare the practical layout before production.
GET A FREE MOCKUPFor more detail on dimensions and backing, see Custom embroidered patches UK Sizing and Backing Options Explained. The same planning principles apply to raised embroidery, with extra attention to how the foam sections read at the selected size.
5. Select the right backing for the garment
Backing determines how the patch is attached. The main choices are sew-on, iron-on and Velcro. None is automatically right for every garment. A sew-on patch is dependable on a blazer, denim jacket or thick kit, while iron-on is convenient on suitable heat-resistant fabric. Velcro is useful for removable identifiers on equipment, uniforms and tactical-style garments.
Iron-on that peels after a dryer cycle is a familiar failure. It can happen because the fabric was unsuitable, the application temperature was wrong, the press time was too short or the garment was washed before the adhesive had settled. Nylon shells and coated fabrics need particular care because heat can mark or distort them.
Sew-on avoids many heat-related problems but takes longer to apply. On a curved sleeve, the patch may need careful pinning so the edge does not pull. Velcro adds flexibility, though it also adds thickness and may not suit a close-fitting polo or a formal school blazer.
| Backing | Useful for | Points to confirm before ordering |
|---|---|---|
| Sew-on | Blazers, denim, wool, heavy jackets and long-term club kit | Needle access, edge stitching and the person applying the patch |
| Iron-on | Suitable cotton garments and straightforward one-time application | Fabric heat tolerance, press instructions, washing and dryer use |
| Velcro | Removable identifiers, equipment and garments with hook-and-loop panels | Loop panel position, extra thickness and matching patch dimensions |
Name the garment when requesting a quote. A patch for a nylon shell should not be specified in the same way as one for a cotton hoodie. If the job involves club kit, provide a clear photograph of the application area. This helps avoid an attractive patch that is difficult to attach in practice.
6. Confirm quantity, budget and the 5-piece minimum
The Customized Patches has a 5-piece minimum per design. This is a minimum for each artwork, not a combined total across unrelated badges. Five identical football club crests count as five pieces; a crest, sponsor badge and player initials are separate designs unless agreed otherwise.
Quantity affects the unit price because artwork preparation, digitising and setup are shared across the run. Give the most realistic quantity you can. A small first run of 5 to 10 pieces may suit a new business testing workwear, while a school, league or retail brand may need a larger batch.
The final price depends on dimensions, stitch coverage, number of colours, raised sections, border, backing and quantity. A large patch with dense embroidery needs more production time than a small single-colour badge. For a sensible comparison, request like-for-like quotes with the same size, backing and quantity.
Budget for application as well. Sew-on patches may need a tailor or alterations service, while iron-on patches need a suitable press or careful household application. A Velcro panel may already be present on a garment, but adding one can change the total project cost.
7. Request and check the free digital mockup
Send the artwork with a short specification: finished size, quantity, garment, backing, border, thread colours and the sections that should be raised. The more of this information included at the start, the fewer assumptions are needed during quoting.
The Customized Patches usually provides a free digital mockup within 12 hours. This is a visual production check, not a photograph of the finished patch. It should show the overall shape, lettering, colour arrangement, raised areas and approximate proportions.
What to check before approval
- Spelling, numbers, dates and initials.
- Finished width and height, including the border.
- Which sections are raised and which remain flat.
- Thread colours against the intended garment.
- Border style and overall outline.
- Backing type and orientation.
- Placement of any Velcro hook or loop side.
- Any small text that may need removing or enlarging.
Share one consolidated list of changes where possible. For a football club, that might be changing the gold thread to yellow, widening the outer border and raising the team name rather than the date. For a company uniform, it may be moving the logo away from a polo seam and reducing the number of colours.
Approval matters because the patch is made to the agreed design. The Customized Patches produces only after approval, so use this stage to ask questions rather than treating it as a formality. If the design changes after approval, the specification and timing may need to be reviewed.
8. Understand production and UK delivery
Once the artwork and specification are approved, the order moves into production. The work may include preparing the embroidery file, setting the foam for the raised sections, stitching the patch, trimming the edge and applying the selected backing. The exact lead time depends on the design, quantity and current production schedule.
Ask for the expected production and dispatch timing if the patches are needed for a match, launch, event or school term. Build in time for artwork changes and garment application. A courier delivery date is not the same as the date the order enters production.
UK-wide delivery is suitable for orders going to England, Scotland, Wales and Northern Ireland, subject to the delivery arrangement quoted for the order. Provide the full delivery address and a contact number, especially for a club premises, school office or business reception that may have restricted opening hours.
When the patches arrive, compare one against the approved mockup. Check the design, quantity, edge, backing and raised sections before distributing them to players, staff or customers. Store unused patches flat and dry, away from direct heat and heavy pressure on the foam.
Common ordering mistakes to avoid
Most problems begin before the embroidery machine runs. The artwork may have been supplied at the wrong proportions, the size may not fit the garment, or the customer may assume that all areas will be raised. A clear brief prevents these issues.
Name sew-on, iron-on or Velcro on the quote and include the garment type. We show the correct backing and raised layout on a free digital mockup usually within 12 hours, then produce only after your approval.
GET A FREE MOCKUP- Ordering from a screen image without confirming the finished size in inches.
- Using tiny text because it is readable in the original logo file.
- Requesting every detail in 3D instead of selecting one or two strong raised elements.
- Choosing iron-on backing for a heat-sensitive nylon shell.
- Forgetting that separate artwork files count as separate designs for the 5-piece minimum.
- Approving a mockup without checking spelling and numbers.
- Matching thread to the logo but not checking how it will look against the actual garment.
- Leaving no time for application before a match, launch, ceremony or event.
A useful checklist is available in Common Mistakes to Avoid When Ordering 3D embroidered patches. For a broader comparison of methods, review 3D embroidered patches: Everything UK Buyers Need to Know.
Examples of good 3D patch briefs
A good brief does not need technical language. It needs enough detail for the production team to understand the intended result. The following examples show the useful level of information.
- Football club: 3.5-inch wide shield crest, red and white thread, raised club name and football, merrowed border, sew-on backing for polyester shirts, 30 pieces.
- Cadet unit: 3-inch circular badge, navy base with white lettering, raised central initials only, clean-cut border, sew-on backing for uniform sleeves, 20 pieces.
- Hospitality brand: 3-inch rectangular logo for black cotton polos, raised company initials, flat supporting line, black border, sew-on backing, 10 pieces.
- Biker vest: 10-inch back design with a large raised club name, flat supporting text, strong contrast thread, sew-on backing for denim or leather, 5 pieces.
- Small business: 2.5-inch chest badge for work jackets, raised icon, flat company name, Velcro backing to move between garments, 8 pieces.
Leather and denim can need different application planning from a lightweight polo. If the design is intended for a motorcycle club, see the biker and motorcycle club patches hub. If the patch will be used on a modern utility garment, PVC patches may be worth comparing with embroidery.
When another patch method may be better
3D embroidery is chosen for its raised thread-and-foam appearance, but it is not a universal replacement for every patch method. A printed patch can reproduce a complex illustration more directly. A woven patch can keep small lettering crisp without adding height. A PVC patch can tolerate a different type of handling and suit outdoor or utility clothing.
A traditional club badge may still look best as flat embroidery with a merrowed edge. A soft sports mascot may suit chenille. A premium casualwear label may prefer leather patches for a restrained material finish. The right choice is the one that works with the artwork, garment, wash routine and expected use.
You can browse the wider embroidered patches range before settling on the raised treatment. The quote stage is a sensible place to discuss alternatives because a small artwork adjustment can change the most suitable method.
Final ordering checklist
Before approving your order, run through the points below. It takes a few minutes and can prevent a full batch from being made to the wrong specification.
- The artwork file is clear and the final wording is correct.
- The raised 3D areas are marked or explained.
- The finished size is stated in inches.
- The quantity is confirmed, with at least 5 pieces for each design.
- The garment type and application area are included.
- The backing is suitable for the garment.
- The border and edge finish are agreed.
- The mockup has been checked for colours, proportions, spelling and placement.
- Production approval has been given in writing.
- There is enough time for manufacture, UK delivery and application.
The simplest route is to send the artwork and garment details first, then let the production team identify any practical issues before you commit. The Customized Patches will prepare the free digital mockup usually within 12 hours, answer specification questions and produce only after approval.
Frequently asked questions
What are 3D embroidered patches?
3D embroidered patches use foam beneath selected stitched areas to create a raised effect. They are commonly used for bold lettering, sports logos, mascots, numbers and strong symbols. Fine details and very small text may need simplifying because the foam requires enough space to be covered neatly.
What is the minimum order for 3D embroidered patches?
The minimum order is 5 pieces per design. Five identical patches count as one design run. Different logos, names or artwork versions may be treated as separate designs, so state the full breakdown when requesting a quote.
How quickly can I receive a mockup in the UK?
The Customized Patches usually sends a free digital mockup within 12 hours. This timing applies to a clear request with enough artwork and specification information. Production does not start until the customer has approved the mockup.
Can 3D embroidered patches go on nylon shells or wool jackets?
They can be suitable for different garments, but the backing and application method must match the fabric. Nylon shells may be sensitive to heat, so iron-on backing needs care. Wool coaches and heavy jackets often suit sew-on backing. Include a garment photograph or description with the quote.
Are 3D embroidered patches washable?
The stitched patch itself can be durable, but washing instructions depend on the backing and garment. Sew-on patches avoid some adhesive problems. Iron-on patches may loosen through high heat, repeated tumble drying or incorrect application. Follow the supplied care guidance and check the garment label.
Can I order 3D embroidered patches with Velcro backing?
Yes, Velcro backing can be requested for removable identifiers, equipment and garments that already have hook-and-loop panels. Confirm which side is required, the panel size and the patch orientation. Velcro adds thickness, so it may not suit every polo, blazer or close-fitting garment.
Ready to produce custom patches for your UK team or brand?
GET A FREE MOCKUP