
Puff embroidery patches UK Best Practices for brands
Puff embroidery patches UK are raised, three-dimensional embroidered badges made with foam beneath selected stitched areas. They suit bold logos, caps, jackets, sportswear and branded workwear, but fine lettering and very small details may not reproduce well. The Customized Patches provides a free digital mockup usually within 12 hours, with a 5-piece minimum per design.
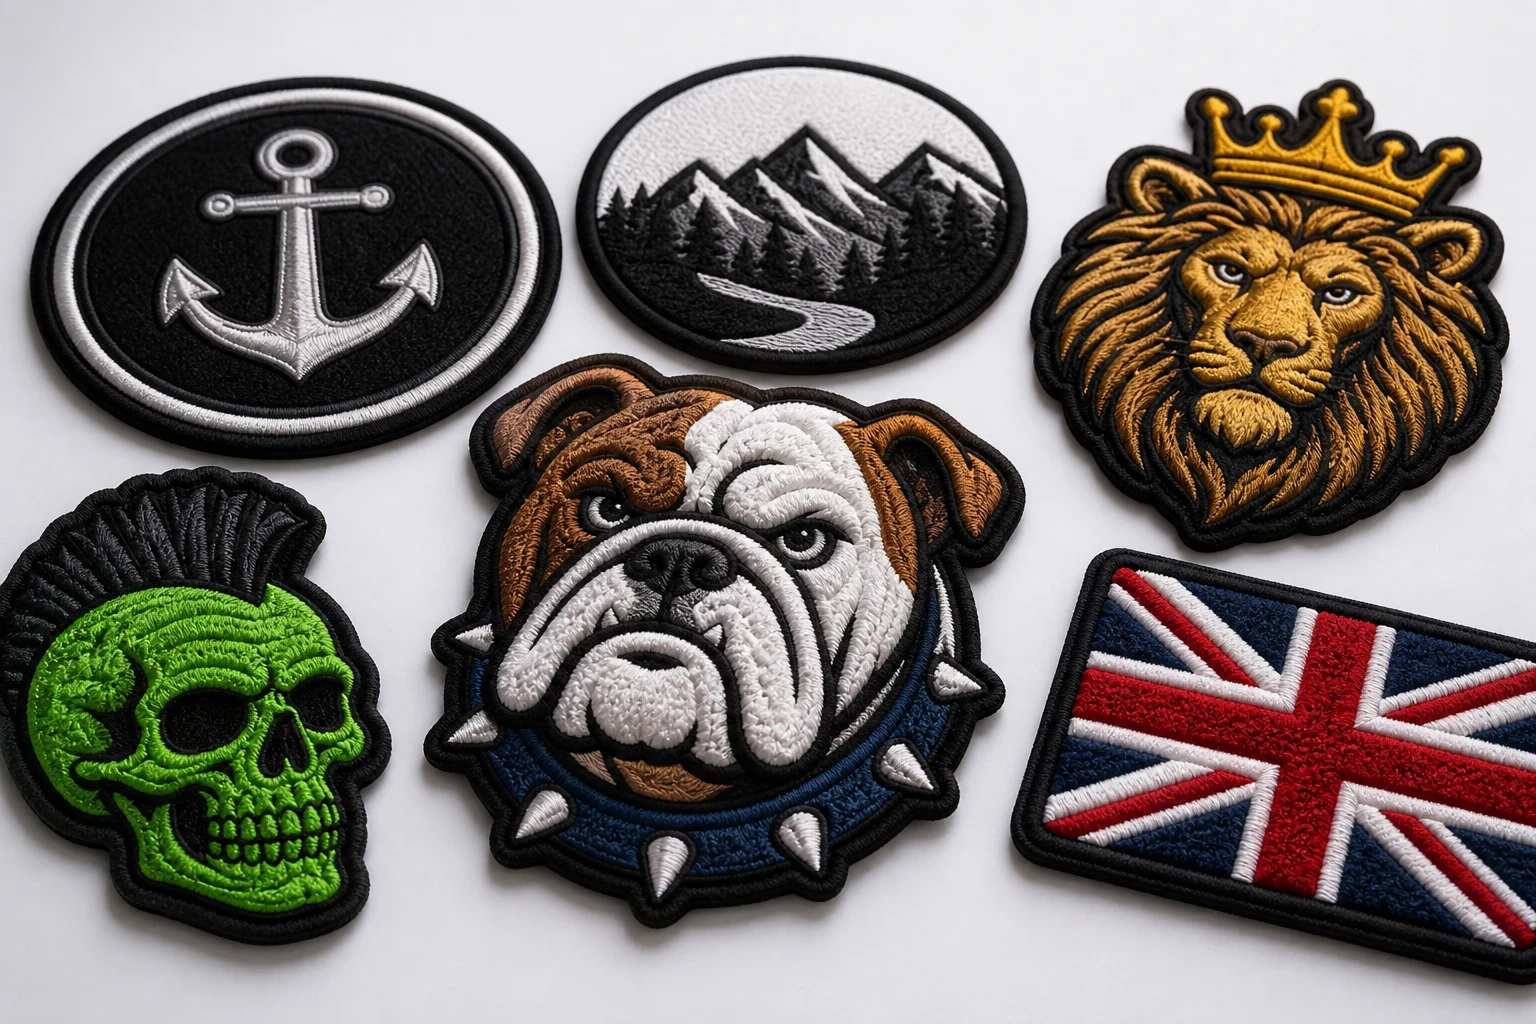
Key takeaways
- Puff embroidery works best for bold shapes, short lettering and logos with clear spacing; it is not a good fit for every fine line or tiny word.
- Choose the garment and application method before finalising the badge. Nylon shells, wool coaches, caps and Velcro panels each need a sensible backing decision.
- The Customized Patches has a 5-piece minimum per design and produces only after artwork and mockup approval.
- A free digital mockup is usually supplied within 12 hours, allowing UK brands to check size, thread, foam coverage and placement before production.
Puff embroidery patches UK are raised badges made by placing foam beneath selected areas of embroidery, giving a logo visible height and shadow. They are best for bold brand marks, short lettering, caps, jackets, teamwear and workwear; very fine details and long small text are usually better handled with flat embroidery, weaving or print.
The Customized Patches supplies UK customers with a free digital mockup usually within 12 hours. There is a 5-piece minimum per design, and nothing is produced until the artwork and mockup have been approved. That approval stage matters: it is where we catch lettering that is too small, a border that will crowd the logo, or a backing that does not suit the garment.
What makes puff embroidery different from flat embroidery?
Flat embroidery places thread directly across the patch surface. Puff embroidery adds a shaped foam layer under selected stitched sections, then the needlework covers the foam and cuts a clean edge around it. The result is a raised face that can be felt with a finger and seen more clearly from an angle.
That extra height changes the design rules. A simple club crest with a bold initial can look excellent in puff. A detailed coat of arms with tiny motto text may lose clarity, particularly on a patch under 3 inches wide. We often advise splitting the treatment: use puff for the main initials or symbol, then use flat embroidery for the supporting border.
The finish is not automatically better than every alternative. Printed is flatter; that is the point. A printed patch may show a photographic image, gradient or long line of small copy more clearly. A woven patch can give a neat, low-profile result for detailed logos. Puff is chosen for its raised visual effect, not because it replaces every other construction.
Where the raised effect earns its place
- Front panels of caps and trucker hats, where a raised initial or short word remains readable at a glance.
- Football, rugby and motorsport teamwear where the badge needs a strong, tactile identity.
- Hospitality polos, overshirts and work jackets where a company mark benefits from a more substantial finish.
- Biker and motorcycle club patches where a bold centre emblem can sit alongside a merrowed crest or larger back design.
- Limited-run brand merchandise, supplied as a sew-on badge or attached to a Velcro panel.
Artwork best practices for puff embroidery patches UK
Start with the mark, not the patch shape. Send a vector PDF, AI or EPS file where possible, alongside a PNG that shows the intended colours. If the logo only exists as a low-resolution image, send it anyway and explain where it will be used. We can assess the practical version rather than guessing what a blurry file was meant to say.
Raised foam needs room around it. Broad letters, thick strokes and open counters are safer than narrow type with tight gaps. A lowercase word set in a light modern font may look perfect on a website but close up once stitched. Block capitals, initials and simplified icons normally translate more reliably.
- Keep the main raised strokes visibly wider than a fine single line.
- Avoid placing tiny text across a heavily raised section.
- Leave enough breathing room between the logo and the outer border.
- Use contrast: dark navy thread on black fabric will be harder to read than a lighter thread.
- Choose two or three priority colours before adding minor shades.
- Mark which parts should be puffed and which should remain flat.
- Supply the real wording exactly as it must appear, including apostrophes and initials.
A common request is to make every stitch raised. That can work for a compact, bold mark, but it can also make the surface busy and reduce definition. Selective puff usually gives the eye a clear focal point: a raised crown, initial, animal head, bolt or word, with a flat outline supporting it.
Lettering, outlines and minimum practical detail
There is no single minimum size that suits every font, colour and patch dimension. A 4-inch wide bold word may be straightforward, while a 2-inch circular patch containing six words may need a redesign. The mockup is the useful test because it shows the proposed embroidery at its intended proportions rather than relying on the appearance of a screen logo.
For a school blazer, for example, a simplified house emblem with one large letter tends to work better than a full shield packed with tiny Latin text. For a hospitality polo, the business name may stay flat while the icon is raised. For a cadet unit, a larger sleeve badge can carry more detail than a small chest badge.
Choosing the patch size, shape and edge
Measure the actual area rather than choosing a size from the logo file. A chest patch on a polo often needs to stay compact so it does not interfere with a placket or pocket. A back patch on a wool coaches jacket can be much larger. A cap front is restricted by its curve, seam and available panel height.
State the finished width and height in inches if the shape is rectangular, or the diameter if it is round. For an irregular crest, give the maximum width and height. Also tell us whether the patch will sit near a zip, a curved sleeve, a pocket flap or a Velcro panel. Those details affect the border and application advice.
| Use | Practical starting point | Puff design advice | Main caution |
|---|---|---|---|
| Cap front | About 2.5–4 inches wide | Use a bold icon, initials or short word with a clean outer edge. | Curvature can distort long lettering and excess height may catch on handling. |
| Polo or shirt chest | About 2.5–4 inches wide | Keep the logo balanced beside the placket and use selective puff. | A heavy patch can pull lightweight fabric if it is too large. |
| Sports jacket sleeve | About 3–4.5 inches wide | Use strong contrast and a simple crest or number. | Check seams and movement before confirming the size. |
| Wool coaches jacket back | About 8–12 inches wide | Large initials or an emblem can make good use of the raised surface. | Allow space around the patch so the border does not compete with the garment. |
| School blazer | About 2.5–3.5 inches wide | Keep the badge tidy, with clear house colours and readable initials. | Check the school’s preferred position and whether sewing is required. |
| Velcro panel | Match the existing panel dimensions | Use a stable shape that sits within the hook-and-loop field. | A backing that extends beyond the panel can catch on other fabric. |
Edges also set the tone. A merrowed edge gives a raised rolled finish around many traditional badge shapes. A clean stitched edge can suit sharper modern logos or irregular outlines. The right choice depends on the artwork, not a general rule that one edge is always superior.
Backing and attachment: sew-on, iron-on or Velcro
Backing is a functional decision, not just a line on a quote. Sew-on is dependable for jackets, heavy cotton, wool coaches and items that will be washed regularly. Iron-on can be convenient on suitable cotton or polyester garments, but it is not the right answer for every fabric or laundry routine.
It is common to see iron-on patches peel after a dryer cycle, particularly where the garment was not pressed at the required temperature or the fabric had a water-resistant finish. Nylon shells can be heat-sensitive, coated and slippery. A sew-on badge is often the sensible option for an outdoor shell, while Velcro is useful for uniforms that need patches removed or swapped.
Not sure whether your logo should be fully puffed, selectively raised or flat embroidered? Send the artwork and intended size for a free digital mockup usually within 12 hours, then compare the practical finish before you produce.
GET A FREE MOCKUP- Choose sew-on for wool coaches jackets, heavy outerwear, school blazers and items expected to receive hard use.
- Consider iron-on for a suitable smooth garment when the care label and fabric can tolerate the application method.
- Choose Velcro for removable identifiers, tactical-style panels, event staff garments and kit that needs changing.
- Tell us if the patch will go on a nylon shell, coated jacket, fleece, cap or stretch fabric.
- Do not assume an iron-on backing removes the need for testing on a sample garment.
For more detail on dimensions and attachment choices, see 3D embroidered patches Sizing and Backing Options Explained. Although names vary between suppliers, puff embroidery and 3D embroidery are commonly used for the same raised construction family. The garment still decides what is sensible.
Comparing puff embroidery with other branded patch options
Brands often ask for a raised finish because they want the patch to feel more like a product than a printed label. That can be a strong reason, especially for merchandise and clubwear. It should still be weighed against wash conditions, artwork detail, target price and the surface available.
| Patch type | Surface and detail | Good fit for | Trade-off |
|---|---|---|---|
| Puff embroidery | Raised selected areas with visible thread texture | Bold logos, initials, caps, jackets, sports and merchandise | Fine detail and small text may need simplifying. |
| Flat embroidered | Textured stitched surface without foam height | Traditional crests, uniforms, names and general branding | Less visual height than puff, though often easier for detail. |
| Woven | Low-profile, tightly woven face | Small lettering, clean lines and detailed compact artwork | Does not provide the raised tactile effect. |
| Printed | Flat ink or printed image | Gradients, photographs, long copy and complex colour changes | Can look less textured and may need different care expectations. |
| PVC | Moulded rubber-like surface | Outdoor-style branding, bold icons and water-resistant applications | Different feel and appearance from thread; not suited to every brand identity. |
| Chenille | Soft, looped, visibly tactile yarn surface | Varsity lettering, school teams and large simple motifs | Usually less suitable for very fine detail or compact technical logos. |
If the brand identity depends on gradients, photographic shading or a long slogan, look at printed patches before committing to puff. If the intended style is collegiate, soft and high-pile, chenille patches may be closer to the brief. If the badge needs a rugged moulded surface, PVC patches could be worth comparing.
For a conventional logo with no requirement for height, standard embroidered patches may be the cleaner quote. For a premium leather label on a bag or jacket, leather patches may make more sense. The best production choice is the one that behaves properly on the garment and communicates the brand clearly.
Garment-specific advice for UK teams and brands
A football club usually needs a badge that survives changing rooms, kit bags and repeated washing. A raised sponsor mark on a training top may look strong, but the fabric weight and stretch still matter. For match or training garments, check the care instructions and consider sewing where heat application could affect technical fabric.
Biker and motorcycle club garments bring a different set of choices. A leather vest, denim jacket and nylon riding shell do not behave alike. Large back pieces can carry a detailed arrangement, while the front chest may need a smaller raised club mark. Our guide to biker and motorcycle club patches covers the broader layout and attachment questions.
Hospitality polos need a restrained approach. A raised icon beside a flat business name can look more polished than a thick patch covering the whole chest. On a branded apron or overshirt, check the patch will not sit directly under a strap, pocket opening or area that receives frequent rubbing.
School blazers and cadet garments are usually ordered in repeat batches, so consistency matters. Keep a record of the approved size, thread colours, backing and artwork version. The five-piece minimum makes small pilot orders possible, but the approved mockup should become the reference for later replenishment.
Nylon, wool, cotton and coated fabrics
Nylon shells can be thin, smooth and heat-sensitive. Wool coaches jackets can accept a substantial sew-on badge but may need careful positioning to avoid puckering. Cotton twill is generally easier to work with, while stretch sports fabrics need consideration around weight and movement. A patch that sits beautifully on cotton may not behave the same way on a lightweight shell.
Send the garment type with the quote, even if the logo has already been used elsewhere. We can then recommend a backing and point out risks before production. If the item is valuable or difficult to replace, test application on a spare or sample garment rather than using the first production piece as an experiment.
Ordering puff embroidery patches in the UK
A useful quote includes the artwork, finished size, quantity, patch shape, thread colours, backing, garment type and delivery postcode. The quantity must be at least 5 pieces per design. If you have several designs, list each one separately because five of one badge and five of another are treated as separate designs.
The Customized Patches usually sends a free digital mockup within 12 hours. Review it for the points that are easy to miss in a general logo file: spelling, raised sections, border width, colour contrast, overall dimensions and whether the shape leaves enough room around the design. Production starts only after approval.
- Send the cleanest artwork available and state the intended garment.
- Confirm the finished size in inches and the required quantity per design.
- Choose the backing and application method, or ask for a recommendation.
- Review the free digital mockup usually supplied within 12 hours.
- Request changes if the lettering, border, colours or puff coverage are not right.
- Approve the final mockup in writing before production.
- Check the delivery details for UK-wide shipping and retain the approved artwork for future repeats.
Lead time depends on the design, quantity, backing and current production schedule. A simple five-piece sample and a large multi-size club order are not the same job. Ask for the current estimate when requesting the quote rather than relying on a generic number copied from another product page.
For cost context, read How Much Do puff embroidery patches UK Cost in the UK?. Price can change with size, stitch coverage, number of colours, edge, backing and quantity. A larger patch may cost more per piece but give a brand more usable space; a smaller patch may be cheaper yet need a simpler logo.
Quality checks before approving the mockup
A mockup is not decoration. It is the point at which the production brief becomes specific. Compare the proposed patch with the garment colour, not only a white screen background. A dark patch on a black nylon jacket can lose its border, while a bright thread on a pale polo may need a darker outline for separation.
Ready to check the real proportions on your garment? Name the size, backing and quantity on the quote. We will show the correct construction on a free digital mockup usually within 12 hours, and production begins only after you approve it.
GET A FREE MOCKUP- Is every word spelt correctly and shown at the intended size?
- Are the raised areas marked clearly enough for the production team?
- Does the outer edge follow the shape without crowding the logo?
- Can the smallest letter or line still be understood at the finished dimensions?
- Does the thread contrast with the actual garment?
- Is the backing suitable for the fabric and expected washing?
- Does the patch leave room for seams, pockets, zips and Velcro?
- Has the correct quantity been stated for each separate design?
Ask someone who has not seen the artwork before to read the small text. If they cannot identify it on the mockup, the finished badge will not magically make it clearer. Simplifying one line of copy is usually less costly than producing a batch that the wearer cannot read.
Common failures and how to avoid them
The most frequent issue is trying to reproduce a website logo exactly at a much smaller physical size. Digital artwork can contain hairline strokes and tiny gaps that have no practical equivalent in thread. The next is choosing iron-on for a garment whose surface, finish or care routine does not support it.
- Overloading a small circular patch with a long organisation name and several decorative lines.
- Using low-contrast thread because the screen preview looked brighter than the actual garment.
- Leaving no room for a border around a raised central mark.
- Assuming every part of a logo needs foam, creating a crowded surface.
- Ordering before confirming whether the cap, shell or blazer can accept the chosen backing.
- Approving a design without checking the finished inches and then discovering it overwhelms the garment.
- Treating a repeat order as a new design without keeping the original approved file.
Our guide to Common Mistakes to Avoid When Ordering puff embroidery patches UK goes deeper into artwork, size and application errors. The practical fix is usually simple: give the garment details early, choose the priority part of the logo, and use the approval stage properly.
Care, use and repeat orders
Care starts with the garment label and the attachment method. Do not press an iron directly over the raised foam. If the patch is sew-on, make sure the stitching is secure around the perimeter and avoid catching only a loose decorative edge. For Velcro, keep the hook side covered when the patch is removed so it does not snag other clothing.
Repeated washing, tumble drying, abrasion from straps and outdoor exposure will affect any textile decoration over time. A raised patch can collect dust around its edges more visibly than a flat printed mark. That is part of the texture, not a manufacturing fault, but sensible cleaning and the correct garment care will help preserve the finish.
For repeat club or business orders, keep the approved artwork, patch dimensions, backing and colour notes together. Tell us if a later batch is intended to match an earlier run. A named artwork version helps avoid accidental changes to the border, lettering or puff coverage.
A straightforward decision for brands
Choose puff embroidery if the brand mark is bold, the raised surface is part of the appeal, and the garment can support the patch. Choose flat embroidery when a traditional stitched badge or more forgiving detail matters. Choose woven or printed construction when the artwork relies on small copy, gradients or a low-profile face.
There is no benefit in forcing a detailed logo into a puff construction simply because raised patches are popular. The strongest result is normally a controlled design with one clear focal area, suitable contrast, a sensible size and a backing chosen for the actual garment.
For more buying guidance, compare Puff embroidery patches UK vs flat embroidered patches: Which Is Right for Your Project? and How to Choose the Right puff embroidery patches UK for Your Brand. Brands ordering across the United Kingdom can also browse our UK city pages for local delivery information while keeping the same production and approval process.
Frequently asked questions
What are puff embroidery patches UK?
Puff embroidery patches UK are raised embroidered badges made with foam beneath selected stitched areas. The foam creates a three-dimensional logo surface. They are commonly used on caps, jackets, sportswear, club garments, workwear and branded merchandise, especially where a bold tactile finish is wanted.
What is the minimum order for puff embroidery patches?
The minimum is 5 pieces per design. If you need five football badges and five sponsor badges, those are normally treated as two separate designs. State each quantity clearly on the quote so the artwork and pricing are assessed correctly.
How quickly can I see a puff patch mockup?
The Customized Patches usually provides a free digital mockup within 12 hours. The mockup lets you check size, spelling, colours, border, raised areas and backing before production. Patches are produced only after the artwork and mockup have been approved.
Are puff patches suitable for small lettering?
They can suit short, bold lettering, but very small or fine text may lose clarity once stitched over foam. A mockup is the best test. If the wording is long, a woven or printed patch may reproduce it more clearly, or the design can use a raised symbol with flat supporting text.
Which backing is best for a nylon jacket or wool coaches jacket?
Sew-on is often the safer choice for nylon shells and wool coaches jackets because heat application can be unsuitable for coated, slippery or heat-sensitive fabrics. Velcro may suit removable uniform identifiers. Iron-on should only be selected after checking the fabric, care label and application conditions.
Can puff embroidery patches be used for school, football and biker club clothing?
Yes. They can work on school blazers, football and rugby kit, cadet clothing, biker vests, denim jackets, polos and caps. The best size and backing depend on the garment. A simple crest or bold initial normally works better than a small badge packed with fine wording.
Ready to produce custom patches for your UK team or brand?
GET A FREE MOCKUP