
How printed patches Can Strengthen Your Brand Identity
Printed patches strengthen brand identity by placing a clear, repeatable design on clothing, bags and equipment. They suit artwork with gradients, small details and photographic elements, while giving a flatter finish than thread. UK teams and businesses can test the result with The Customized Patches’ free digital mockup, with a 5-piece minimum per design.
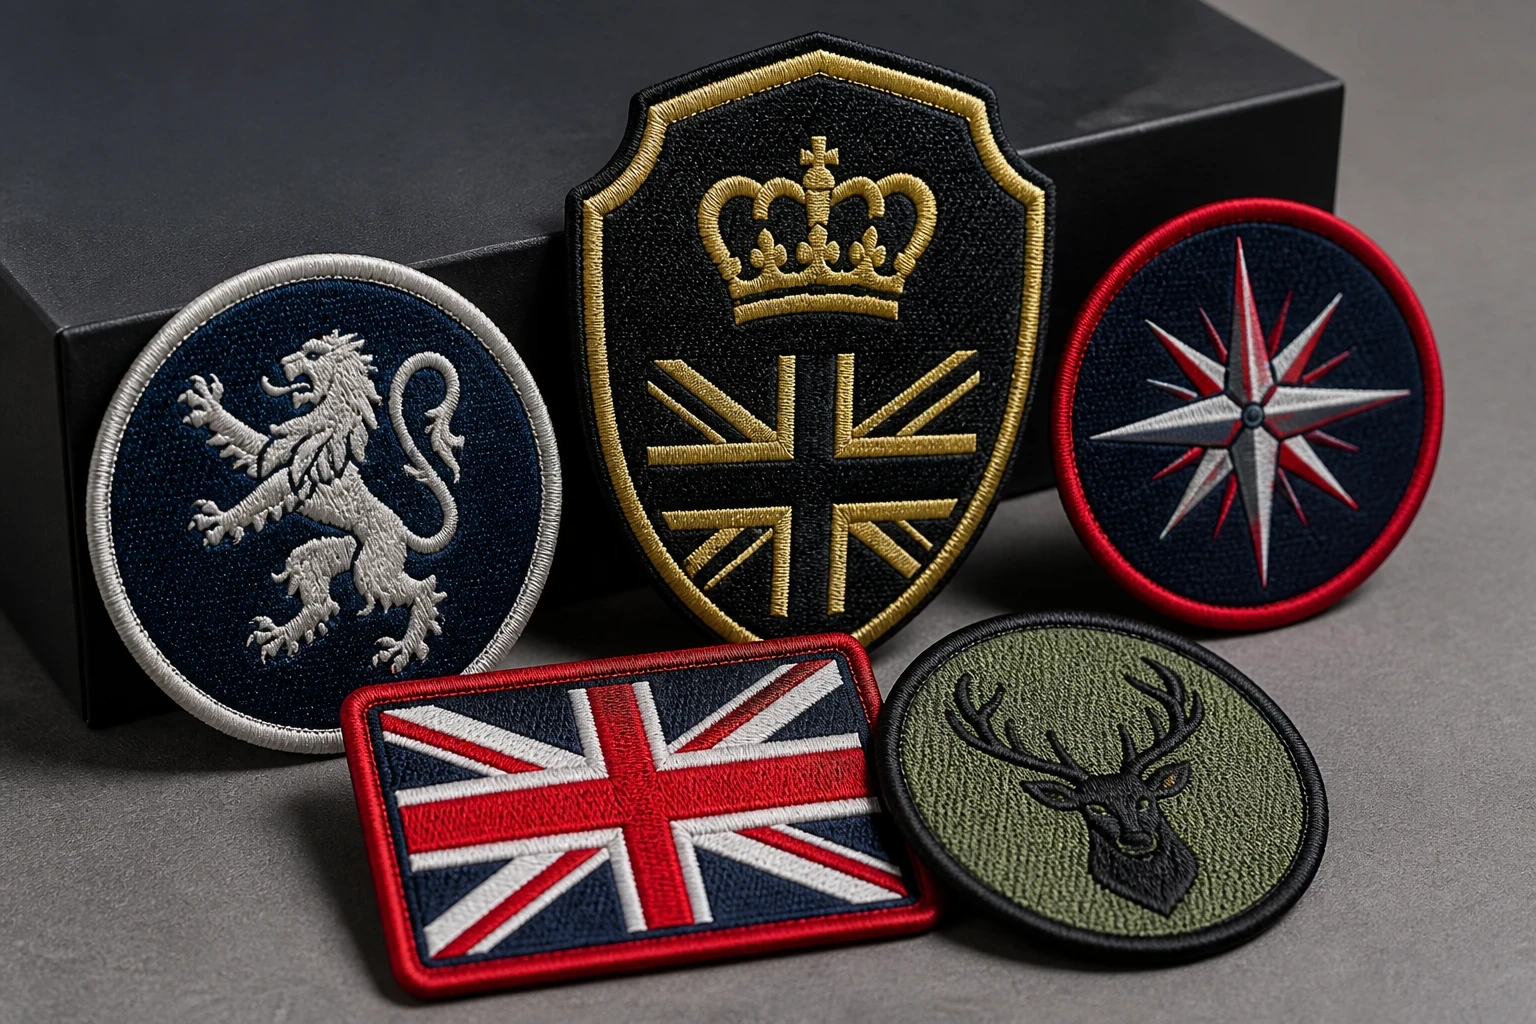
Key takeaways
- Printed patches make detailed logos, gradients and illustrated artwork easier to reproduce than raised thread.
- A consistent patch shape, colour palette and placement can make separate garments look like one organised brand range.
- Printed is flatter; that is the point. Choose it for a smooth graphic finish rather than the textured surface of embroidery.
- The Customized Patches has a 5-piece minimum per design, supplies a free digital mockup usually within 12 hours, and produces only after approval.
Printed patches can strengthen brand identity by putting the same recognisable artwork on jackets, polos, bags and equipment. They are especially useful for logos with gradients, fine lines, illustrations or photographic detail that would be difficult to show with raised thread. The result is a flatter graphic finish that looks closer to the original artwork.
For a UK team, club or business, the value is consistency. A football club can use one crest on tracksuit tops and kit bags; a hospitality company can carry the same mark across staff jackets; a small brand can turn a plain overshirt into identifiable merchandise. The Customized Patches supplies a free digital mockup usually within 12 hours, accepts a 5-piece minimum per design, and produces only after approval.
Why printed patches matter to a brand
A brand is not only a logo on a website. People meet it on clothing, parcels, event equipment, delivery bags and the staff member standing at a counter. A patch gives that identity a physical place. It can be seen at a five-a-side match, on a market stall, in a workshop or at a trade show, often while the wearer is moving through a busy setting.
That physical repetition helps people connect separate items to the same organisation. The shape of the crest, the dark green border, the particular red in a badge and the position on a sleeve can all become useful recognition cues. You do not need to cover a jacket in branding. One well-sized mark, used consistently, often does more work than several unrelated graphics.
- They turn ordinary garments into identifiable teamwear, workwear or merchandise.
- They make one approved design usable across jackets, backpacks, caps and kit bags.
- They can reproduce shaded artwork and small graphic details without adding a thick layer of thread.
- They give staff, volunteers, players or customers a visible connection to the organisation.
- They provide a practical way to test a new visual identity before committing to a large clothing run.
The strongest results usually come from treating the patch as part of the brand system, not as an afterthought. Decide which logo version is approved, where the patch will sit, which colours must remain consistent and how it should look beside the garment colour. That planning prevents every new order becoming a slightly different interpretation.
How the printed finish changes the visual message
Printed is flatter; that is the point. Ink sits as a graphic surface rather than building the raised texture associated with embroidery. For a contemporary clothing label, an illustrated festival logo or a photographic outdoor design, that flatter appearance can feel more faithful to the source artwork.
Printed patches are also a sensible option when the artwork contains several tones that need to blend into one another. A sunset gradient, a shaded mountain, a hand-drawn character or a detailed food illustration may lose information if converted into a limited set of thread areas. Printing does not remove every production constraint, but it gives the artwork more room to remain recognisable.
There is a trade-off. Printed work does not have the tactile, raised surface of a merrowed crest or a heavy embroidered badge. A biker vest, military-style jacket or traditional club blazer may need that structured, stitched appearance instead. If the physical texture is central to the identity, compare embroidered patches or 3D embroidered patches before deciding.
| Brand requirement | Printed patches | Embroidered patches | Practical choice |
|---|---|---|---|
| Detailed illustration | Usually better suited to gradients, shading and fine graphic detail. | Detail is represented through stitch areas and may need simplification. | Choose printed when preserving the illustration matters most. |
| Surface appearance | Flat, smooth and close to a printed graphic. | Raised, textured and visibly made from thread. | Choose printed for a clean graphic finish; embroidery for texture. |
| Traditional crest | Can show a detailed crest clearly, but without raised thread. | Creates a familiar club, school or uniform badge appearance. | Choose based on whether heritage or detail is the stronger cue. |
| Small text | Can reproduce small lettering, subject to size and artwork checks. | Very small lettering can close up or become difficult to read. | Ask for a mockup at the intended finished size. |
| Garment weight | Often feels lighter and flatter against the fabric. | Can add more texture and thickness, especially with dense stitching. | Printed may suit lightweight shells and casual clothing. |
| Brand personality | Graphic, illustrative, modern or image-led. | Established, traditional, tactile or uniform-led. | Let the brand’s intended feel guide the material choice. |
The comparison is not a claim that one method suits every job. A school blazer may call for a stitched crest, while the same school’s summer activity bags could carry a printed mascot. A clothing brand may use printed patches for artwork-led seasonal drops and woven patches for a simpler label. The best choice can change by garment and use, even within one identity.
Colour control is part of identity
Colour is one of the quickest ways a customer recognises a brand. Send the clearest colour references available and identify colours that must remain close to your brand guidelines. Screens, fabric colours and lighting can make the same shade look different, so the digital mockup is a useful point for checking the overall balance before production.
Think about contrast as well as accuracy. A navy patch with a dark blue mark may be technically on-brand but hard to see on a nylon shell. A pale border may look clear on screen but disappear against a light polo. The mockup should show the patch at its intended size and against a comparable garment colour, not floating on a white page.
Choosing a patch size, shape and placement
Size affects both recognition and legibility. A chest patch on a polo may need to be modest enough for everyday wear, while a back patch on a biker jacket has more room for a name, emblem and surrounding text. Measure the usable area on the actual garment rather than guessing from a screen.
- Chest or left-breast patches should remain readable without dominating the garment.
- Sleeve patches need to account for seams, zips and the curve of the arm.
- Back patches can carry more information but should be checked against the wearer’s movement and the garment’s panel lines.
- Cap patches need a shape that follows the available front panel and does not fold over the peak.
- Bag patches should avoid handles, pockets and areas that rub against the wearer’s body.
- Velcro panels need accurate sizing so the hook-and-loop area is fully covered without catching on other fabric.
Shape is another recognition cue. A clean circle can suit a club badge, a shield can reinforce a team identity and a custom outline can follow an illustrated character. A border helps separate the design from the garment, but it should support the logo rather than become a thick frame that steals attention.
Placement should match how the garment is used
A patch on a hospitality polo may sit where a customer naturally looks when speaking to staff. A patch on a football tracksuit may need to avoid the zip and sponsor area. On a work jacket, the patch may share space with a name strip, safety marking or employer logo. These details are easy to miss if artwork is approved without considering the garment.
For removable identity systems, specify the backing clearly. A Velcro panel is useful for cadet units, event crews and teams that change roles or locations, but it needs a compatible loop surface. Sew-on backing is dependable for long-term use. Iron-on can be convenient, yet a patch that looks fine at first may peel after a dryer cycle if the fabric, heat and application are not suitable.
Matching printed patches to real UK garments
The garment decides more than many first-time buyers expect. A smooth cotton polo gives a different result from a ripstop nylon shell. Wool coaches’ jackets, fleece, waterproof fabrics and heavy denim all have different surfaces, seams and handling requirements. Tell us what the patch is going on, not only the logo you want printed.
Not sure whether a flat print or raised thread will hold your logo’s character? Send the artwork and garment details for a free digital mockup usually within 12 hours. We show the proposed result before production, and the minimum is 5 pieces per design.
GET A FREE MOCKUP| Garment or item | What to check | Common concern | Useful approach |
|---|---|---|---|
| Nylon shell | Surface coating, seams and care label. | Heat or adhesive may not suit the fabric. | Confirm the fixing method before ordering and consider sewing. |
| Wool coaches’ jacket | Pile, lining and panel construction. | A stiff backing may sit awkwardly or catch on the lining. | Use the mockup to check position and ask about sewing options. |
| Football tracksuit | Zip, sponsor marks and stretch panels. | A patch may distort if placed over a moving or elastic area. | Choose a stable panel and check the finished size. |
| School blazer | Woven surface, lining and traditional badge position. | A flat print may not provide the expected formal crest finish. | Compare printed with embroidered or woven options. |
| Velcro panel | Loop area and panel dimensions. | The patch may be too large, too small or partly unsupported. | Match the patch back to the loop panel exactly. |
| Canvas bag | Seams, handles and repeated rubbing. | Edges can catch if the backing or border is poorly matched. | Keep clear of high-friction areas and consider sewing. |
A practical example is a cadet unit ordering patches for field jackets. The design may be detailed enough for printing, but the unit still needs to consider removable Velcro, rain exposure, the position of the loop panel and whether the patch will be swapped regularly. The artwork method and the backing method solve different problems; choosing one does not automatically choose the other.
A biker club presents a different case. A large back design can carry a club name, central emblem and location, but the group may expect the weight and raised border of a traditional badge. For that use, compare biker and motorcycle club patches with a printed sample rather than assuming a flat finish will give the right character.
Using one patch system across teams, brands and clubs
Brand identity becomes stronger when different groups use a common visual rule. A company might give customer-facing staff a left-chest patch, warehouse staff a sleeve patch and delivery teams a bag patch. The sizes can vary by garment, but the border, core mark and colour relationships should remain recognisable.
- Football clubs can use the same crest on player jackets, coaches’ tops, kit bags and volunteer clothing.
- Hospitality businesses can mark polos, overshirts and event jackets without commissioning a new logo for every garment.
- Schools can carry a mascot or house mark onto blazers, sports bags and fundraising merchandise.
- Independent clothing brands can use a detailed seasonal graphic on overshirts, caps and packaging accessories.
- Trade teams can add a clear company mark to jackets while keeping personal names and safety information separate.
- Music, arts and festival groups can use illustrated patches as merchandise that continues promoting the event after it ends.
The key is to separate permanent identity from temporary information. The core brand patch may stay the same for several seasons. Names, roles, locations or event dates can be changed through separate strips, labels or removable patches. This reduces waste and makes repeat ordering simpler because the main artwork is already approved.
Some brands also mix patch methods. A detailed printed front patch can sit beside a simple woven patches label, while a premium range might use leather patches on heavier overshirts. A soft sports mascot may suit chenille patches, and a raised mark may call for 3D embroidered patches. Brand consistency does not mean every item must use identical construction.
Artwork decisions that protect recognition
Start with the version of the logo people actually need to recognise. A full brand lock-up may work on a website but become crowded on a 2-inch patch. A symbol, short name or simplified badge can be more effective on a sleeve or cap. That is not weakening the identity; it is adapting the identity to a physical scale.
Keep important lettering large enough to read at the finished size. Fine lines, thin outlines and crowded shapes should be checked in the proposed patch dimensions. Do not judge only a large PDF on a monitor. A design that looks clear at 10 inches may lose its smallest details at 3 inches.
- Send vector artwork where available, along with a reference image showing the intended appearance.
- Name colours or provide brand references rather than relying on an unlabelled screenshot.
- Mark any text that must remain exact, including spelling, dates and place names.
- Remove unnecessary background detail if the patch will be small or viewed from a distance.
- Keep a clear border around the main design so it does not merge with a busy garment.
- Check the logo in black and white as well as colour to test whether the shape remains identifiable.
For detailed projects, our guide on How to Design Artwork for printed patches That Production-Ready covers the handover points that commonly slow an order. The aim is not to force every logo into a rigid template. It is to identify what must stay, what can be simplified and what needs a production check.
Ordering details, quantities and lead times
Start a quote with four facts: the design, finished size, quantity and intended garment. Add the preferred backing and the delivery address in the United Kingdom. If you have several designs, list the quantity for each one because the minimum applies per design, not simply to the total number of patches.
The Customized Patches has a 5-piece minimum per design. That suits a small club trial, a new merchandise idea or a team needing only a few replacement badges, while larger runs can be quoted from the same approved artwork. UK-wide shipping can be arranged once the specification and address are confirmed.
- Send the artwork, quantity and approximate size in inches.
- Tell us whether the patches are for cotton, polyester, nylon, wool, denim, fleece, bags or another surface.
- Confirm the backing: sew-on, iron-on, adhesive or Velcro, depending on the garment and intended use.
- Review the free digital mockup, usually supplied within 12 hours.
- Check the design, spelling, colours, size, shape, backing and placement.
- Approve the mockup and quote in writing.
- Production begins only after approval, followed by dispatch to the agreed UK address.
Lead time depends on the final specification, quantity and production schedule, so a fixed promise should not be made before the quote is checked. The mockup stage is usually the quickest part of the process, but an order can still be delayed if the artwork changes several times, the backing is undecided or the garment information arrives late.
If you are comparing suppliers, ask what happens after artwork is sent. A useful process should show the proposed patch before production, identify the backing clearly and give you a chance to correct a spelling or sizing problem. The A Step-by-Step Guide to Ordering printed patches explains the handover in more detail.
Common mistakes that weaken a patch-based identity
The most common problem is not the printing itself. It is a decision made too early or too vaguely. Someone orders a badge without measuring the chest area, chooses iron-on for a fabric that cannot take the heat, or sends a low-resolution image and expects tiny lettering to remain sharp.
- Using several slightly different logo files across departments or seasons.
- Choosing the patch method from appearance alone without checking the garment.
- Approving colours on a white screen when the patch will sit on black, navy or patterned fabric.
- Making a small patch carry a full slogan, address, date and multiple symbols.
- Putting a sleeve patch across a seam or zip where it cannot lie flat.
- Ordering iron-on for a nylon shell, coated fabric or garment that is regularly tumble dried.
- Forgetting to specify Velcro dimensions when a patch will be moved between panels.
- Assuming five patches in total meets the minimum when there are several separate designs.
- Producing before checking a mockup, spelling and finished size.
One real-world failure is the iron-on that peels after a dryer cycle. That may be caused by unsuitable fabric, insufficient heat, incorrect pressure, repeated washing or an application method that does not match the backing. If the garment will be washed heavily, worn outdoors or issued to many people, say so at the quoting stage and consider sewn application.
Another failure is a beautifully detailed logo reduced until its lettering becomes decoration rather than information. Printed patches can retain more artwork detail than embroidery, but they are not exempt from scale. The cure is simple: decide what the viewer must read first, make that element clear, and use the mockup at the finished dimensions.
Ready to check the real size and backing against your garment? Send the design, quantity and UK delivery details for a free digital mockup usually within 12 hours. We produce only after approval, with a 5-piece minimum per design.
GET A FREE MOCKUPHow to keep the identity consistent after the first order
Save the approved artwork, patch dimensions, backing, border treatment and colour references together. Record the garment type and placement as well. This creates a useful repeat-order file instead of relying on somebody’s memory six months later.
When a new garment is introduced, do not assume the old backing or size will transfer perfectly. A patch made for a stable canvas bag may not behave the same way on a stretchy tracksuit. A chest patch that works on a polo could look too large on a lightweight running top. Keep the core artwork consistent, but review the application for each surface.
- Keep one master artwork file and one approved production version.
- Record the exact finished size in inches rather than using phrases such as small or standard.
- Store the backing and application notes with the artwork.
- Photograph the approved patch on the garment for future placement checks.
- Order replacement patches before the current stock is completely gone.
- Ask for a new mockup if the logo, garment colour or intended use changes.
A repeatable system saves time for clubs with changing squads, businesses that issue new uniforms and brands that release several garment colours. It also protects the identity from small, accidental changes: a different border width, an altered green or a shortened word that nobody formally approved.
Are printed patches the right brand investment?
Choose printed patches when the design is image-led, detailed, flat by nature or likely to be used on lightweight clothing and accessories. They are a strong fit for illustrated merchandise, event graphics, modern workwear marks and logos that depend on gradients or shading.
Choose another method when texture, heritage or a raised surface is a central part of the message. A formal school crest may be better embroidered. A small, simple label may suit woven construction. A rugged outdoor product may need PVC, and a premium leather goods range may call for leather patches. The correct material is the one that supports the brand and survives the intended use.
The sensible way to decide is to compare the actual artwork, garment and placement rather than selecting from a generic list. Send the design at the intended size, explain how the garment will be worn and ask for a mockup. That gives your team something concrete to approve and reduces the chance of a patch that looks right on screen but wrong in use.
For more background on the choice, read The Difference Between printed patches and embroidered patches, Explained. If you already know the method and want a wider ordering checklist, the Printed patches Checklist: What to Confirm Before You Order is a useful next step.
A practical final check before approval
Before approving, view the mockup as the person who will wear or receive the patch. Is the logo recognisable from a few feet away? Is the text worth keeping at that size? Does the border separate the artwork from the garment? Will the backing work with the fabric and washing routine?
- Confirm the correct logo version and spelling.
- Check the finished width and height in inches.
- Review the patch shape and border.
- Compare the artwork with the garment colour.
- Check that the backing matches the intended application.
- Confirm the quantity for every separate design.
- Check the delivery address and UK postcode.
- Approve only when the full specification is correct.
That final pause is worthwhile. A patch may be small, but it is seen repeatedly and often at close range. A clear, consistent mark can make a mixed group of garments look organised; a rushed mark can make a careful brand look inconsistent.
Frequently asked questions
How can printed patches strengthen a brand identity?
Printed patches put the same approved artwork on clothing, bags and equipment, helping people recognise the organisation across different settings. They are useful for detailed logos, gradients, illustrations and photographic designs, and they can make plain garments part of a consistent brand range.
Are printed patches better than embroidered patches for branding?
Neither is automatically better. Printed patches are usually suited to flat graphics, gradients and fine artwork, while embroidered patches provide raised texture and a traditional crest appearance. The garment, size, brand personality and intended wear should decide the method.
What is the minimum order for printed patches?
The Customized Patches has a 5-piece minimum per design. If you order three different designs, the quantity is considered separately for each design, so list every design and its required quantity when requesting a quote.
Can I see printed patches before production?
Yes. The Customized Patches provides a free digital mockup usually within 12 hours. Check the proposed size, colours, shape, backing, placement and spelling, because production starts only after the mockup and order details have been approved.
Which backing should I choose for a branded jacket?
Sew-on backing is often a dependable option for jackets that will be worn and washed regularly. Iron-on may suit compatible fabrics and applications, but it is not suitable for every nylon shell, coated fabric or dryer routine. Velcro is useful when patches need to be removed or exchanged, provided the garment has a compatible loop panel.
Can printed patches be used on school blazers, football kits and workwear?
They can be considered for all three, but the right method may differ. Football kits and workwear need checks for seams, stretch, washing and placement. School blazers may traditionally use embroidered or woven crests, so compare the expected formal appearance with the flatter look of printed patches before ordering.
Ready to produce custom patches for your UK team or brand?
GET A FREE MOCKUP