
Printed patches: A Worked Example for a UK Brand
In this illustrative worked example, printed patches can help a hypothetical UK brand apply a detailed, flat logo to several garment types without losing small artwork features. The brand chose printed patches for colour detail, specified a suitable backing for each garment, reviewed a free digital mockup, and ordered only after approval. The Customized Patches has a 5-piece minimum per design.
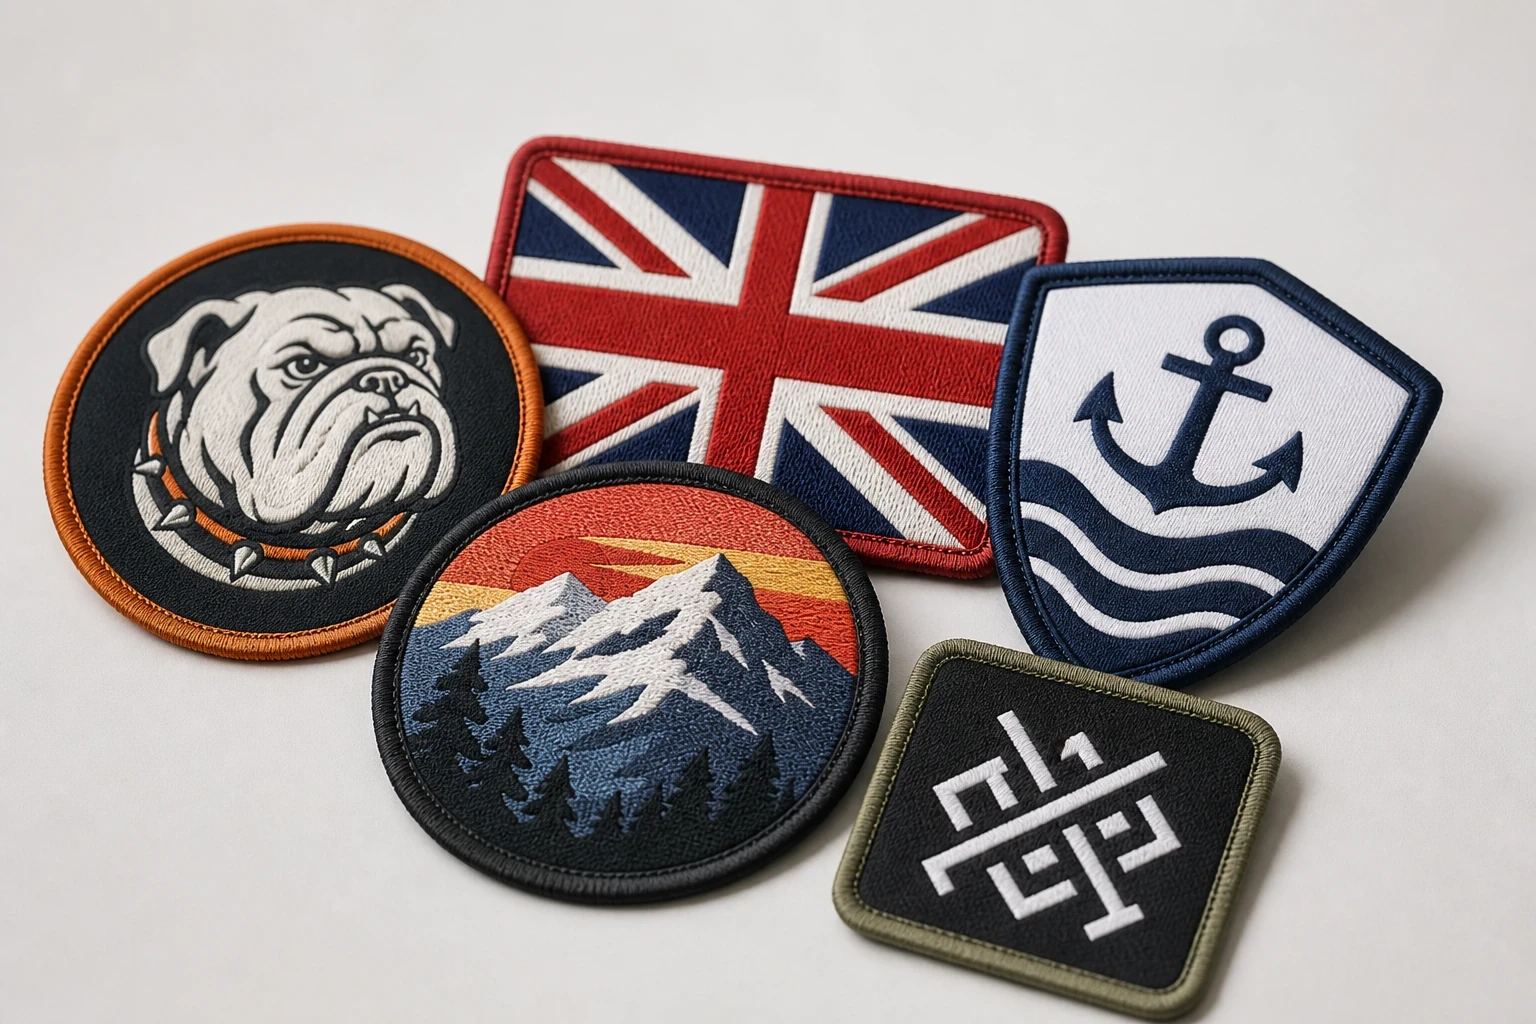
Key takeaways
- Printed patches suit detailed, flat artwork, small colour changes and logos that would be difficult to reproduce with heavy thread.
- A backing choice should follow the garment: sew-on is dependable for frequent washing, iron-on suits suitable fabrics, and Velcro works for removable identification panels.
- The Customized Patches has a 5-piece minimum per design and normally sends a free digital mockup within 12 hours.
- Production starts only after the customer approves the mockup, so sizing, spelling, colours and backing can be checked before manufacture.
Please note: this is an illustrative worked example, not a report on a real customer. The brand, garments and decisions below are a hypothetical scenario based on common UK patch briefs, written to show the questions worth asking and the choices involved. No customer results, sales figures or reviews are claimed.
This printed patches worked example follows a hypothetical UK brand that needed a detailed logo on several types of clothing. Printed patches were selected because they kept the artwork flat and allowed small colour changes, fine lines and a shaded illustration to remain visible.
The successful part was not simply choosing ink instead of thread. The brand matched the patch size, edge, backing and garment to the way the clothing would be worn. The Customized Patches supplies a free digital mockup usually within 12 hours, accepted a 5-piece minimum per design, and produced only after the brand approved the finished specification.
Why the UK brand chose printed patches
The brand had a logo with a small illustrated object, narrow lettering and several tones of the same colour. It needed the mark to look consistent on a lightweight jacket, a cotton overshirt and a set of promotional garments. A raised, heavily stitched finish would have changed the proportions of the artwork and made some areas look crowded.
Printed is flatter; that is the point. Ink sits across the patch face rather than building up with rows of thread, so a detailed image can be reproduced without every small shape being converted into a stitch path. That does not make printed patches the right answer for every order. A simple crest intended for a traditional club blazer may have more presence as an embroidered patch.
- The artwork contained fine lines and several close colours.
- The brand wanted the logo to sit close to the garment rather than form a raised surface.
- The same design had to work on different garments and promotional items.
- The finished patches needed to be supplied in a small first run, with room for a later reorder.
- The brand wanted to check the actual proportions before anything was made.
This is a common decision for UK clothing brands, hospitality suppliers, event teams and small businesses. An embroidered design can be excellent for a bold merrowed crest, but thread has physical limits. Tiny gaps can close, very small lettering can lose clarity, and a smooth photographic transition usually needs a different construction. Our guide to printed patches vs embroidered patches: Which Is Right for Your Project? explains that choice in more detail.
The logo and garment problem had to be solved together
The first question was not simply, “Can this logo be printed?” It was, “Where will the patch go, and what will happen to it there?” A patch on the left chest of a hospitality polo is treated differently from one on a nylon shell, a wool coaches jacket or a Velcro panel on a utility bag.
Nylon shells can be slippery and heat-sensitive. A hot iron-on application may not be suitable without careful testing, while a sew-on finish gives the wearer a more dependable attachment. A wool coaches jacket may accept sewing well but can show damage if the needle work is rough. On a removable identification panel, hook-and-loop backing is usually the practical option.
| Application | Useful backing | Why it may suit the job | Point to check |
|---|---|---|---|
| Cotton overshirt or sturdy work jacket | Sew-on or iron-on | A firm fabric gives the patch a stable base | Confirm that the iron-on adhesive is suitable for the garment care label |
| Nylon shell | Sew-on or Velcro | Avoids relying on high heat on a coated or technical fabric | Check lining, seam position and waterproofing before stitching |
| Wool coaches jacket | Sew-on | Gives a secure finish without depending on adhesive | Use careful stitching and avoid damaging the wool surface |
| Removable team or staff panel | Velcro | Allows names, roles or units to be changed | Measure the existing loop panel and match the hook side |
| Promotional garment with occasional use | Iron-on or sew-on | Can provide a neat result when the fabric is suitable | Iron-on can peel after a dryer cycle or repeated hot washing |
The brand supplied photographs of the garments and marked the intended placement. That small step prevented a common production problem: approving a patch that looks right on a screen but is too large for the pocket area, too close to a seam or too heavy for a thin garment. We regularly ask football clubs, cadet units and businesses for this information before finalising a quote.
Size was judged at actual viewing distance
A logo that is legible at 100 per cent on a monitor may not be legible at 2 inches wide on a jacket. The brand tested the design at its intended physical size. The patch was kept large enough for the smallest wording, but not so large that it overwhelmed the garment.
For many chest applications, a width around 3 to 4 inches is a useful starting point, although the correct dimension depends on the garment and the artwork. Back patches, sleeve patches and bag patches can require different proportions. A ruler or paper cut-out is often more useful than guessing from a digital preview.
Artwork preparation made the order more predictable
The brand supplied a clean logo file and identified the colours that mattered most. Small text, thin outlines, transparent areas and the intended background all need checking. A printed patch can reproduce much more visual detail than a simple stitch-only treatment, but it is still a physical product with a defined edge and a limited finished size.
Photographic artwork needs particular attention. A dark image printed on a dark patch base may lose contrast, and very light lettering can disappear against a pale garment. Gradients should be reviewed at the final patch size rather than judged only from a large screen file. Our guide to How to Design Artwork for printed patches That Production-Ready covers file preparation and common issues.
- Keep small wording short, bold and large enough to read at the intended distance.
- Use strong contrast between the artwork and the patch background.
- Tell the manufacturer if a colour must match an existing garment or brand guide.
- Do not hide important details against the border or a merrowed edge.
- Check the finished shape, including corners and any cut-out sections.
- Send the clearest available artwork rather than a compressed screenshot.
The border also mattered. A clean printed face can be finished with a stitched or merrowed edge, but the border needs enough room to look deliberate. If the artwork runs too close to the edge, small details may feel cramped. Where a fine outline was central to the logo, the mockup showed the relationship between the face, border and garment.
Printed patches compared with other patch types
The brand did not treat printed patches as a universal replacement for other constructions. It compared the visual finish, the artwork and the garment. That is the sensible way to quote a patch: start with the use, then select the construction rather than choosing a material from a short list.
| Patch type | Best suited to | Main strength | Trade-off |
|---|---|---|---|
| Printed patches | Detailed logos, illustrations, photographs and colour-rich artwork | Flat face with strong control over visual detail | May feel less traditional or textured than raised embroidery |
| Embroidered patches | Bold crests, team badges, uniforms and traditional branding | Raised thread texture and familiar club appearance | Fine text and gradients may need simplifying |
| Woven patches | Small lettering, neat line work and flatter woven detail | Fine woven surface with a clean profile | Colour and texture behave differently from printed artwork |
| PVC patches | Outdoor, tactical and workwear applications | Water-resistant rubber-like construction with strong shape | Not the natural choice for soft photographic or shaded artwork |
| Chenille patches | Varsity, sports and large statement lettering | Heavy, tactile pile and bold presence | Small detail is limited by the thick yarn surface |
| Leather patches | Heritage, premium casualwear and simple marks | Material character and a strong natural feel | Complex full-colour imagery is not the usual application |
A football club might choose embroidered patches for a large crest on a blazer, while a hospitality team may prefer a flat printed logo on a lightweight polo. A biker or motorcycle club may need a different construction again, particularly for a back panel exposed to movement and frequent wear. See our guide to biker and motorcycle club patches if that is your application.
Not sure whether thread or ink will hold your logo at the intended size? Send the artwork and garment details to The Customized Patches for a free digital mockup, usually within 12 hours, so you can compare the finished proportions before production.
GET A FREE MOCKUPThe brand in this case chose printed patches for the detailed face, then used the backing and edge to suit the garments. That distinction matters. The patch face and the method of attachment solve different problems, and one should not be used as a substitute for the other.
The mockup caught issues before production
The free digital mockup was the point where the order became specific. It showed the proposed patch size, shape, artwork treatment and placement. The brand could see that one small line needed to be strengthened and that the original chest version was slightly too wide for the overshirt pocket.
A mockup is not a photograph of the final physical item, and it should not be treated as a colour proof under every lighting condition. It is a production check. It helps confirm spelling, layout, proportions, border treatment and the selected backing before money and materials are committed.
What the brand checked before approving
- The wording was correct, including any small text around the logo.
- The patch width and height matched the intended garment position.
- The background gave enough contrast to the artwork.
- The border did not cover or crowd important details.
- The chosen backing matched the nylon, cotton, wool or Velcro application.
- The requested quantity was correct for the first run.
- The delivery details were suitable for UK-wide shipping.
The Customized Patches normally sends a free digital mockup within 12 hours. Production begins only after approval. That sequence gives the customer a clear point to request a change, and it gives our team an agreed reference rather than relying on an old attachment or an informal message.
Quantity, pricing and the 5-piece minimum
The first order was planned as a controlled run rather than an oversized stock purchase. The Customized Patches has a 5-piece minimum per design, which allows a small brand, club or business to test the patch on its actual garments before considering a larger reorder.
The price of a patch depends on more than the number printed. Size, shape, artwork complexity, backing, edge treatment, quantity and delivery all affect the quotation. A 2-inch name patch and a 4-inch full-colour badge do not use the same amount of material or production time, even if both are described as one patch design.
| Specification | Why it affects the quote or result | What to provide |
|---|---|---|
| Finished size in inches | Larger patches use more material and can change how the artwork reads | Required width and height, or the garment area available |
| Number of pieces | Quantity affects set-up and unit pricing | Total pieces per design; the minimum is 5 pieces per design |
| Artwork detail | Fine lines, gradients and small text need careful review | The clearest logo or artwork file available |
| Backing | Sew-on, iron-on and Velcro suit different garments and uses | The application fabric and whether removal is required |
| Shape and edge | A complex cut line can alter the appearance and finishing | Simple shape, custom outline or reference image |
| Delivery | The address and timing affect the final order plan | UK delivery postcode and required date |
Small quantities are useful for approval and testing, but a larger repeat order can make more sense once the artwork and garment combination are settled. If a club is ordering for a full squad, it should also confirm whether every garment uses the same patch size and backing. Mixing a nylon shell with a cotton shirt may call for separate application advice even when the printed face is identical.
Ordering and lead-time details for a UK project
The order moved through a straightforward sequence: artwork and garment details were sent, the specification was reviewed, the mockup was issued, changes were made, and the brand approved the final version. Only then did production start. This is safer than sending a logo with a short note and assuming the manufacturer will know the intended size or backing.
Lead time depends on the design, quantity, backing, finishing and current production schedule. A quote should be based on the actual job rather than a broad promise. If a club needs patches for a fixture, a business has a launch date, or a hospitality supplier is preparing uniforms, state the required date at the first enquiry.
- Send the artwork, patch quantity, finished size and garment information.
- Explain whether the patch is for a chest, sleeve, back, bag, cap or Velcro panel.
- Choose the preferred backing, or ask for advice if the fabric is unusual.
- Review the quotation and free digital mockup.
- Request corrections in one clear reply where possible.
- Approve the mockup and specification before production starts.
- Allow time after manufacture for delivery across the United Kingdom and application to the garments.
UK-wide shipping should be planned alongside the garment schedule, not after it. Patches arriving at the same time as a batch of jackets may still need sorting, sewing or pressing. Build in time for fitting and inspect a sample before applying the whole order.
What made the printed patch project successful
The brand succeeded because it made practical decisions early. It did not ask a small chest patch to carry an oversized illustration, and it did not assume that an iron-on backing would suit every garment. The artwork was adjusted to the physical size, the edge was kept clear, and the backing followed the fabric.
It also treated the first run as a specification check. That is sensible for any business changing supplier, launching a new logo or applying patches to unfamiliar garments. The 5-piece minimum per design made it possible to test a small group of items, inspect the finish and make a measured decision about a repeat order.
- The logo was judged on the garment, not only on a large computer preview.
- The chosen construction matched the detail in the artwork.
- The backing was selected for the fabric and washing routine.
- The quantity was large enough for a real test but did not create unnecessary stock.
- The mockup gave the brand a written visual reference before production.
- Changes were made before approval rather than after the patches had been produced.
There were still trade-offs. Printed patches have a flatter surface and may not provide the raised texture expected from a traditional embroidered badge. Iron-on backing is convenient but can peel after a dryer cycle or repeated hot washing if the garment and application are unsuitable. Sew-on backing takes more time to apply, but it is often the sensible choice for a frequently worn work jacket.
Common mistakes the brand avoided
Many patch problems begin in the brief. “Make it the usual size” is not enough if the order is going on three different garments. A logo file without dimensions does not tell our team whether the patch should be 2 inches, 3 inches or 5 inches wide, and a backing request without fabric details can lead to the wrong application method.
Name sew-on, iron-on or Velcro on the quote and tell us what the garment is made from. We will show the proposed backing on a free digital mockup, usually within 12 hours, and production will start only after you approve it.
GET A FREE MOCKUPThe brand also avoided treating every colour on screen as an exact physical promise. Monitors vary, garment colours vary, and printed material has its own surface. If a colour is commercially critical, identify it clearly and discuss the requirement at quotation stage rather than relying on a screenshot.
- Ordering before confirming the final patch dimensions.
- Using tiny wording that cannot be read at the finished size.
- Putting a heat-sensitive nylon shell forward as an iron-on application without checking.
- Assuming a dryer will not affect adhesive backing.
- Ignoring the curve, seam or pocket behind the intended position.
- Approving a mockup without checking the edge and backing.
- Sending a low-resolution image when a vector or clearer file is available.
- Ordering one identical backing for garments that need different attachment methods.
Our guide to Common Mistakes to Avoid When Ordering printed patches is useful if several people are involved in approving the order. One person may own the brand artwork, another may manage uniforms and a third may receive the delivery. A short written specification keeps those details together.
Could another UK business use the same approach?
Yes, but the result depends on the application. A small food business may use printed patches on aprons or overshirts to show a detailed illustrated mark. A music brand may apply them to cotton jackets and bags. A school activity group may need a compact flat badge, while a cadet unit may prioritise removable Velcro panels and hard-wearing attachment.
For a traditional school blazer or football club crest, compare the visual result with embroidered patches. For fine small lettering, woven patches may be worth considering. A raised sports finish may point towards 3D embroidered patches, while outdoor kit may call for PVC patches. The right option is the one that fits the artwork and the garment, not the one with the most impressive description.
If you are still comparing materials, our printed patches product page gives a starting point for the flat printed construction. You can also send the artwork through the free mockup quote route with the garment type, size and quantity. Our team can then comment on the practical specification rather than guessing from the logo alone.
A short brief you can copy into an enquiry
- Design name: the internal name for the patch.
- Artwork: attach the clearest logo or illustration file.
- Quantity: list the number of pieces for each design; the minimum is 5 pieces per design.
- Size: give the finished width and height in inches, or the available garment area.
- Position: chest, sleeve, back, cap, bag, trouser leg or Velcro panel.
- Garment: state whether it is cotton, polyester, nylon, wool, denim or another fabric.
- Backing: sew-on, iron-on, Velcro or advice required.
- Date: give the date the patches are needed in the United Kingdom.
- Approval contact: name the person who will approve the digital mockup.
That brief gives enough information to start a useful conversation. The Customized Patches can then prepare the quotation and mockup around the real application. The brand in this case did not need a complicated process; it needed the right questions answered before the production file was released.
Final advice
Choose printed patches when a flat face, detailed artwork and controlled colour are more useful than raised thread texture. Be open about the garment, especially if it is a nylon shell, wool coaches jacket, technical fabric or existing Velcro panel. The backing and application method can matter as much as the artwork.
Start with the smallest sensible run, check the real garment and approve the mockup carefully. The Customized Patches offers a free digital mockup usually within 12 hours, has a 5-piece minimum per design, and produces only after approval. Those three facts make the ordering process clear, but the quality of the result still depends on an honest specification.
For more background, see Printed patches: Everything UK Buyers Need to Know and How Much Do printed patches Cost in the UK?. If your artwork is detailed or photographic, explain that at the first enquiry. A short conversation before quoting is usually more useful than trying to correct a poor fit after production.
Frequently asked questions
Why did the UK brand choose printed patches?
The hypothetical UK brand chose printed patches because its logo included fine lines, small lettering, shaded artwork and several close colours. The flat printed face kept those details clearer than a heavily stitched construction would have done, while still allowing the patch to be applied to workwear and promotional garments.
What is the minimum order for printed patches at The Customized Patches?
The minimum order is 5 pieces per design. This suits small businesses, clubs and brands that want to test a patch on real garments before ordering a larger quantity. If several designs are required, each design is treated separately for the minimum.
How quickly can I receive a mockup for printed patches?
The Customized Patches usually provides a free digital mockup within 12 hours. The customer should send clear artwork, the intended size, garment information, placement and preferred backing. Production starts only after the mockup and specification have been approved.
Which backing should I use for printed patches on a nylon jacket?
Sew-on or Velcro is often worth considering for a nylon jacket because technical or coated fabrics may not suit high heat. The correct choice depends on the shell, lining, intended removability and washing routine. Send a garment photograph or fabric description so the backing can be reviewed before production.
Will iron-on printed patches stay attached after washing?
They can stay attached when the garment, adhesive and application method are suitable, but no iron-on backing should be treated as immune to heat and washing. A dryer cycle, hot wash, unsuitable fabric or poor pressing can cause adhesive to peel. For frequent-use workwear, sew-on attachment may be more dependable.
Are printed patches better than embroidered patches for a UK business logo?
Printed patches are often better for flat, detailed or colour-rich artwork, while embroidered patches suit bold crests and raised thread texture. Neither is automatically better. Compare the logo, finished size, garment, washing routine and desired appearance. The printed patches vs embroidered patches guide explains the main trade-offs.
Ready to produce custom patches for your UK team or brand?
GET A FREE MOCKUP