
Are printed patches Right for Your Project? A Decision Guide
Printed patches suit artwork with gradients, small lettering, photographs or detailed illustrations because the design is applied as a flat printed image. They are usually the better choice for visual detail, while embroidered patches provide raised texture and a more traditional finish. The Customized Patches offers a free digital mockup, usually within 12 hours, with a 5-piece minimum per design.
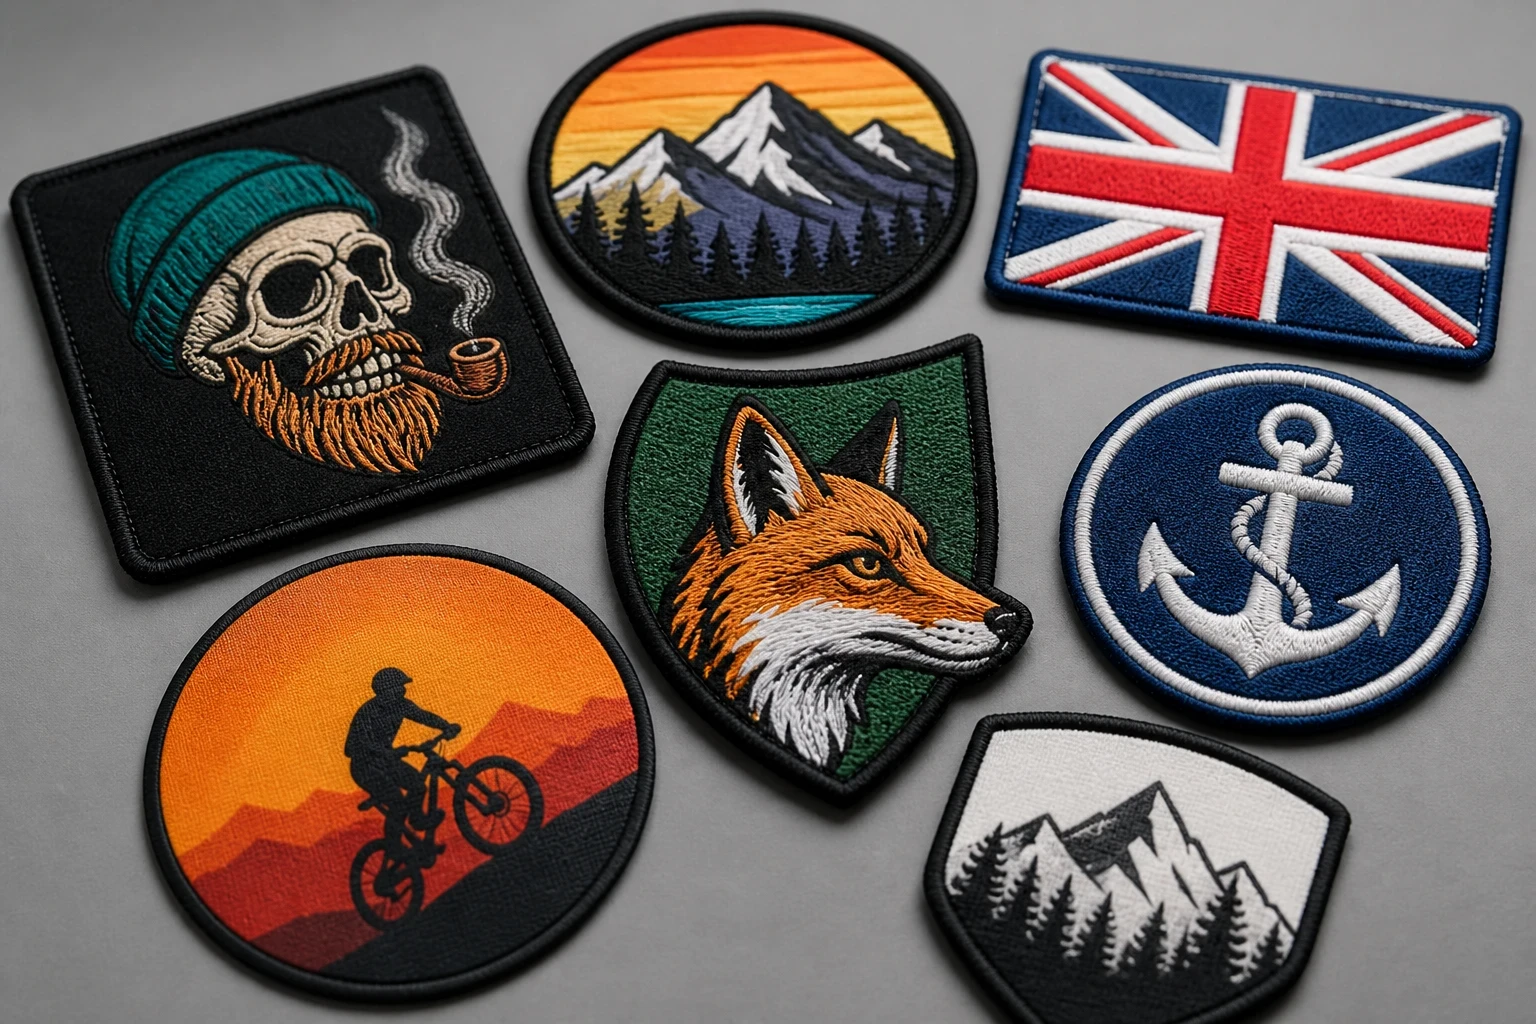
Key takeaways
- Printed patches are well suited to gradients, photographs, illustrations and small visual details because the artwork is reproduced on a flat surface.
- Embroidered patches add raised thread texture and a traditional badge appearance, but very fine or photographic artwork may need simplifying.
- The Customized Patches has a 5-piece minimum per design, and a free digital mockup is usually supplied within 12 hours before production.
- Backing, garment fabric, washing, placement and the patch size can matter as much as the patch material itself.
Printed patches are usually the right choice when your design contains gradients, photographs, fine illustration, small visual details or colour shading that would be difficult to reproduce in thread. If your priority is a flat, accurate image rather than a raised stitched surface, they are worth considering. Embroidered patches may be better for a traditional crest, bold lettering or a tactile club badge.
For UK orders, The Customized Patches can review the artwork and garment details before anything is made. A free digital mockup is usually supplied within 12 hours, production takes place only after approval, and the minimum order is 5 pieces per design. That gives you a practical way to compare the intended result before committing to the finished patches.
What printed patches are best at
The main strength of printed patches is image reproduction. Ink can show a continuous change from one shade to another, so a sunset, painted mascot, map, illustrated animal or shaded logo does not have to be reduced to a handful of thread colours. A designer can also retain more of the original artwork instead of redrawing it around stitch paths.
That makes them useful for independent clothing labels, hospitality uniforms, event merchandise, school projects, football clubs and short-run promotional garments. A small brewery may want a detailed illustrated hop cone on a work jacket. A cadet unit may need a map or landscape illustration. A brand launching a seasonal collection may prefer a patch that follows the artwork on its packaging rather than a simplified crest.
Printed is flatter; that is the point. The surface does not have the same raised, tactile character as dense embroidery, but it can look cleaner on a lightweight shirt or a smooth nylon shell. If you want a closer look at the practical differences, compare printed patches and embroidered patches before deciding.
Printed versus embroidered, woven and PVC patches
No patch method wins every brief. A football club crest on a thick tracksuit may need the texture and visual weight of an embroidered patch. A narrow line drawing can suit woven patches, where the surface is flatter but the design is formed from woven threads. A rubberised outdoor badge may call for PVC patches instead.
| Patch type | Best suited to | Main advantage | Trade-off to consider |
|---|---|---|---|
| Printed patches | Photographs, gradients, illustrations, shading and artwork with many colours | Flat image reproduction can retain visual detail without converting every area into stitch shapes | The surface is flatter and may not provide the raised texture some clubs expect |
| Embroidered patches | Traditional crests, bold logos, workwear, football shirts, blazers and club badges | Raised thread gives a familiar badge texture and strong visual weight | Very small text, gradients and photographic detail often need simplifying |
| Woven patches | Fine lettering, narrow lines and flatter logos where a textile finish is wanted | A relatively smooth woven face can handle small graphic elements more neatly than heavy embroidery | The finish is still textile-based, so it will not reproduce a photograph in the same way as a print |
| PVC patches | Outdoor equipment, bags, technical clothing and designs needing a rubber-like surface | Raised moulded areas and a wipe-clean feel can suit practical equipment | PVC has a very different look and feel from cloth, and may not fit a heritage or formal uniform |
| Chenille patches | Varsity lettering, school teams, college clothing and bold sports designs | High pile gives a soft, prominent and deliberately traditional appearance | Small detail and long fine lines are not its strongest use |
The garment often decides the answer. Printed patches can sit neatly on a smooth nylon shell, while a dense embroidered crest may feel more at home on a wool coaches jacket or a heavyweight hoodie. A school blazer may call for a formal embroidered badge, whereas a modern hospitality polo could benefit from a flatter printed mark that does not add much bulk.
There are also mixed approaches. A company might use printed artwork for a photographic event patch and embroidered badges for its permanent staff uniform. A biker club may choose a large embroidered back piece with a printed detail patch on a lightweight overshirt. The sensible comparison is not just material against material; it is artwork, garment, wear pattern and expected appearance together.
The artwork test: detail, colour and legibility
Start with the artwork at the size you actually need. A logo that looks clear on a laptop screen can lose small lettering when reduced to a 3-inch-wide patch. Printed patches can preserve more fine detail than embroidery, but there is still a physical limit. Tiny text, hairline outlines and closely packed colours may blur or become hard to read on a moving garment.
Photographs and gradients
Photographic images and smooth gradients are strong candidates for printing. Think of a mountain silhouette with a fading sky, a detailed pet portrait, a cocktail illustration with several translucent tones, or a brand mark containing a subtle shadow. These effects do not need to be translated into individual stitched blocks.
Small wording and thin lines
Printing helps, but it does not make miniature wording automatically readable. If a club name must be understood from several feet away, increase the letter height, open the spacing and allow enough contrast with the background. A border can give the design a clean edge, but a narrow border packed against fine lettering can make both elements look crowded.
Colour expectations
Send the best artwork available and describe any important colour references. Screen colours, fabric colours and printed colours can appear different under workshop lighting, daylight and indoor lighting. A mockup helps confirm the design direction, but it should not be treated as a physical colour swatch. If colour matching is central to the project, say so at quotation stage.
For file preparation, the artwork guide for printed patches covers useful checks before a quote. A clean vector logo is helpful, but a high-resolution raster image may also be suitable when the patch relies on a photograph or painted artwork.
Choose the patch size from the garment, not the screen
Patch size should be based on the available panel and the viewing distance. Measure the usable area in inches, including the space between seams, pockets, zips and existing badges. A 2-inch patch can work on a chest pocket or sleeve, while a back design may need 8, 10 or more inches to retain impact. The correct size depends on the shape of the artwork as well as the garment.
Try a paper version before ordering if the placement is unfamiliar. Print the design at its proposed size, cut it out and tape it to the jacket, polo or blazer. Check it while the garment is worn, not only laid flat. A patch that looks large enough on a table can appear lost on a broad back, while one that seems modest on screen may crowd a narrow chest panel.
| Placement | Useful checks | Common concern |
|---|---|---|
| Left chest or polo | Measure around the pocket, buttons and seams; check the design remains readable at normal conversation distance | A wide patch can interfere with a pocket or look cramped beside an embroidered name |
| Sleeve | Check the sleeve width, curve and movement through the elbow | A rigid or overly wide patch can sit awkwardly on a narrow sleeve |
| Jacket front | Allow space for the zip, press studs, pockets and other branding | The patch may be hidden or distorted when the jacket is closed |
| Back panel | Use the full available width and check the design from several steps away | Small wording may disappear if the patch is scaled down too far |
| Velcro panel | Match the hook-and-loop area and confirm the loop panel is already present or will be supplied | An otherwise suitable patch can be the wrong size for the existing panel |
Curved garments deserve extra care. A patch on a fitted sleeve, shoulder or cap may follow a curve, so the mockup should show the approximate position rather than only a flat graphic. If the garment is stretchy, the attachment method and patch edge need to be considered together. Ask for a review if you are placing the patch close to a seam or over a pocket.
Not sure whether ink or thread will hold your logo at the required size? Send the artwork and garment details for a free digital mockup, usually within 12 hours, so you can compare the intended result before production.
GET A FREE MOCKUPBacking and attachment: sew-on, iron-on or Velcro
The back of the patch determines how it joins the garment. Sew-on is often the most dependable choice for regular-use jackets, uniforms and workwear because stitching can be selected to suit the fabric. Iron-on can be convenient for some cotton garments, but it is not a universal solution. Heat, pressure, fabric coatings and repeated washing all affect the bond.
Nylon shells are a good example. They can be heat-sensitive or coated, so an iron-on backing may not be suitable without careful testing. A wool coaches jacket may need sewing rather than direct heat. A Velcro panel needs the matching hook or loop arrangement, and the patch dimensions must match the panel rather than an approximate measurement.
- Choose sew-on when the patch will receive frequent wear, regular washing or heavy handling, or when the garment cannot safely take heat.
- Consider iron-on for suitable fabrics where easy application matters, but follow the garment and backing instructions and avoid assuming it will replace sewing in demanding use.
- Choose Velcro when the patch must be removed, swapped or repositioned, such as on equipment panels, tactical-style bags or changing team identifiers.
- Tell us if the patch will be applied to waterproof fabric, coated nylon, wool, fleece, stretch clothing or a garment already carrying another badge.
- If a removable patch is needed, check whether the garment has a loop panel already fitted; the patch alone does not create the receiving surface.
Backing is not a small finishing detail. It changes the way the patch sits, how it is fitted and how easily it can be replaced. The best quote includes the garment type, intended placement and whether the patch is to be sewn, ironed or attached with Velcro.
Durability, washing and real use
Printed patches can be suitable for everyday garments, but the finished life depends on the print, edge, backing, attachment and treatment of the garment. A patch sewn securely to a jacket is not facing the same conditions as one ironed onto a cotton hoodie and put through a tumble dryer. Washing instructions, abrasion and sunlight all matter.
A familiar failure is this: an iron-on that peels after a dryer cycle because the garment, temperature or application was not suitable. That is not a reason to reject every iron-on patch, but it is a reason to describe the use honestly before choosing the backing. A football club washing kit every week has a different brief from a brand selling occasional festival overshirts.
For workwear, hospitality polos and school blazers, ask how the garment will be cleaned and how often. For biker jackets and motorcycle clothing, consider abrasion, rain, movement and the thickness of the base material. A large back patch may need secure stitching around the edge, while a small chest patch may need a lighter approach to avoid stiffness.
Edge finish and shape
A border gives the artwork a defined edge and can make the patch easier to place against a busy garment. A merrowed crest has a rounded overlocked edge associated with traditional embroidered badges, while other shapes may use a clean cut edge or a shaped border. The best edge depends on the design, not a default preference.
A patch with a complex outline can look more distinctive, but every point and narrow cut adds a production consideration. If the design is intended for a football shirt, blazer or club jacket, show the actual shape in the mockup. Do not approve a rectangular sample if the finished badge is meant to follow the silhouette of a mascot or shield.
Quantity, pricing and the 5-piece minimum
The Customized Patches produces a minimum of 5 pieces per design. That is useful for a small business testing a new logo, a school ordering a handful of prefect badges, or a club wanting samples for committee approval. If you need two different designs, the minimum applies to each design rather than treating unrelated artwork as one combined run.
A quote normally depends on the patch size, shape, quantity, backing, edge, artwork and any special requirements. Larger patches use more material and may involve more work in handling and finishing. Very small patches can also require care if the artwork contains detailed wording. The lowest unit price is not always the right comparison if it comes with the wrong backing or a simplified design that no longer represents the brand.
For a useful estimate, send the finished or near-finished artwork, the quantity per design, dimensions in inches, preferred backing and the garment or item receiving the patch. Include a photograph if the placement is unusual. A short note saying “nylon jacket sleeve”, “wool coaches jacket back” or “Velcro bag panel” gives our team more to work with than a product name alone.
Ordering printed patches in the United Kingdom
A straightforward order starts with the brief. State what the patch is for, how many designs you have, how many pieces you need per design, the approximate size and the garment or product it will be applied to. Add the delivery postcode if timing matters. The Customized Patches serves customers across the United Kingdom, with UK-wide shipping arrangements discussed as part of the quote.
- Send the artwork and explain whether the design contains photographs, gradients, small lettering or colour-critical elements.
- Confirm the patch width and height in inches, or provide the available garment area for advice.
- Name the backing required: sew-on, iron-on or Velcro, and state if the garment is nylon, wool, coated, stretchy or waterproof.
- Confirm the quantity per design, remembering that the minimum is 5 pieces for each separate design.
- Review the free digital mockup, usually supplied within 12 hours, and check the wording, proportions, colours, edge and placement.
- Approve the mockup in writing. Production begins only after approval, so changes can be dealt with before the order enters production.
- Check the finished patches when they arrive and apply them according to the agreed backing and garment requirements.
Lead time depends on the order details, quantity, artwork and production schedule, so it is better to ask for a current estimate than rely on a generic number. If you have a kit launch, event, school term or club presentation date, mention it at the start. The step-by-step ordering guide explains the information that helps a quote move forward without avoidable revisions.
Examples from common UK projects
A football club usually needs clear lettering, a recognisable crest and a finish that works with repeated kit washing. If the badge is a bold shield with simple blocks of colour, embroidery may give the expected club feel. If the design includes a detailed mascot, shading or a commemorative illustration, printed patches may preserve more of the artwork.
Cadet units and outdoor groups often use equipment made from nylon or coated fabric. The backing and attachment method need more attention than the artwork alone, especially if the badge is going on a sleeve, pack or removable Velcro panel. For rainwear, state the fabric and intended use rather than selecting iron-on because it sounds convenient.
A hospitality business may put a small logo on polos, aprons or jackets. A flat patch can be appropriate if the garment is lightweight and the logo contains a fine illustration. A bold embroidered mark may be more suitable if the goal is a formal, textured uniform badge. Check how the patch sits beside printed staff names and existing woven labels.
Name sew-on, iron-on or Velcro on the quote and include the garment type. We can show the proposed backing and placement on a free digital mockup, usually within 12 hours; production starts only after you approve it.
GET A FREE MOCKUPBiker and motorcycle clubs often have strong traditions around large back pieces, rocker shapes and layered badges. Browse the guidance on biker and motorcycle club patches if that is your project. Printed artwork can work for a detailed scene or colour-rich supporting badge, but the club may prefer embroidery for the main crest because of its texture and established appearance.
Small brands have a different calculation. Five pieces per design can provide a manageable first run for product photography, packaging, staff clothing or a market stall. If the design is likely to change after the first collection, a printed patch may let the brand retain more of the original illustration without commissioning a fully simplified stitch version.
When printed patches may not be the best choice
Choose another construction if the raised texture is central to the brief. A varsity jacket with thick college lettering may need chenille patches, while a heritage club crest may look more convincing as embroidery. If the patch will be exposed to demanding outdoor conditions and needs a moulded, wipe-clean surface, PVC is worth comparing.
Printed patches may also be the wrong fit if the design is extremely simple and the customer specifically expects visible thread. A one-colour shield with a bold name does not require photographic reproduction. In that case, embroidery can provide the stronger badge character, particularly on wool, fleece, denim or heavyweight cotton.
The right answer can vary within one order. A clothing brand might use printed patches for an illustrated seasonal design and 3D embroidered patches for a raised logo on caps. A premium label could choose leather patches for a restrained jacket mark while using printed cloth patches for a colourful campaign.
A practical decision checklist
Before requesting a quote, answer the questions below. They expose most of the decisions that affect appearance and production. If you cannot answer one yet, say so; a clear unknown is more useful than an assumed specification.
- Does the artwork contain a photograph, gradient, fine illustration or several closely related colours?
- Would a flat surface suit the garment, or is raised thread texture part of the intended look?
- What is the finished width and height in inches?
- Where will the patch sit, and how much space is available between seams, zips and pockets?
- Is the garment cotton, polyester, nylon, wool, fleece, denim, coated or stretchy?
- Will the item be washed often, tumble dried, worn outdoors or exposed to abrasion?
- Do you need sew-on, iron-on or Velcro attachment?
- How many pieces are required for each separate design?
- Is there a deadline for a match, event, product launch, school term or uniform delivery?
- Have you allowed time to review and approve the digital mockup before production?
If the answers point towards accurate image detail and a flatter finish, printed patches are a sensible starting point. If they point towards raised texture, a formal badge appearance or heavy thread coverage, compare embroidery as well. The useful decision is the one that still looks right after it has been fitted to the real garment.
Final guidance for choosing with confidence
Printed patches are not simply a substitute for embroidery. They solve a different production problem: showing detailed artwork on a compact textile badge without turning every gradient, photograph or fine illustration into a simplified stitch plan. Their flatter finish is a benefit for some jackets, polos, bags and branded garments, not a defect to hide.
The strongest order is specific about the artwork, garment, size, backing, quantity and use. Send the design, tell us where it will go, and be clear about washing or outdoor exposure. The Customized Patches can then prepare a free digital mockup usually within 12 hours. Nothing is produced until you approve the design, and the minimum remains 5 pieces per design.
If you are still weighing up the options, review the printed patches checklist or compare the wider embroidered patches range. Customers across the United Kingdom can request a quote with UK-wide shipping requirements included from the start.
Frequently asked questions
Are printed patches better than embroidered patches?
Neither is better for every project. Printed patches are usually better for photographs, gradients, fine illustrations and artwork with many colours. Embroidered patches are often better for traditional crests, bold lettering and a raised, tactile badge finish. The garment, washing routine, placement and desired appearance should decide the construction.
What are printed patches used for?
Printed patches are used on jackets, polos, bags, uniforms, club clothing, event merchandise and branded garments. They suit artwork that would be difficult to reproduce in thread, including photographs, shaded illustrations, maps, detailed mascots and colour-rich logos. The correct backing depends on the fabric and whether the patch needs to be removable.
What is the minimum order for printed patches from The Customized Patches?
The minimum order is 5 pieces per design. If you need two different designs, each design must meet the 5-piece minimum. Send the artwork, size, quantity and garment details so the quote reflects the actual project rather than a generic patch specification.
How quickly can I receive a mockup for printed patches?
The Customized Patches usually provides a free digital mockup within 12 hours. The mockup should be checked for spelling, proportions, colours, border, size, backing and placement. Production starts only after approval, so requested changes can be addressed before the patches are made.
Can printed patches go on nylon jackets or Velcro panels?
They can be suitable, but the backing and attachment method must match the item. Nylon may be coated or heat-sensitive, so sew-on can be preferable to iron-on. A Velcro panel needs the correct hook-and-loop arrangement and matching dimensions. Include a garment photograph or describe the fabric when requesting a quote.
How do I choose the right size for printed patches?
Measure the usable garment area in inches and allow for seams, zips, pockets and curves. Consider how far away the wording must be readable. A paper cut-out at the proposed size can be placed on the real garment to check the result. The mockup can then show the intended design and placement before approval.
Ready to produce custom patches for your UK team or brand?
GET A FREE MOCKUP