
Why Patch Edges Fray and How to Stop It
Patch edges fray when exposed fabric fibres or damaged border stitches work loose through rubbing, snagging or washing. Prevention depends on matching the border and cutting method to the fabric and shape. Inspect patches before attachment, avoid cutting structural stitches, and follow care instructions for both patch and garment.
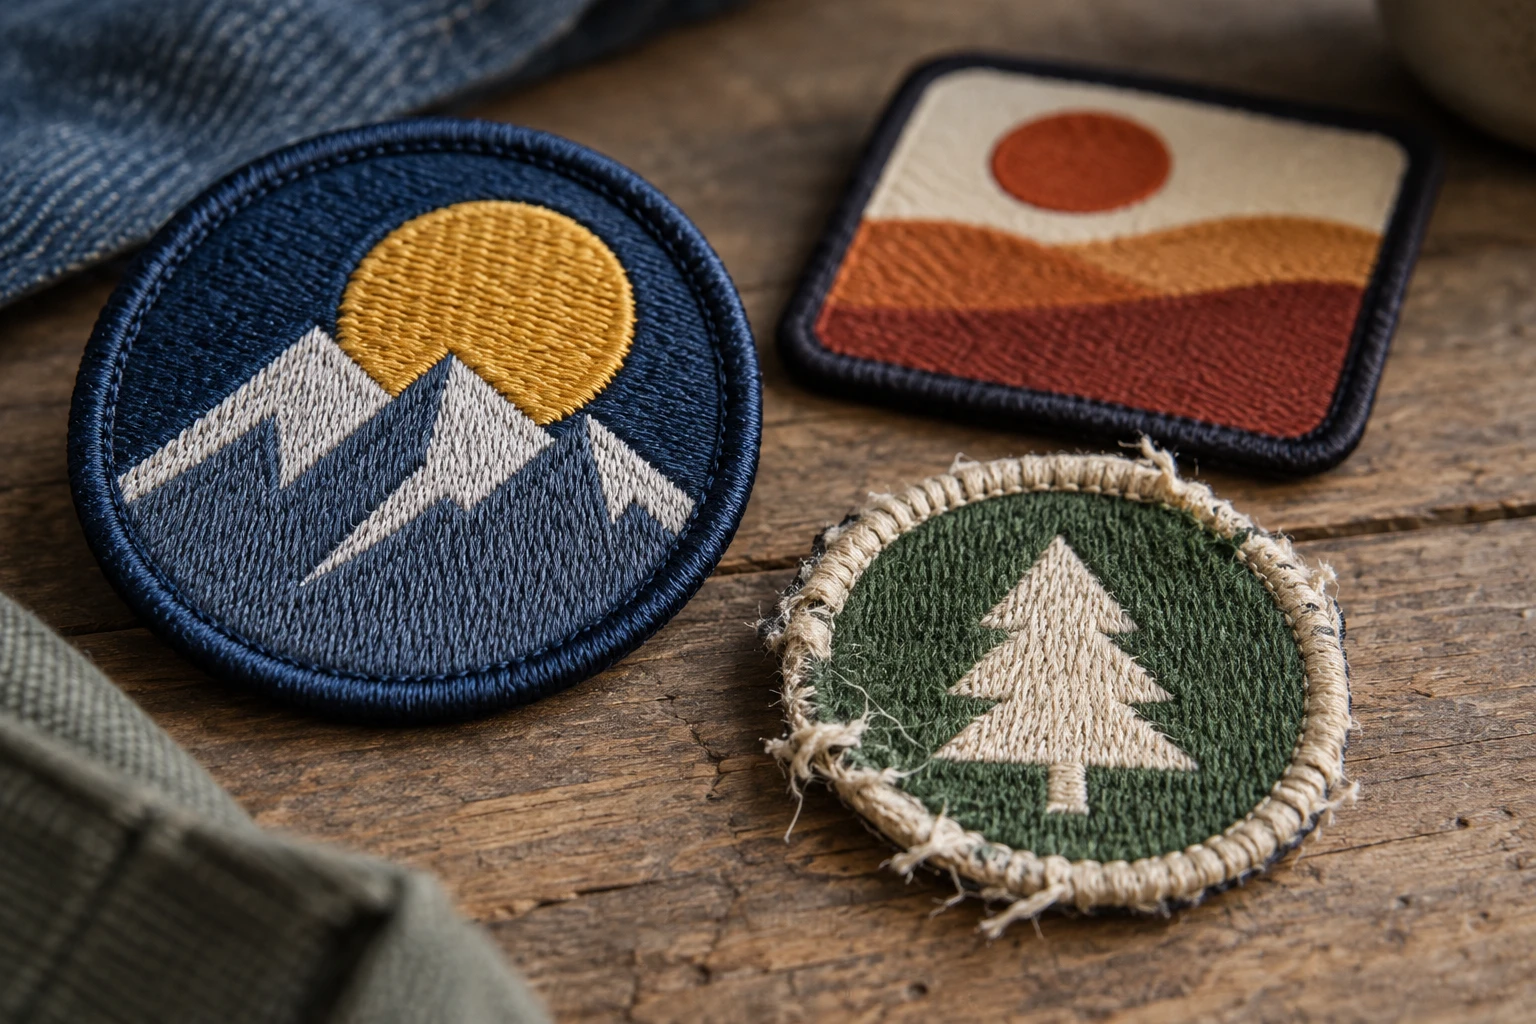
Key takeaways
- A stitched border must cover the cut fabric edge adequately to limit fraying.
- Merrowed borders suit simple outlines; satin-stitched borders allow more shape flexibility.
- Heat sealing works on suitable synthetic fibres, not every patch material.
- Inspect patches before attachment: a digital mockup cannot prove physical edge quality.
The main causes of patch fraying edges are exposed fabric, damaged border stitches and wear from rubbing or washing. To prevent fraying, match the border and cutting method to the patch material and shape, then check the finished edge before attaching it.
First distinguish loose fibres from a lifting patch. A fuzzy edge usually concerns the fabric or stitching; an intact edge peeling away from a polo is an attachment problem. They need different fixes.
What causes patch fraying edges?
Textile patches contain threads that can loosen where the fabric is cut. A border protects that cut line, but gaps, insufficient coverage or cutting into the border can leave fibres exposed.
Even a properly finished edge can deteriorate if repeatedly scraped or snagged. A bag strap rubbing a shoulder patch, exposed hook fastener in the wash or a sharp zip can damage the stitching.
- Fine fuzz beyond the border: exposed base fabric or surface abrasion.
- Long loops or an opening border: snagged, broken or unsecured stitches.
- A clean edge lifting from the garment: adhesive or attachment failure, not necessarily fraying.
Which border should you specify?
For embroidered patches, merrowed and satin-stitched borders are common options. Merrowing wraps an overlocked thread edge around the patch; a satin border uses closely spaced embroidery stitches along the outline.
Choose by shape and use, not appearance alone. A simple oval can suit a merrowed border, while deep notches and tight points need discussion. A thin merrowed border that fails to cover the base fabric adequately can still allow fraying.
| Edge finish | Suitable uses | Trade-off and delivery check |
|---|---|---|
| Merrowed border | Circles, ovals and straightforward badge outlines | Raised, wrapped edge; less suited to tight internal corners. Check coverage and the thread join. |
| Satin-stitched border | More detailed outlines with a defined embroidered edge | Cutting must not damage the stitches. Check corners for gaps and exposed fabric. |
| Heat- or laser-cut edge | Suitable synthetic fabrics and detailed shapes | Can fuse compatible fibres but may leave a firm or discoloured edge. Check finish and comfort. |
| Unsealed raw textile edge | Deliberately unfinished designs | Exposed fibres can loosen. Unsuitable if the brief requires a lasting neat outline. |
Keep lettering clear of the border
Ask for the proposed border width and usable artwork area in the proof. On a hypothetical 60 mm (2.36 in) badge, a 3 mm (0.12 in) border on each side leaves approximately 54 mm (2.13 in) inside; the actual allowance depends on construction.
Send the artwork, intended size and garment so the proposed border can be reviewed. Get a free digital mockup, usually within 12 hours, before approving production.
GET A FREE MOCKUPDo not squeeze small lettering into that remaining space. Woven patches or printed patches may reproduce fine detail more clearly, but textile versions still need a suitable edge finish. See Seven Patch Design Mistakes That Cause Rework (and How to Avoid Them) before finalising the outline.
Does cutting or sealing stop fraying?
A clean cut reduces stray fibres, but cutting alone does not secure every fabric. Mechanical cutting leaves a raw edge; heat cutting can fuse suitable synthetic fibres. Cotton does not melt into a sealed edge in the same way.
Laser cutting describes the cutting process, not a universal guarantee against fraying. Ask whether the chosen material is compatible and whether the cut edge will be covered by stitching. Excessive heat can leave hard spots, discolouration or distortion.
Iron-on backing is not an edge finish. It attaches the patch to a compatible garment but does not replace border coverage; iron-on lifting after a hot wash can occur even while the patch edge remains intact.
What should you check on delivery?
Inspect patches before sewing, pressing or distributing them. A digital mockup confirms the proposed appearance and specification, but it cannot demonstrate stitch security, edge softness or attachment strength.
- Compare the size, outline, border colour and backing with the approved specification.
- Check the whole perimeter in good light, including corners, notches and the border join.
- Look for exposed base fabric, cut stitches, loose loops and gaps in coverage.
- Lightly run a finger around the edge without pulling threads. Note hard, sharp or brittle areas.
- Photograph defects and keep affected patches unattached while asking the supplier for advice.
An isolated trimmed thread end is not the same as an unravelling border. The warning signs are stitches opening, loops lengthening or fabric escaping through a gap. Do not pull a suspect thread to test it.
Can you repair a fraying patch safely?
For a new patch, document the problem before altering it. For a worn patch, trim only clearly detached surface fuzz with small scissors; do not cut a loop that may form part of the border.
Include your garment, border preference and required arrival date with the artwork. We provide a free digital mockup, usually within 12 hours, and produce only after approval.
GET A FREE MOCKUPBroken border stitching may need repair by someone competent with embroidery or garment repairs. A textile fray inhibitor can stiffen or mark fabric, so check compatibility and test discreetly. Never use a lighter to melt loose threads.
- Follow both patch and garment care instructions; use the more restrictive limit.
- Close hook-and-loop fasteners and, where suitable, wash the garment inside out.
- Avoid brushing the edge aggressively or ironing it without confirmed heat compatibility.
Attachment must suit the garment too. A nylon shell can be heat-sensitive, while a wool jacket may need specialist care; neither should receive an assumed iron-on treatment. For garments without a separate badge edge, compare Patch or Direct Embroidery on the Garment? When Each Makes Sense.
What to put on your quote and approval
State the patch dimensions, quantity per design, shape, garment fabric, backing and expected washing conditions. Request the proposed border type, width and cutting method in writing, especially for narrow points or an edge worn against skin.
The Customized Patches makes patches to order from your artwork, with a 5-piece minimum per design and free shipping across the United Kingdom. Our digital mockup is free and usually arrives within 12 hours; we produce only after approval.
Mockup turnaround is not production or delivery time. Give your required arrival date on our free mockup quote form and ask for the production and shipping schedule before approving. For cost factors, read Why Patch Quotes Vary: Size, Stitch Count, Colours and Backing.
Frequently asked questions
Does washing cause patch fraying edges?
Washing can worsen exposed fibres or damaged stitching through agitation and snagging. It is not always the original cause. Inspect border coverage and follow both garment and patch care instructions.
Is a merrowed border always more durable?
No. It protects simple outlines well, but quality, coverage and wear matter. A well-executed satin border can be more suitable for a detailed shape.
Can I seal a fraying patch with glue?
General-purpose glue can leave a hard, visible edge and may not withstand washing. Ask for repair advice first; any textile fray inhibitor needs a compatibility check.
Will sewing around an iron-on patch stop fraying?
Perimeter stitching can improve attachment where the garment permits it, but it does not automatically repair exposed fabric or broken border stitches. Treat those separately.
Do PVC patches fray?
Moulded PVC patches have no woven fabric edge to fray. Their attachment threads or textile backing can still wear, and the moulded material can suffer other damage.
Should I approve a mockup if the edge finish is unclear?
Ask for clarification first. Confirm the border type, width, cutting method and backing in writing. A visual outline alone does not specify how the physical edge will be finished.
Ready to produce custom patches for your UK team or brand?
GET A FREE MOCKUP